Monday, 25 March 2019

Completed: Bowline Sweater

True fact: when Papercut first released this pattern, I thought it was only worth making in a stripe. Couldn't see why anyone would want to make this in a solid. I was actually dismissive of the idea. Thought it was ridiculous. Why would someone chose to make this in a solid? Wasn't the whole point to make a statement of the stripe direction? Hmmm.
I have been wanting to make this since the pattern came out, but it was never high up in the queue for some reason. I finally bought the pattern last year during a sale, although still with no firm plans for actually sewing it. 

This winter I've been trying to inject some colour into my wardrobe. The past few years have all been about sewing and buying all the shades of black and grey come winter. I haven't questioned it, and gone with the flow, until this winter when I didn't want that any more. Its not that I don't like my older winter wear, or that I don't want to wear it. I just don't want to wear black or grey every day. So although I don't need any new winter clothes, I've tried to be a bit more colourful in what I've made, Olya notwithstanding (it gets a pass because it was from the stash). Our office gets pretty warm and meeting rooms are like furnaces at any time of year (particularly fun in summer), so I thought a Bowline would fit the bill for long sleeve but not heavy weight top, in a colour. A solid colour. Because, Olya notwithstanding again, that's my current jam. 


The fabric is modal loopback from Guthrie and Ghani. It's not cheap, but it's lovely, and definitely worth it. It has photographed brighter than it is in real life. It's really more of a burnt orange or terracotta as Lauren describes it. It's very lightweight, pretty much a t-shirt weight which was what I was after. Its maybe slightly too drapey for the pattern as it doesn't want to hold the top of the pleat in shape properly, but I actually don't care. To go back to G&G, I haven't bought much from them, but I am super impressed with their customer care. They do offer swatches on their website, although they are hard to find. When I emailed to ask, I got a very quick response with the link. When I ordered the samples, I got them on a card with the fabric name and price and corresponding Gutterman thread colour. Isn't that genius? So, so helpful. When the fabric eventually came (ordered Thursday afternoon, arrived Friday morning), it came with a little handwritten note too. 

 My plan had been to make this a t-shirt, as opposed to sweatshirt by omitting the sleeve and hem bands, which I thought might also make it look a bit more work appropriate, but I screwed that up by forgetting to add length to the front bodice, and not having enough fabric to cut another. I did try to just hem it at the length it was, but it didn't look right (proportions, remember?), so although I had hemmed it at that length, I unpicked it and added the band. I didn't bother adding the sleeve bands and I think it looks fine without. 


Construction-wise this is an interesting sew. That pleat and dart is really cool and it's very cleverly put together. It's one of those patterns that I bought because I wanted to see how it worked. I am really intrigued by more interesting pattern drafting at the moment, partly for the fun of sewing it, and partly to learn about pattern drafting. I spend too much time trying to visualise how some RTW clothes are put together. I cannot fathom how they figured out how to put this together, but it works. There is a sewalong with photos which helps a bit too. In possibly a record for me, I finished this in a day - including printing and sticking together the PDF. I've never done that. Well, in honestly, I finished it that day, but then went back and fixed the bottom another day because it took a day or 2 to figure out why I didn't like it and how I could save it. But I could have made it in a day had I made it as drafted. 


This is only the second Papercut pattern I've made, the first being the Sway dress. My preference is definitely for PDFs with Papercut as I find their brown paper difficult to trace off, and I don't like the instruction layout on the printed pattern. I know a lot of people wax lyrical over the packaging, but it's not my preference.

I had also planned to sew this entirely on my overlocker but chickened out, and ended up sewing it with a lightening bolt stitch then overlocking the raw edges, because I'd already made the effort to change the thread. My main issue is that I'm struggling to maintain a consistent SA when using the overlocker, so a bit more practise is required, I think, particularly since this pattern is drafted with a 1cm SA. It might be easier with a narrower SA. Maybe.


Anyway, I am delighted with the final tee. It's a great colour and it's a great design. It works with a t-shirt or cami underneath, if I need a bit more warmth - in these photos it was layered over a black Lark tee. I wore it 3 days out of 5 when I first finished it, which is definitely a sign of success! It's a pretty distinctive shape, so I don't see me making millions more, but I probably still am hankering after a striped version at some point...
SHARE:

Sunday, 17 March 2019

Completed: Kabuki Tee

This is the latest installment in my current series known as "Helen Makes Paper Theory Patterns in Insanely Difficult Fabrics".

I've fancied the Kabuki tee since it was released, but it somehow never managed to get prioritised. Probably because I needed to buy both pattern and fabric, and I've been trying to not do that, in order to use stuff up. However, my very kind Mother in Law gave me a Merchant and Mills voucher for my birthday, which I had earmarked for denim, but then Carol very kindly sent me a sample of the Woolsey she had ordered, and Judith did a bit of enabling too, and I ended up going for the Woolsey in the Alta Mare colour.

This is a tricky fabric. It's a linen/wool mix and is like a double gauze in that it has 2 layers. It's pretty shifty, likes to fray and has a loose weave. It was challenging to sew. Pieces seemed to grow and stretch as they were handled, notches literally disappeared in the weave of the fabric and unpicking was extremely not fun.

The pattern is pretty cool. I love the right angles and the wide sleeves. I think you can tell it's Paper Theory's first pattern, as it's maybe not quite as polished as the others. The drafting is predictably great but there are quite a few spelling mistakes and the instructions are less thorough. Having said that, there's a video tutorial of how to sew the right angles (it's the same process as for the Olya), so it's a good overall experience. Top Tip, which I don't remember seeing on the Olya tutorial, if your fabric is prone to fraying (me! me!), put a small L shaped bit of interfacing just right at the right angle. Wish I'd known/thought to do that on the Olya.

It's a pretty easy and quick make once you get your head round the angles, and there are 4 for good measure. With the notches disappearing, I managed to sew my first sleeve on the back to front, which was frustrating since the fabric was so hard to unpick, but also because you snip into the right angle as you sew it, which is hard to do twice. I ended up trying to mend the snip with even more interfacing, which didn't really work. I think it's OK though. As you can see above, I stay-stitched all the edges. It doesn't say to do this in the instructions but I think it's worth doing.

I'm not 100% sure I liked the method of attaching the bias binding at the neck, although it was easier. You sew one shoulder seam, then apply the binding before sewing the second shoulder seam. It is far less faffy, but you end up with a bulky seam at one shoulder, which in this fabric is pretty bulky and wants to poke out at the neck (see below).


As the fabric is bulky, I didn't double turn the hems, instead I overlocked the raw edge and turned once. I actually ended up doing a double row of stitching on the hem because the first line didn't quite catch it all the way round on the bottom, then thought I'd better do the same on the sleeves. I like it although no one else can actually see it. This is definitely one of those fabrics where the stitches sink right in! Other than that, the only alterations I made were to add length to the sleeves. I'm afraid I ca'nt remember how much because I added more, then chopped some of it back off again. I left the sleeves the full width, rather than tapering them at all.


Insides-wise, it's all overlocked. Oh, wait! I have a new Overlocker! I had a bit of a payout on our work sharesaves at the end of last year and so I treated myself. What a difference! I previously had the old Lidl Singer one, which wasn't great. This one is like a dream. It purrs, rather than shakes the house down, the tension is spot on, it's easier to thread and works pretty much straight away when I do. I haven't had a lot of opportunity to use it, as I was making stuff that didn't require it, so it's been nice to use it on both this and the Olya.

When I first tried it on, post hemming and with the longer sleeves, I was completely unconvinced and thought I'd potentially wasted some pretty expensive fabric. But with the hem done and the sleeves shortened slightly the proportions started to look right. It's funny how proportions change something from awful to excellent, isn't it? I still think it's a bit too oversized on me, as it slightly shifts around when I wear it, but this is the smallest size, the 8. The hem is a bit dodgy (you can see it in the photo above when I'm side on). It seems to hang down at the sides, but when measured flat, it's even all the way round, so I'm just going with it. It's possibly the heavy and drapey fabric.


Other things to say? Just that I really love it. It's not super practical. I chose a wool mix for warmth, but the shorter sleeves kind of make that counterproductive, plus the wide sleeves don't fit under any of my cardigans or coats, so it ends up bunched up and creased. Still love it though. And our office is warm, so it's a work top until the proper spring arrives. I fully intend to make more of these in stripes, more solids, maybe a shirting, definitely linen, possibly a sweatshirt version, all the options! I am clearly now a fully-fledged Paper Theory fangirl, having made all 3 existing patterns (hacked LB Pullover not yet blogged) and I have already acquired the new Zadie jumpsuit. Just trying to decide on weather appropriate fabrics...


SHARE:

Wednesday, 21 February 2018

Completed: Astoria Sweatshirt (Hacked)

This is the Seamwork Astoria sweater. It's the first Seamwork pattern i've made, despite having had a subscription for the first year it launched. I'll be honest, I'm not that fussed about most of the patterns. There have been a few I've quite liked, but never quite enough to actually prioritise the sewing of them, but I always did quite like the Astoria.


There were a few things that slightly put me off making it previously. It's both very fitted and very cropped and I just am not overly comfortable with things being very tight over my stomach or bust. I did like the neckline though, and as I was recently in the market for a slightly more smart/dressy top for work, and I wanted a sweatshirt, I thought the Astoria would be a good starting point.

I sized up. My bust size put me at an XS, but I went with the finished measurements, opting to make a S instead. I had a quick chat with Christine who has made a few of these before, and, at her suggestion, took out the waist shaping, straightening the pattern from bust down to hip. This widened the hip, so I checked by how much, and added that onto the width of the waistband, also taking the shaping out of that. I also added 6cm to the length at the lengthen/shorten lines.


As a last hack, to make it a bit dressier still, I added a ruffle cuff to the sleeve, a little detail I'd spotted on a RTW jumper.

I'm fairly happy with how this worked out and I like the resultant shape. It's fitted, but not tight over the bust, and then more relaxed over my waist. It's still fairly short for a sweatshirt, but perfect for me over high waisted bottoms. I do find the sleeves to be very tight below the elbow, particularly when bearing in mind that I sized up. If I made this again, I'd add a bit of width to the bottom half of the sleeve, but really my fabric probably didn't have quite as much stretch as the pattern asks for. Initially, I made the sleeves too long. I removed the inch hem allowance and took a further 3/8 inch SA to attach the ruffle cuff, but they are still too long, so I went back and removed the first ruffle cuff, cut more length off (can't remember how much, sorry), and cut and sewed another ruffle cuff. Unfortunately, I cut the second cuff the same width, but clearly the sleeve is wider since sleeves narrow to the wrist, so now the ruffle is less pronounced, and I think looks a bit daft. Not sure I can be bothered to do it again though. I topstitched the SA on the ruffle cuff to the sleeve as the first iteration has a tendency to flip out, and this has helped.

I think the shoulders are a little big, probably a result of sizing up. It doesn't bother me, but if I do make this again, I think I'll shave a little off the armscye.


Finally, let's talk about the neckband. So, I always baste my neckbands (and collar and sleeve bands for that matter). I really struggle with stretching to fit, plus working round pins, plus curling knit fabric edges, so I tend to baste, check and remove puckers etc, then sew in place. This time I decided not to. And I sewed the neckband on with raw edges to the outside. Gah! I spent a good few hours unpicking it (black thread, black fabric, teeny tiny lightening bolt stitch), making at least one hole in the process... only to then sew it on the wrong way round the second time! So, the neckband joining seam is at the front. I wasn't unpicking it again. I'd already made one hole (I sewed the neckband on the second time with a bigger SA to compensate), and I wasn't about to try that again. And actually it doesn't bother me in the slightest. I don't think you really see it when it's on, and if anyone asks, it's a design detail!

The fabric is the black loop back terry from Splendid Stitch, which is currently out of stock unfortunately. It's a really nice fabric actually. Cotton with elastane, which a lot of french terry doesn't have. The loops are not very obvious on the wrong side, and the right side has a lovely smooth face. It's a decent weight and the elastane means it has good recovery, so it would be good for some joggers or something similar. I wish she had it in lots more colours!

True fact - I have only just realised that I appear to have cut this out on the cross grain. The rib of the fabric in these photos very clearly runs horizontally. D'oh!

Final verdict - this isn't my favourite sweatshirt pattern, but I do like it. I think it'll work well in a work context with midi skirts and boots, and you can never go amiss with a black top. I wore it a few times over the Christmas period, with my silver pleated velvet midi skirt and also black jeans. It dresses up nicely with some jewellery or down with jeans and trainers. Very versatile, so I should get lots of wear out of it.
SHARE:

Wednesday, 14 February 2018

Completed: Chat Chocolat Linden


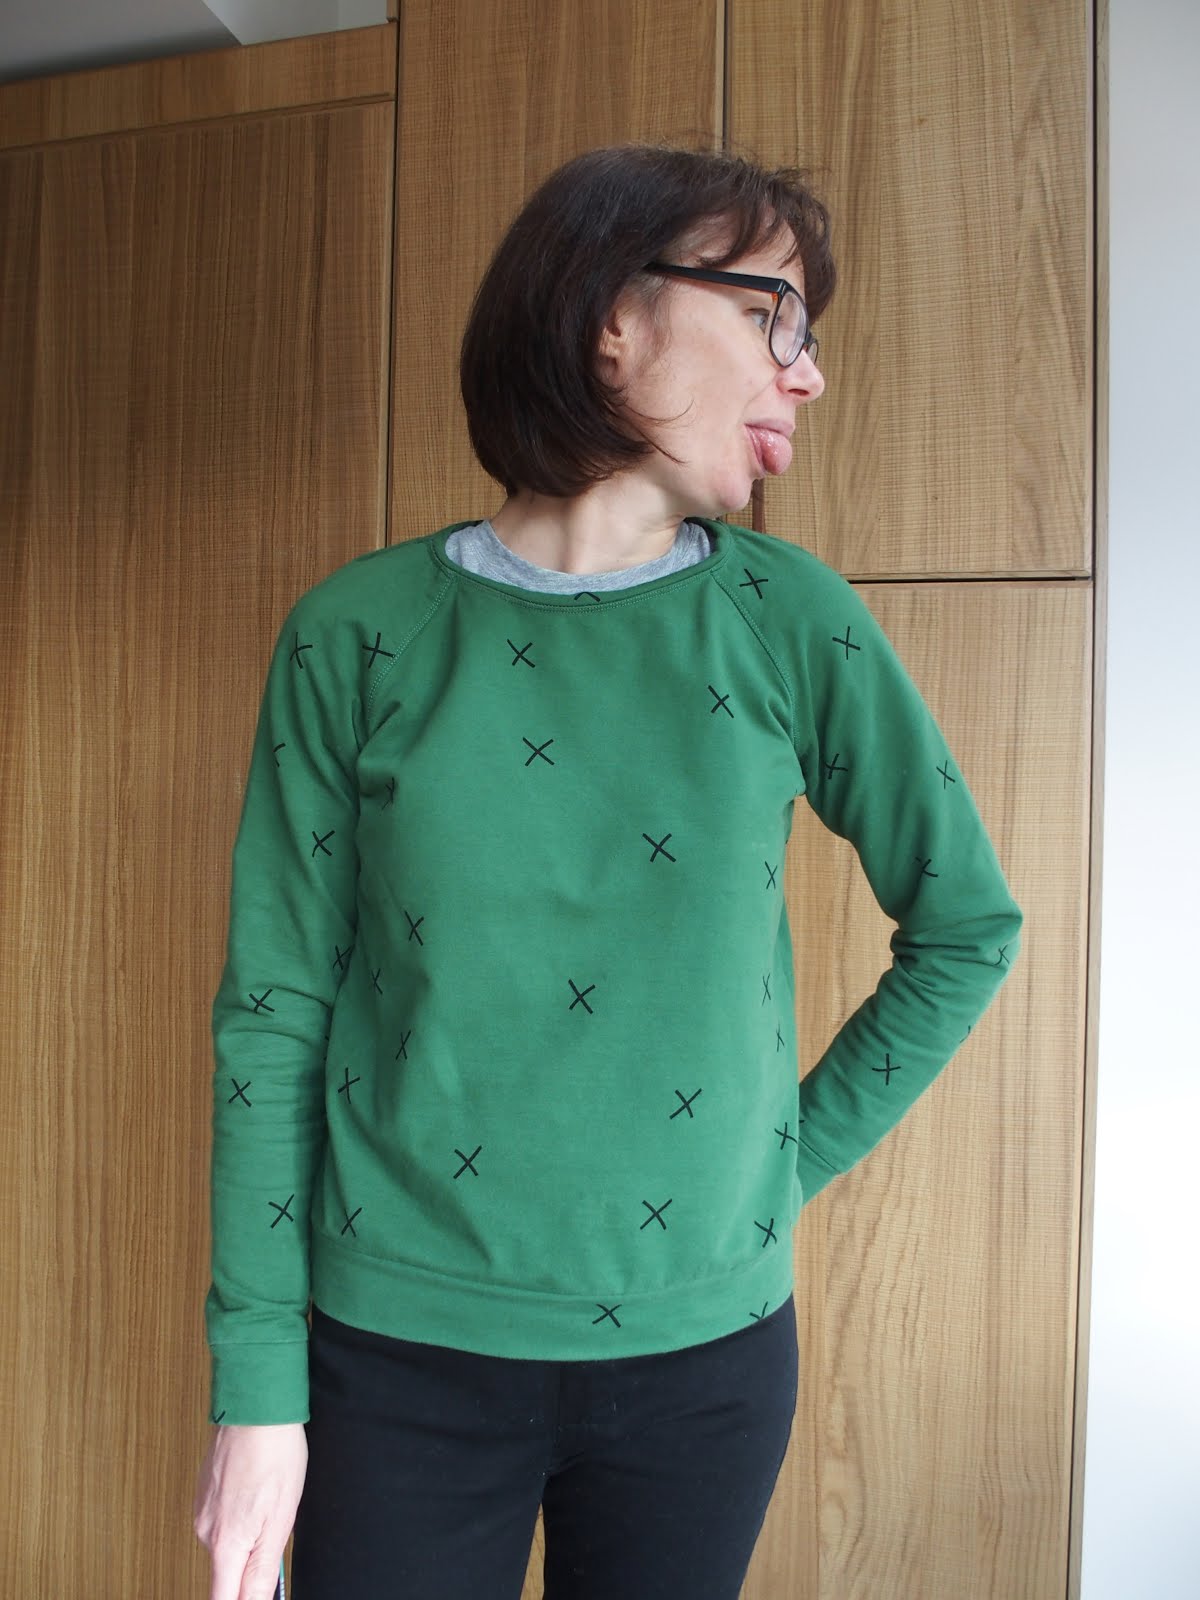
I decided a wee while back that I really wanted a dark green sweatshirt for this winter. I’ve been meaning to make the Linden again for a while – my ampersand version is literally my most worn piece of clothing, handmade or shop bought – but I’m a bit picky about fabrics and colours for sweatshirts, plus I was worried that a solid coloured version might be a bit dull. I can’t remember how I got onto them, but somehow I came across Chat Chocolat’s website and signed up to their newsletter, thinking they sold fabric directly to the public in the manner of Atelier Brunette. When they emailed their newsletter featuring their new collection, We're All Stars, I immediately fell for the forest green version. As it turns out, they only sell wholesale, but they have one UK supplier in the form of Faberwood, which of course, I had known all the time because I’ve seen their fabric on Fiona’s website before. So… being a bit cheeky, I DM’d Fiona to ask if she was considering stocking it. She wasn’t even aware of it, but because she is so lovely and has such fabulous taste, she very quickly got in touch when them and within a matter of weeks, had it on the website, alongside the solid green, should crosses not be your thing.


I am going to rave about this fabric, because, well it’s fabulous and also because I would feel guilty in the unlikely event that Fiona doesn’t shift the rest (she did and has since restocked it!). It’s a very stable sweatshirting with a lovely, cosy, fleecy back. It doesn’t have a lot of stretch, something I didn’t really consider, and is less drapey than say, the Atelier Brunette sweatshirting, although isn’t much thicker. The colour is a glorious forest green, deeply saturated and gorgeous.

I made a Linden, as originally planned, but with a couple of changes. I sewed the size 4, but used a ½” seam allowance everywhere, except the sleeves due to the lack of stretch in the fabric – initially I sewed them at ½” too, but they felt too tight, and I want to be able to layer other things under this. For info, the given SA is ¼” which is what I ultimately sewed the sleeve seams with. I added darts in the shoulders to fix the gaping there – this is a feature I quite like in my ampersand version, but with the smaller SA, it’s made the neckline smaller and the darts don’t sit that well unfortunately. I think I used slightly more than a ½” SA to attach the neck binding, because I wanted it narrower. All this has meant the sweatshirt is approx. one size smaller than the cut size, which was my goal. A lazy version of sizing down. It is tighter than my others, but it’s very comfortable.
It was all sewn on my sewing machine with the lightening bolt stitch and the edges were left raw although they were trimmed slightly to reduce bulk.


And that was it! I’d forgotten how quick sweatshirts are to make, but I’d also forgotten how much I hate attaching neck/hemband and cuffs. Man, I detest attaching those things. I always feel like I need at least one extra pair of hands, and as always basted before sewing them properly. Kudos to anyone to can attach them directly with their overlockers. I have no idea how anyone could do that!

Having now worn this a few times there are a few things I want to go back and fix. The darts bug me, so need altering and actually I'm not happy with the narrower neckband at all. I think it was fine until I washed it, and the raw edges have since curled, which means the neckband just doesn't sit right. I think I will go back and cut off the neckband and attach a new one with the correct SA. None of this has stopped me wearing it non-stop though. It's cosier than my ampersand version, so better suited to the winter weather, plus I just love the colour!
SHARE:

Sunday, 13 August 2017

Completed: Sointu Kimono Tee

This was one of those fabrics that you fall in love with, think about all day every day, then cave in and buy. Only once it arrives you realise you have absolutely no idea what to make with it. It's a viscose, but not a challis, more of a medium weight, which would make it suitable for a dress, but it's still a little transparent and I'm not a light coloured dress person. So into the stash it went.
I had a few ideas - there is a whole "window pane check" period in my Sewing Inspiration Pinterest board, and came across this Madewell top, which I really love, but then I discovered the Named Sointu tee and a plan was born. This was all some time ago, and it wasn't until more recently that I realised the pattern was designed for stable knits, not drapey wovens!

However, kimonos are made in drapey wovens, and the pattern has lots of ease, and if you Google Image (that's a verb, right?) the pattern, you will see that loads of people have made it in wovens, so all good. 

I whipped this top up in a couple of nights. It would have taken less time if I hadn't had to pattern match and cut flat. After the first night, when I had sewn the front and back together and added the belt loops, I HATED it! Even taking into account that it was meant to be belted, it just looked awful. Massive, too baggy, shapeless and dull. Even though I'd had this pattern and fabric matched in my head for a while, I'd had a last minute wobble about whether the pairing would work, and at this stage I started to think I should have listened to my gut. However, after a night off, I went back to it. I ignored the given construction order and made the belt first, thinking that I'd try it with that before investing any more time in finishing it off. I tried it on with the belt and it just worked! It still wasn't perfect though - cutting off the belt loops helped with that. I found them to be clunky and too low and they just looked wrong. I figured that I could go back and make thread chain loops if I needed them (like I did for my Sway dress), but having worn the top once I don't find I need them. 


I think other than the fabric and the belt loops, I made the rest as per the instructions. Oh no, there were a couple of other things. I took a slightly longer hem, so I could do a double turn - the instructions have you overlock the raw edge and turn once. Fine for a knit, but not great on a woven, IMO. So, my version is about 1cm shorter than drafted. And I cut the sleeve bands on the bias, because it was going to be impossible to pattern match them. The sleeve band has no shoulder seam, so it was never going to match up at both front and back. I like it with the bias detail, and kind of wish I'd made the belt on the bias too now. I think it's a nice contrast. 

But otherwise, as per instructions. ;)

I think this is a fabulous pattern, and it's deceptively simple. I wore it to meet a friend for dinner and Festival shows last night, and she commented that it must have been quite challenging to make - and she sews (albeit not clothes). But it's such a simple shape under that very long belt (designed to be worn wrapped around twice). The rounded v neck is a little tricky to get neat, as it's finished with bias binding, but perseverance gets there. I would suggest stay stitching the neckline though, if you do use a woven in this pattern. The instructions don't suggest it, but it's worth doing.

But the sign of a good pattern is how many more versions you immediately start planning, isn't it? I think this would be absolutely perfect in silk and lengthened to dress version. I'd also like to try it in a knit. I think it could be a great basic in a solid colour, but could be amazing in a really bold print - imagine a large scale floral on a dark background, or a watercolour type print? It's a bit of distinctive shape to be a true basic, and there is a lot of volume going on, so you need to think about what to balance that out with (it's far better with skinny jeans, than the straight leg ones I am wearing in these photos, for instance) but I think there is definitely room for another version or 3 in my stash!

Also: I had my hair cut! Not sure I love it, but time will tell. 
SHARE:

Tuesday, 25 July 2017

Completed: Broderie Anglais Kalle Shirt

Usually for me, I start with the pattern. I find a pattern and then I am pretty quick to visualise the fabric that I want. Doesn't mean I always find it of course. This time, however it was the fabric that drew me in. I spotted this geometric broderie anglais on Fabric Godmother's IG feed (seems to be out of stock, sorry!), and instantly knew it needed to be a blouse. A boxy, short sleeved blouse. I perused patterns, and initially fancied the Deer & Doe Melilot blouse, but it was a bit too fitted for my liking. I had initially dismissed the Closet Case Files Kalle as being too cropped, but someone else lengthened it and the penny dropped! I am not always the smartest cookie!

This was my first Closet Case Files pattern and I really enjoyed making it. Having said that, it wasn't a breeze. I found the instructions to be inconsistent. In general they were good. The instructions for both the collar and the yoke were excellent, but there were others, such as the hidden placket and the sleeve cuffs that I found lacking and somewhat confusing. There is a sewalong, which I used for the cuffs and which was very clear, so all good in the end. I bought the Ginger jeans pattern at the same time, so we'll see how we get on with them. Feedback is that the instructions for them are excellent.
I really like the pattern, which I think is well drafted and goes together very well. As I said, I found the instructions for both collar and yoke to be really comprehensive and clear. The collar uses the universally exhalted "Andrea's method" and the yoke is burritoed, which is possibly one of my favourite sewing methods. Since they are the scary bits of shirt making, that really helped. 
As mentioned, as drafted I thought the cropped version of the shirt was a little too short for comfort, so I added 5cm to the length. If you do this, remember to also lengthen the button band/placket. This gives me a nice length that sits at high hip - short enough to look deliberately cropped, but I am in no danger of flashing my tummy. I chose the "proper" collar as I'm not a fan of band collars, and the hidden placket. I had planned to also use the hem facing, which I really like, but it didn't seem right for this fabric. Due to the exaggerated curves of the hem, I faced it with bias binding - not the given pattern piece for the shirt dress, instead I just made bias binding as usual. I then encountered a couple of problems - the SA was less than the drafted 5/8" which didn't work at the side seams, and the bias binding was just too bulky, affecting the way the shirt hang. In the end I fixed it, by not double folding the bias when I turned it under. I'm really not explaining myself well but there is a raw edge on the inside, as I chose not to turn it under. With regards to the side seams, I just fudged it. The finish works well. In theory the binding shouldn't fray as it's cut on the bias. We will see.
Bias facing


Hidden placket

Oh yes, and I actually chose the inverted pleat, but ended up sewing my front pieces on back to front and only realised after I'd burritoed the yoke thus after the point of no return. Due to the button band positioning, it made sense to keep the front right way out and make the back the wrong side. There really isn't much difference from the point of view of the fabric, but it's annoying because I had thought about the placement of the embroidery and holes when cutting and had deliberately offset the underside of the yoke so the holes would not align, so now the embroidery is not centred on the yoke. No one normal will notice, but still. 

Other changes? As I couldn't use iron on interfacing (the glue would have shown through the "holes" in the fabric), I interfaced with white poly/cotton from my stash, which I basted on. I also used this for the bias binding. And the shirt only has 4 buttons. With multiple layers, and also the embroidery adding bulk, I just could not get the collar stand under my button hole foot. I know it's trendy but i doubt I'd do up the top button anyway, so have gone without. The white buttons were in my button jar and are recycled from something else. And I accidentally did horizontal buttonholes, which I didn't realise were wrong until I tried to button it up! 
Modelling support. Also: this is my new kitchen. Still not finished.


I made a good portion of this at a mini Blogger meet up organised by Franca. It was only the pair of us, plus Jen and Kerry, but Roisin was in Edinburgh for the weekend and popped in to say hello. It was lovely to meet her. She even got to witness my parallel parking skillz!
So, yes, delighted with this. I really, really love it. I'm not normally someone who wears white, and I did consider dying the fabric, but I think the white looks really fresh, as long as I have no spillages. So far so good on that front. By keeping the broderie unlined I have the option to wear different coloured camis underneath, which changes it up a biit, or possibly to wear just a bra if I'm feeling brave (and warm) enough? Ha ha!


SHARE:
© Grosgrain Green | All rights reserved.
Blogger Template Created by pipdig