Sunday, 27 April 2014

Completed: Liberty Kimono

Hello! I'm still hanging in there. As of today I am 38 weeks so still a bit to go. And still sewing!

My friend Lorna and I had a Crafternoon planned for last Tuesday. Lorna sews home dec and soft furnishings, for a living, specialising in curtains, cushions and gorgeous appliqued gifts. It was all good in theory, and I duly packed my machine, sewing stuff and even my overlocker into the boot of the car, but events conspired against us, and it turned into more of a Chat-and-eat-ernoon instead. We should have known better seeing as we haven't seen each other for a few weeks, we had lunch and cake to eat, and she had a brand new 10 week old puppy for me to meet! Unsurprisingly, not a stitch was sewn. We did have a bit of sewing chat though - her asking for my advice on how to refashion her daughter's old dress into a skirt - and me asking for her advice on how to make piping, so it wasn't all lost.

So, Lorna will be reading this, fully expecting a post about the chair cushions I had planned to work on (and pipe) that afternoon. And instead, although this has already been given away by my post title - I have made a kimono! Eh, what?


I did say back in this post, that I had wanted to make a lightweight dressing gown to wear in hospital. I had kind of forgotten about it, until recently Kirsty from Top Notch made the same one.

The pattern came from The Liberty Book of Home Sewing, which, funnily enough, Lorna gave me for Christmas a couple of years ago. It's a beautiful book, but this is the first thing I've made from it.The biggest turn off as far as the book is concerned is that it doesn't come with any patterns: you have to draft them.


Actually once I got down to it, the drafting wasn't that bad. I used centimetre squared dressmaking paper (like this), which I already had, and basically copied the "technical drawing" in the book, which was also printed on a grid. It was pretty straightforward. The idea of it was much worse than the reality.


I "drafted" the pattern on Wednesday, and then went fabric shopping. I went with a fairly open mind, not necessarily wanting Liberty fabric (i.e. hoping to find something cheaper) but of course, that was the thing that jumped out at me. The fabric is Liberty Tana Lawn, from Mandors, and was labelled as Abstract Blue Rose. I've done a quick Google search, but haven't found it so not sure what it's official name is, nor the history of the design. I deliberated for a while in the shop over various contrasting and co-ordinating fabrics for the trim. I really wanted 2 co-ordinating prints, but nothing looked right. Eventually I settled for this solid lightweight cotton. In the shop it looked quite purple-y, picking up the little purple spot in the middle of the flowers, but since I got it home it has looked much browner, which is how it has photographed. It gives the kimono more of a masculine feel but I still really like it. And the purple/brown fabric is actually shot with pink, albeit not that obviously.

Pretty good match, non?
I like to imagine there are little zebras hidden in there.
You can just about see the pink in this photo.
The make was really straightforward. The only changes I made were to add in-seam pockets and a hanging loop, and using French seams throughout (yep, including those pockets, using this tutorial). I finished the front and cuff bands by hand.
My first every rouleau as belt loops
I made a third rouleau to use as a hanging loop
French seamed in-seam pockets! So, so proud!
I completed the majority of it on Thursday. With the handsewing finished across Thursday and Friday evening in front of Masterchef. I was sewing slowly as I've had quite a bit of back pain this week, so I tried to keep moving while sewing, mixing up cutting and sitting at the machine with standing to press. As a result I took the long and probably less logical route. I didn't even cut it out in one go. But that was infinitely preferable to rushing it. I am immensly proud of this make. The insides are so pretty!!!

My only gripe, other than drafting my own pattern, is the sizing. It's one size, which the book describes as a "comfortable UK size 12". Now, I know I am pregnant, but even so, I expected it to be bigger - a size 12 is 2 sizes bigger than my normal size and this barely meets over my tum. It will fit me once the baby is born and is comfortable, but to me a dressing gown or kimono should be oversized, not snug - the lounging lady in the book (pic at the top of this post) would certainly suggest that. My old M&S size small towelling dressing gown fits me, 38 weeks pregnant belly and everything, with room to spare! It's not an issue, but something to be aware of if you were planning to make this. I can't tell you the number of times I have checked the measurements and seam allowances.

It was a joy returning to sewing with cotton. I have enjoyed the knit sewing I've been doing recently, but cotton is and always will be my favourite. It's just so easy!

Now, I know it's always much better to see finished garments worn. But since this currently looks a bit ridiculous on me, I decided to embrace the ridiculousness and so Small Boy and I embarked on a photo shoot! Bear with us on this one. I did deliberate over whether to use these photos, but figured if Nessa can post a photo of herself in a slip, I can do it in a dressing gown. However if I ever decide to look for a new job, this part of the post may disappear...

With our PJs, our dressing gowns and our teddies (and yes, that's my original 1970's teddy bear I am holding!)


Pockets in action!
And just in case you think I wake up looking like that - I don't! This was after my shower, I have my normal make up on, I have "post-hairdressers" hair (from yesterday), and I am wearing underwear (top and bottom!). Small Boy on the other hand, really does look that cute, and lively, when he wakes up! :)
SHARE:

Wednesday, 16 April 2014

Completed: Woven maternity skirt

In the spirit of honesty, I am committed to showing you my failures as well as my successes. And I've had a few successes recently so was due a failure...


I actually made this a while ago. Before my jersey gathered skirt.Well, it was the same day, apart from the hem, which took me a while.

The skirt was loosely based on this one by Shivani, and is made using exactly the same method as I used for my jersey version, but for this I used jersey for the waistband rather than ribbing. This was because I wanted the waistband to be black. I was sceptical it would work, but since Shivani had had some success with a jersey waistband, I thought it was worth a try.

The other changes were to leave a huge hem allowance - 5 inches - because, as per Shivani, I want to be able to use this skirt post-pregnancy; and that I lined it.

The fabric is 100% polyester! I know! Me? With polyester? But I love the print, which reminds me of leopard print without actually being leopard print.


The fabric is really thin, hence lining it. But this was an impulse make from the stash, and I didn't have any spare lining fabric, so I cut it out of something in my refashion pile! This means the lining is less full than the skirt, but that doesn't matter too much.

I bought the polyester in Mandors at the Glasgow Meet Up in February. I'd seen it in Mandors previously but didn't buy it, but it stayed in my mind, so I had to buy it when I went back. The original plan was for a dress. The skirt was to be the polyester print, with a short sleeved black jersey bodice (based on Lady Skater), and a Peter Pan collar made from the same poly print. I still love the idea of that dress, but I faffed and put it off and then it became too late to make a maternity dress. So I decided on the skirt.


I still think the dress would have been nicer, so have left the large hem. This gives me scope to keep it as a skirt, or to make a non-maternity dress at some point in the future. I have fabric leftover to make either a waistband or a collar.

So, back to that honesty thing; this is a very sloppy make. I somehow failed to line up any of my seams, so the waistband has 2 seams which sit in a different place to the one side/back seam on the skirt, which differs again from the side seams on the lining. Once again the jersey waistband is too big, and the fabric was the wrong choice, so the skirt falls down. Plus I somehow really messed up the hemming. Since I started off with a tube, and used the selvedges, so the fabric was definitely straight and on grain, I'm not sure how I ended up with a hem that was fuller that the fabric I was attempting to stitch it on to! I must have somehow twisted it during sewing and as a result, it's a bit very messy. But I just put that bit to the back, so I can't see it when I wear it!!! I should unpick it, but I actually found the hand sewing aspect of this skirt tortuous. I couldn't find a comfy position to sit in, my back was sore, and my tummy was in the way! I therefore am not doing any more hand sewing until this baby is born!

I have worn this skirt once, to work. I put it on again for the photos, and I was reminded of how much it just doesn't work. Not only does it fall down, but it just doesn't sit right. The rubbish hem sewing bothers me, plus, it being polyester, it didn't press that well. Pity because I do love the fabric. Hopefully I can still make it work under another guise, post-maternity.

But in order to finish this post on a positive, how do you like my new necklace? I received a gift voucher from either P or Small Boy for either my birthday or Christmas (neither of us can remember which) for an independent Edinburgh store called Curiouser & Curiouser. This week I finally got round to using it, and I bought this! I love it!


Small Boy thinks it's a snowflake, but it's actually a bee, with some flowers and honeycomb. So cute! And it goes perfectly with this colour!


SHARE:

Thursday, 10 April 2014

Completed: Birdy Maternity Tee

I'm doing that thing where I write lots of posts in quick succession and then you won't hear from me for a couple of weeks. I should space these out, but what can I say - at the moment I have the time to sew and blog, and I don't know how long that will last for! Plus I'm joining in with Katy's Knit Week! :)


So, here we have... an exact replica of Tuesday's post, but in a different fabric! Yes, it's another Kimono/Ruched Mat Tee crossover. I did want to do something a bit different with this fabric. I was planning some interesting sleeves, but yesterday when I was wearing my blue version, it dawned on me just how much I love it. Both from an aesthetic and wearability point of view. It just works. And if it ain't broke, don't fix it... Plus I knew this was going to be pretty much instant gratification, which is what I need right now.


The make is the same as my last, with the only exception being that I added 2.5cm/1 inch to the length at the back. For some reason maternity bottoms have a really low rise at the back, so I wanted a bit more coverage there. I should have done this with my blue one. I actually don't know why I didn't. In order not to lose any of the ruching, I added the same length to the whole of the front pattern piece, but then removed it from the centre front fold and redrew the hem curve. This means that the centre front is the same length as the original, but the front side seams are 2.5cm longer to match the back.

The larger my bump, the curvier my lower spine becomes. Hence the excess wrinkles.
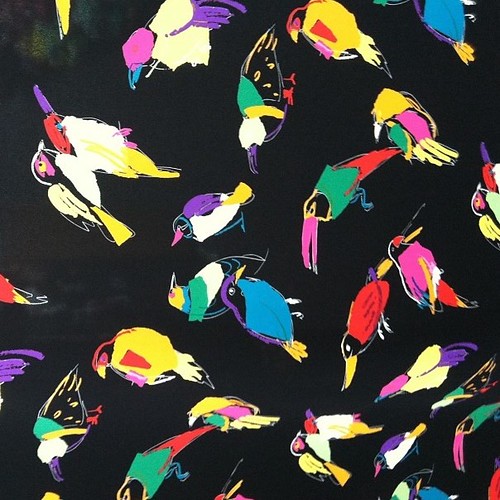
The fabric is another Fabric Godmother buy (now out of stock, sadly), and was a present from my parents (as was the pattern, as mentioned here). Thinking about it, I haven't actually disclosed on the blog my borderline obsession with bird print stuff, because, somewhat bizarrely I haven't actually made that much with birds on it! A non-blogged dress (but featured a lot during last year's MMM13) is, I think, the only other bird themed make.

Unblogged bird print dress. Don't I look delighted at the prospect of wearing it?
Yet, I have tons of bird themed RTW: scarves, tops, dresses, skirts, jewellery, not to mention ornaments, kitchenalia, pictures. You name it! The only reason I can surmise as to why the blog has escaped this, is because I haven't found that much bird fabric that I truly love. Being me, it has to be a particular calibre of bird, to gain entry to my house/stash.

Bird print H&M skirt
 I do have one bird fabric in my stash, that is so beautiful that I am scared to use it - a Marc Jacobs silk crepe de chine, that I bought on ebay about 2 years ago. Lladybird actually has used the same print, albeit her fabric is a Georgette, here.

Photo courtesy of Lladybird
Isn't that beautiful? One day I will pluck up the courage to use mine!

Anyway, back to these particular birds. The fabric was nice to work with. Again, drapey, stretchy and pressed well. BUT... there were some issues. The fabric is actually white on the wrong side, which always makes me think of cheap jersey. I know that's not necessarily the case, and quite possibly all printed jersey is like this, but that's my preconception. I did order a swatch, so I knew this in advance, but I chose to overlook it because the print was so nice. However, wherever the fabric is punctured by the needle, some of the white shows through. Not so that a casual observer would notice, but I notice and it annoys me, particularly on the top stitching at the neck (twin needle again, peeps!). The white background also means that when stretched, the white is visible. I countered this (and avoided having giant distorted birds over my belly) by cutting a Medium over the shoulders and bust, and grading down to a Large from where the ruching starts. This actually worked well, as the fabric has less stretch than the milano jersey.

See the white showing at every stitch? Right and wrong side
Finally there are a couple of flaws in the fabric which of course I didn't notice until after I'd cut the pieces. Firstly, there is actually a teeny hole right in the middle of my front bodice. It is entirely possible that I nicked the fabric somehow, but since this is right in the middle, I'm not sure how I could have managed it. I mean it's absolutely minute, but it is there. I saved the day, by applying a very small Elastoplast (Band Aid) of black interfacing on the wrong side. It's still slightly visible from the right side, but again not to the casual observer.

Hole!
"Elastoplast"
No hole - although you can see the white where it had laddered slightly.
Can't see it now though, can you? (Clue it's above the upside down goose(?) right in the centre of this pic)
Secondly, there is a dark line running across the fabric - again on the front. I didn't actually notice that until I put the top on today to wear, so it's not that obvious. But it is a bit annoying. It wasn't horrifically expensive fabric, but it certainly wasn't cheap.


But. It's a tried and tested shape. It's comfy. It has great colours. And it has birds on it!!!! I love it!


In my last post, I wrote a bit about my experience of using twin needle. Since then, Colette also posted on the subject. I have added the link (and another, which is possibly even better) to that post, but I wanted to mention it here too. Well worth a read if you are new to knits.
SHARE:

Tuesday, 8 April 2014

Completed: Another MN Ruched Maternity Tee

This make is so hot off the press, I literally just finished them hem, pressed it, took some photos and then immediately sat down to blog it!

I am not winking here - the light from the window is reflecting on my glasses! :)
I LIKE being on maternity leave!

I finished up work last Thursday. I am actually officially on holiday just now, as I have about 3 weeks of annual leave before the Mat leave kicks in. I'm finding it a bit strange. I knew I wanted to finish up about 4 weeks before I was due, as I just needed some time to wind down, get organised, and spend some quality time by myself and with my Small Boy. I have spent the last month or so waiting on this very week and now that I'm here I'm finding it a bit of an anti-climax. I had promised myself Friday to literally do nothing. To relax without feeling guilty. No housework, no worrying about anything, no sewing, no cooking. Nothing. I got to about 1.30 before the sewing machine was out. Lying about is all very well in principal but by lunchtime I'd caught up with my bloglovin unread list, I'd spent time browsing Pinterest and I'd read all my emails. And I had a sore back from sitting on the sofa.

So Friday afternoon saw me retracing this pattern, cutting out the fabric and then sewing it together. This morning I finished the neckline, sleeve and hem.


After the sleeve issues of my last version of this top, I decided to do something much simpler this time, and I simply added kimono sleeves instead. I also raised the neckline to a bateau shape. For both the sleeves and the neckline, I used the Maria Denmark Kimono Tee pattern. The rest of the pattern is the Megan Nielsen Ruched Maternity Tee. This mash up of patterns worked perfectly and I am much happier with this version. The first version is OK, and I have worn it quite a bit, but the neckline is too low and I am forever tugging at it to ensure no one gets an eyeful. I'm also not keen on the sleeves. But it is wearable - albeit it did tend to get worn more for work than casual. This version is 100% casual-tastic and I'm really happy with it. Plus, only 2 pattern pieces when you get rid of the sleeves!


The fabric is this merino jersey from Fabric Godmother, which is 100% viscose. I had originally ordered a swatch of the tangerine, which was a gorgeous dark orangey colour but unfortunately Josie advised that not only has she stocked out, but that the manufacturer was no longer producing the colour. Why? Don't they know how "trendy" orange is this summer? (I am seriously lusting after orange lipstick after having seen it in quite a few magazines). Anyway, the royal blue is an absolutely beautiful rich colour, so a good substitute. The fabric is lovely. Very drapey, with a good amount of stretch which is required for this pattern. The handle is lovely and although it can be a bit slippery to cut and sew, it presses and hangs beautifully. I would definitely use this again. Somewhat annoyingly between ordering the swatch and ordering the fabric, Josie also put her prices up, but I guess that's just a sign of the times these days! And the fabric is still very affordable at £10 per metre. I bought 1.5m but was able to make the kimono sleeve version in less than a metre.

Other than the alterations to the neckline and sleeves, the other changes this time were as follows:- I made it 100% on my sewing machine using my stretch stitch; I used Stitch Witchery on the neckline; and I used a twin stretch needle on neckline, sleeve and hem. This was my first time using Stitch Witchery, which was recommended for the neckline in the pattern. I found it a bit faffy to apply to a curved neckline. I managed to weld a good amount of it directly to my iron. But it did work well, once I worked out a system for applying it. It's stiffer than I expected but on the neckline that's fine. I bought the Stitch Witchery from here.

A nice even Stitch Witcheried and twin needle stitched neckline. I am so proud of this.
It was also my first attempt at a twin needle and honestly I have no idea why I was so scared! It worked perfectly first time. I do have some ever-so-slight tunnelling but nothing major, and it's not too noticeable. I was worried about sewing from the right side, but I devised a system to get round this: I turned up and pressed a 1/2 inch seam allowance, then sewed it at a bit less, lining the edge of my presser foot up with the turned hem. I then trimmed away the excess seam allowance on the inside once done. This is probably not what you are meant to do, but it worked well for me!

Twin needled hem from the right side ( bit wobbly there, whoops!)

And from the inside, where I've trimmed any excess seam allowance away
In case you haven't used a twin needle before, here is how it works on my machine (Brother Innovis 10). You thread the machine as normal, threading the left needle manually (the needle threader doesn't work with this needle). The machine comes with an extra "spool pin", which you attach to the bobbin winder on the top of the machine. You put your second thread spool (as you can see I actually just used a bobbin, which worked fine) here, thread the machine as normal excluding the needle bar thread guide (labelled 6 on my particular machine), and manually thread the right needle. Load up your bobbin and you are ready to go! I used the straight stitch, and set it slightly longer - 3.5 versus the default stitch length of 2.5. And that was it! Easy peasy!

My second thread sitting on top of the spare thread pin on top of the bobbin winder.

The view from above - 2 threads.
You can just see here that the left needle thread goes through the thread bar whereas the right needle thread does not.
I bought a Schmetz 2.5 stretch twin needle from here. I had no idea that there were different widths of twin needle until I looked online; the width refers to the gap between the needles. I had no idea what size to go for, so went for the 2.5. It's fine, but comparing it to some RTW items, their twin stitching (which no doubt will have been done by coverstitch) is much wider spaced. I might buy a wider one in future, but I suspect my barely there tunnelling is probably down to having the 2 needles very close together. If anyone knows of the benefits of a narrower or wider needle, please let me know in the comments below! Or if you have any comments about using a twin needle in general, please let me know!

Now, I wonder what I'll do this afternoon, while I count down the hours to the Sewing Bee final!??!

Edit - since writing this post originally, Colette posted about twin needle use, and then I came across this link, which is even better I think. Both are definitely worth checking out!
SHARE:

Tuesday, 25 March 2014

Completed: Take two men's poloshirts...

...and create two loose-fitting woman's tees!


My friends, and some of you, are expressing surprise that I am still sewing. To tell you the truth, I feel like I'm doing less and less, but I've been due some time off work recently and have chosen to dedicate that time to sewing. Rather than, say, hoovering, or you know, getting organised for the baby coming.

So here are a couple of refashions that I rustled up yesterday afternoon. Each one took probably about an hour and half to complete, and most of that was trying on, adjusting, trying on adjusting, trying on, adjusting. Sorry, I forgot to take "before" pictures, so you'll just have to use your imagination on those.

I've had this tutorial from Cotton and Curls pinned for ages, and I've also had 2 of my husband's polo shirts in my refashion pile for nearly as long. I think I put these off because I was scared of getting them wrong and therefore "wasting" the polos, but then it dawned on me that they would just be going in the bin anyway, so what did it matter.


I made this one first using a Gap polo shirt, in a lovely stable cotton with very little stretch. I particularly love the colours. I'm really really happy with it! I don't know how much longer it will last me, as it's already a little tight over the bump (what can I say, I have a thin husband, so his shirts are not particularly oversized...), but it will work well post-pregnancy. I think my only change was that I didn't curve the bottom. I wanted to, as I think that would be more flattering, but the polo suffers from having twisted side seams as a result of having been cut off-grain. I figured any shaping would make this even more obvious, so I opted to leave the finished hem of the polo. Once less thing to do! I'm not convinced it looks right, but I'm unsure what else to do with it. Any suggestions?


As per Liz's suggestion, I changed the original buttons, which were grey, for something brighter. I had 3 turquoise buttons in my stash and they match perfectly, picking out the smaller turquoise stripe.


Some notes on construction
I love Liz's makes but I don't always find her tutorials all that clear. I think she assumes a certain knowledge, and it's probably just her style of writing versus my style of learning. I do know she puts a lot of work into her tutorials, so I don't want to take away from that, however if you are thinking of making this, here are my observations:
  • When cutting the neckline, it's actually easier to first sew up the button placket. Even if you don't plan on adding more buttons, I'd still do this, as it just keeps the neckline more stable.
  • If you plan to change the buttons, remove the old ones before you sew up the placket. It just makes it easier. No pesky buttons in the way of the presser foot!
  • I top stitched the front of the placket closed, and then slip stitched the inside part closed.
  • When top stitching the placket, start from the bottom and work towards the neckline (ensures it all matches up correctly - same principal as when inserting a zip!).
  • It would probably be helpful if you could copy the desired neckline from an existing tee, but if you do, remember to add 1/2 or so seam allowance. If you don't want to copy from an existing tee, start with a small amendment and keep trying it on and trimming a little at a time until you get your desired neckline. Again, remember seam allowance!
  • Similarly if you plan on taking in the sleeves and sides, either copy from an existing garment, adding seam allowance, or do small increments until you are happy. Trying on inside out and pinning helps, although is quite tricky to do under your own arms, and can result in some injuries*
  • When sewing the sleeves, start from the cuff and work towards the "bodice". This ensures your cuffs match up nicely.
  • When sewing the neckline, there will be a LOT of bulk at the placket. Where possible, I trimmed some of this away and my machine still struggled.
  • Liz added additional buttons but didn't say what to do about the lack of buttonholes. I considered making a third buttonhole, even if it was non-functioning, because my buttonholes had contrasting thread, but in the end didn't bother. As I sewed the buttons on with contrasting thread, I don't think it matters too much.
  • My polo had a pocket. I decided to leave this in place, but top stitched the top closed. Having a functional pocket on the back seemed slightly weird.


I loved this so much, I had to make a second, straight away! Talk about instant gratification!


I didn't want 2 tees that were identical in shape, so I drew inspiration from Miss P's recent tutorial, and cut the sleeves off, to make a kimono style sleeve. For this, Portia's tutorial is really comprehensive so I have nothing to add. My drop sleeve isn't quite long enough (again, the curse of the narrow husband), so it kind of sticks out, but you get the idea. I decided to keep the neckline higher on this one. In fact, after removing the collar, I didn't alter the back (original front) neckline at all, and cut the front (original back) neckline to match, widening the neckline as I went to give a kind of bateau neck look.

No buttons yet!
This one is an Old Navy polo, again in 100% cotton, this time with zero stretch. I don't like this one quite as much. The fabric is a bit stiffer, which doesn't work so well with a pregnant tum, and it makes the sleeves stick out. Plus it's mostly white which is a colour I usually avoid like the plague! I will still wear it though, and again it will serve me well post-pregnancy (assuming it doesn't show the baby puke too much!). I don't yet have buttons for this. I did consider some gold anchor buttons from my stash but they didn't look quite right. I think I want a real contrast - mustard or orange - as per Liz's original tee, and I don't have anything like that in my stash, so will need to buy some when I next get a chance.


Pregnant or not, this is a refashion that is really quick and easy and looks great! If not pregnant, you can just take the sides in more, to make it as loose or tight fitting as you prefer. Definitely worth a try!

*Injuries sustained whilst sewing: 1 giant scratch to right arm!


SHARE:
© Grosgrain Green | All rights reserved.
Blogger Template Created by pipdig