Today,
Debi is talking about sharing our Sew Grateful projects, and this coincides with my first finished make on the blog!
And here it is, my Chevron Charlotte!
 |
| Why do my legs look so stumpy? |
This is my Sew Grateful project for a number of reasons. Firstly, I am grateful to my mother-in-law who gave me the pattern for my Christmas this year. Secondly, I'm grateful the girls at By Hand London for being so lovely when I realised I had the
wrong pattern in the right packaging. And thirdly I am grateful for my husband's patience during this make, whilst I scattered black threads throughout the house, cursed while I made stupid mistakes and stayed up til 11.30 last night to finish it - and for his appreciative comments once made (he likes me in something fitted! What can I say!).
And so, to my review. This was quite a painful make. Nothing to do with the pattern, which was so straightforward I could have made it without instructions. No, it was because, as I said
here I chose fabric woven by the devil himself! Loose weave, frayed like mad, pins got lost in it or just fell out, it stretched, it disappeared before my very eyes, it was HORRIFIC and nearly impossible to unpick...
 |
| Another stumpy legged shot... |
I made some really daft mistakes during this make, like sewing the front on inside out (darts on the outside are not a good look), taking it in too much at the sides and chopping a bit too much off the bottom, so a fair bit of horrific unpicking was required. Normal 5/8 inch seam allowances proved not to be enough (as I discovered too late), as the fabric frayed right into, and sometimes beyond that. This means that I have some very dodgy looking seams (luckily only visible close up).
 |
| Very shiny bias binding, in blue, which doesn't go with my plum coloured lining! |
To counter the fact that I cut too much off the bottom, I hemmed it with bias binding. This is something I've not done before, but actually really like the look of. Unfortunately all I had kicking about was some royal blue, shiny bias binding, which doesn't really "go", but it does the job, so I don't really care. I will use this method again though, because a) it looks nice (provided you chose something that coordinates) and b) it had the happy coincidence of reducing what would otherwise have been a very bulky hem.
 |
| Please excuse the poor quality photos - we have a terrible camera and no natural light on winters evenings! |
But... I nevertheless do love this skirt. I wore it to work today and it was really comfy and felt quite grown up and glamourous. I do love the look of the fabric and that textured detail, which brings some interest to the plain black colour. It's lovely to finally have a pencil skirt that fits, as I am quite slim hipped proportionally and so RTW versions never do. I'm not convinced it'll be around for long as the material will be very prone to pulls, and I have a toddler who has already ruined all my tights with his velcro fastening shoes. Plus it's a wool mix, the label said dry clean only, and I didn't pre-dry clean, so god only knows how it will respond when I do eventually need to clean it: a day which will come soon due to the prevalence of jammy/toothpasty/cheesy/humousy* (*delete as appropriate) fingers in our household.
So, to sum up...
What I liked
Straightforward pattern, with really clear instructions, although not sure how a true absolute beginner would get on.
I finally have a pencil skirt that fits on the hips! And I do really, really love this skirt!
What I didn't like
Fabric choice
My daft mistakes
The unhelpful comments from my boys (Husband: "it's too long and too short". Small boy: "it's like a plate, mummy"!!!!).
Update - a couple of others which I only just thought about (but not biggies):
I made this in a size 12 and it comfortably fitted within 1 metre of fabric. To do this, I folded my waistband pattern piece in half and placed that fold on the fabric fold laying it horizontally (length of waistband lying perpendicular to the selvedge). The instructions have the waistband piece laid vertically (parallel to selvedge), which doesn't work with a directional print/weave such as mine, and just uses more fabric. Even a narrower width of fabric (think mine was around 150cm wide) would fit well within 1 metre. As I said, not a biggie, but it might be more difficult for a beginner to figure out.
For a British company, why are all measurements imperial only? I do tend to work in a weird mixture of both imperial and metric, but UK fabric shops sell in metric, and it's just a pain to have to work it out (inevitably I buy too much fabric as I just translate yards to metres as 1:1 for simplicity/lazyness).
Did I change anything?
Took in quite a lot at waist and hips (didn't write down how much though!)
Took 4 inches up at bottom (but that was too much)
Lined the skirt.
Did I try anything new?
Bias binding as hem tape - really liked this as it reduced bulk and looks nice.
Used pins to mark dart location. Liked this method and will use again.
Replaced the darts on the lining with pleats, as per Karen's advice. Unsure if this made a difference or not, but it was easy to do, so probably would do this again.
What would I do differently next time?
Make a more considered fabric choice.
Make a muslin - so I don't have to keep re-fitting me every time I make it.
May try a centered waistband with zip running through the waistband or no waistband at all. This version has turned out to be very high waisted, but I think that's to do with how I fitted it before I put the waistband on. Again, a muslin would help sort this out.
Will I make it again?
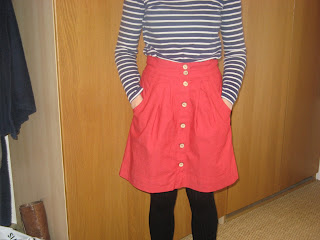
Yes! I really fancy a nice bright version for spring like this, or maybe even a print.


