Monday, 17 July 2017

Handmade Holiday Part 4

The last part! You can find parts 1, 2 and 3 by clicking on the numbers.

I am not a maxi dress person. I think they look lovely, but I never really got them. I had no need for one. But, then I came across this Burdastyle pattern, in Melissa's May Burda review here, and I found myself coming up with all sorts of reasons why I needed a maxi dress for my holiday: if we wanted to visit the Blue Mosque in Istanbul I'd need my legs covered (my head glossed over the fact that I'd also need my head and arms covered too); what if people dressed up for dinner in the all-inclusive resort - wouldn't a maxi beautifully bridge that divide between casual and dressy? Plus, if I hated it, I could always cut it to midi or shorter.


I managed to shoe-horn it in, but only after all the other items were finished and only on the proviso that I finished it BEFORE the week before we went. I started and finished it on the Monday. We left on Friday morning.

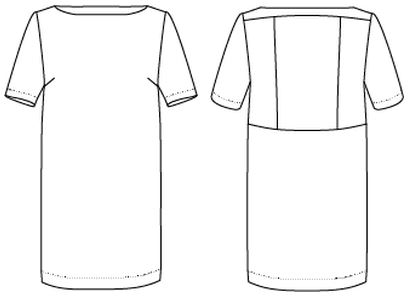
So, although the pattern is in the magazine it's also online. Not sure I would have bought it on the strength of the line drawings, but for once Burda's styling made my heart leap! My experience in making this dress reminded me why I avoid Burdastyle. I'm not going to go on a rant, because we've all made Burda patterns and all know their flaws. At least I didn't have to trace it.

The fabric is bamboo jersey, from Edinburgh Fabrics, which I thought would nice and light and breathable. Actually the dress uses so much fabric it weighs a ton, and was only suited to the cooler evenings. The pattern as drafted actually has an outer dress with an inner layer much like a tank. I'm not clear why, other than to support the outer layer maybe, but I skipped it anyway. I also skipped the neck and armhole bands, because it was quicker and easier to just turn once and stitch. The fabric requirements given by the pattern are woefully inadequate. I mean seriously inadequate. I bought the recommended length of 2.2m, and - bearing in mind I didn't cut the bands or the inner tank thingy - I had to seam the front piece because there was absolutely no way I was going to get those pattern pieces on the fabric otherwise. I don't actually mind the seam at all, so no biggie, but still!

The dress itself is a straightforward tank shape from the front, with a slightly cocoon shaped skirt but the back has all the drama with a sort of cape-like drapey bit hanging off the shoulders (excellent description, Helen). The instructions were clear as mud, so the construction was a bit of a head-fuck, but I got there in the end.
You can see how the back neck sags under the weight of the fabric here

Not sure if it was a drafting error, or if I stretched out the armholes when sewing, but the armscyes were ridiculously large. It's possibly a bit of both. I think I ended up removing about 20cm from each (yes, really!), tapering it down the side seams. Because the side seams actually sit to the front, this has resulted in an angled shape to the armhole, which I rather like.
You can sort of see the angled armscye here

I think I added length, just in case, which I cut off again, but I left the bottom unhemmed - partly laziness, partly time, partly because I doubted I'd keep this as a maxi, so what was the point? So far it's still a maxi dress!

The result? Yeah, I kind of love it. I wore it twice on holiday. Not sure how much wear it'll get outside Turkey or a similar hot location, but you never know. I love the kind of Grecian vibe it has. It's nice unbelted but Paul vetoed that, so I wore it belted. It works well, but it is the kind of dress you fiddle with quite a lot. But I like the swishy nature and I really love the shape of the skirt. I think I will have to find another excuse to wear it at home!
Grecian Goddess pose, obvs.

SHARE:

Wednesday, 12 July 2017

Handmade Holiday Part 2

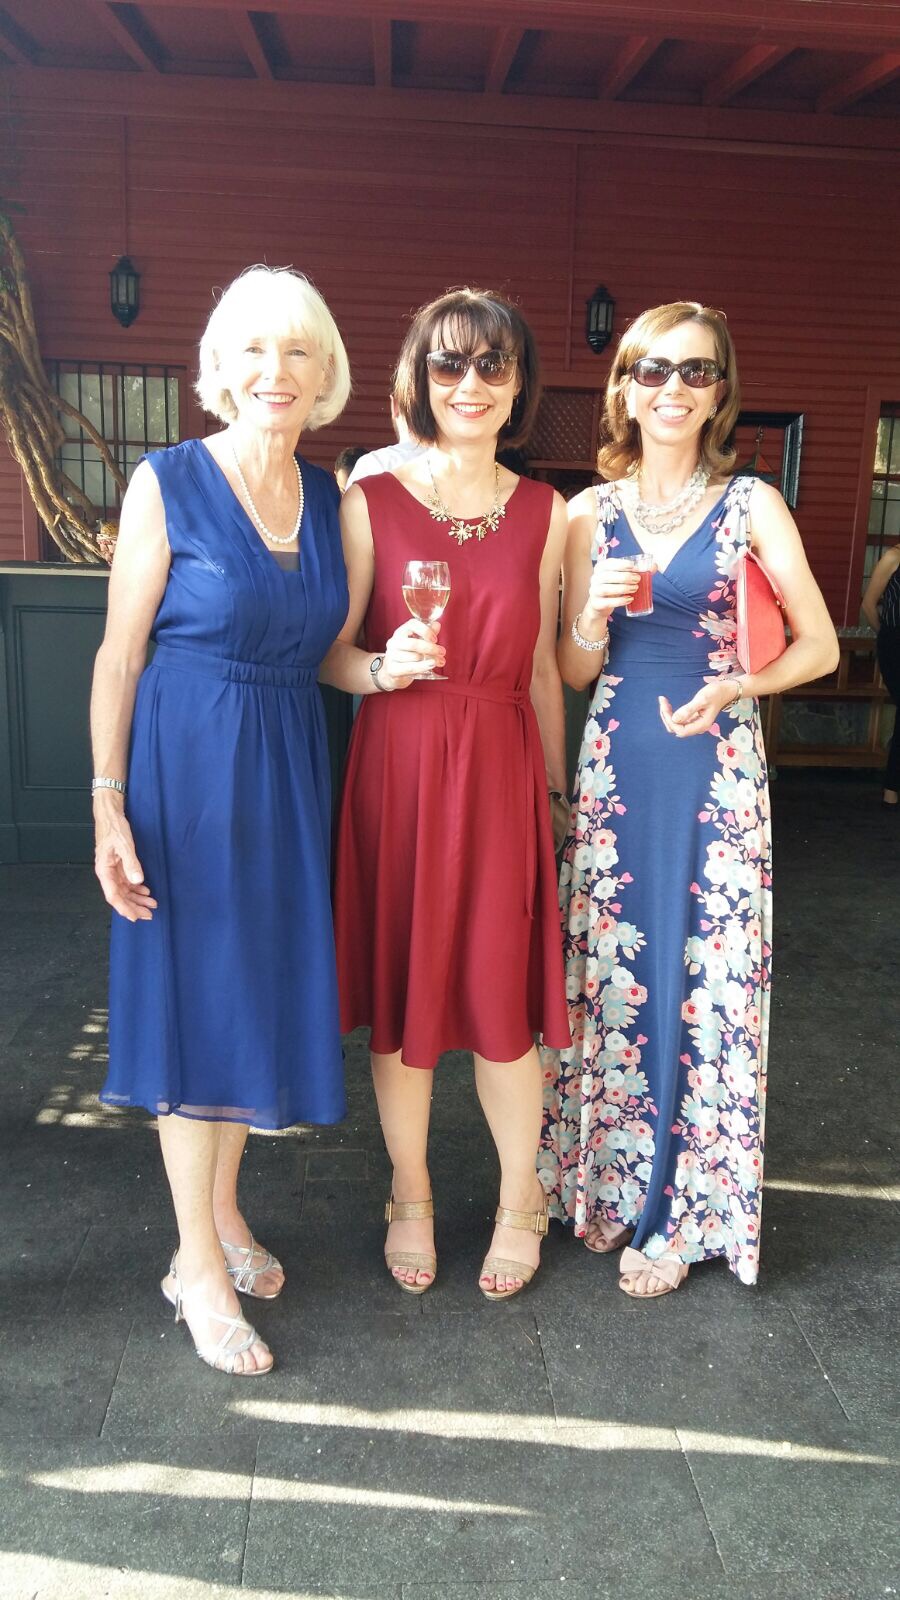
My dress for my brother's wedding! :) (I posted part 1 here).
Me with my mum and my sister
From the start I wasn't overly committed to making my dress, but if I'm honest, I couldn't be bothered shopping. I kind of hate shopping these days. Anyway, I decided that if I did see a RTW dress I loved, that I would buy it, but in the meantime I'd have a look around for patterns and fabric. I wasn't hung up on a particular style of dress, but it needed to be easy to fit and to sew and comfortable to wear in the anticipated heat of Istanbul. I had seen the Sway dress by Papercut Patterns before, but it had never really stood out for me, but for some reason, this time it appealed. It fit the bill on all counts. If you don't know it, it's essentially a tent dress with a self made belt. No darts, no waistline. Very little fitting required.

I made a toile anyway, in poly crepe because I'd read that the armscye was low - it was - and I wanted to check the length. In the end I reduced the size of the armscye by a couple of cm, I think, and I also added to the length by about 10cm just for personal preference. I had to sew the toile at my parent's house because that was the week they ripped out the kitchen and we had a makeshift set up in our living room, with basically no room to swing an unpicker.


I may go back and finish this toile properly as I really love the colour.

For fabric, I initially fancied silk, but couldn't find anything I really loved. I then went to the Knitting and Stitching show in Edinburgh and found the perfect Atelier Brunette viscose crepe in a gorgeous burgundy colour on the Guthrie & Ghani stand. It's a lovely fabric in a gorgeous weight and it has a slight sheen to it, making it look very rich. It frayed pretty badly, but otherwise was nice to sew. I think the crepe made it much less prone to slipping than other viscoses/rayons I have used in the past. I would definitely recommend this fabric and would love to buy more. It comes in a range of colours.

I then procrastinated a lot. I have no idea why. I think I was nervous of cutting out the viscose for some reason, so when I forced myself down to it, it was only a couple of weeks before the wedding. Luckily it comes together quickly and is a very easy sew. I had a minor setback in that my overlocker broke halfway through making this, and I ended up having to finish the raw edges with my overlock stitch on my sewing machine. It works fairly well, but it's SLOW and obviously it doesn't trim the edges, so the insides of this are not as pretty as I would have liked.


The dress was made as per the instructions, other than I messed up the pockets and sewed them with raw edges showing on the outside, so I unpicked them and did without. They were also too low anyway, probably something to do with where I decided to lengthen the dress. I didn't make the belt loops, preferring to add chain stitch loops for a more subtle look. This pattern is reversible, but it's designed that the V neck is at the front. I far preferred the low V to the back, and thought the curved neck at the front was very flattering.
Thread chain belt loop. Also this gives a good indication of the sheen on the fabric.

I love the resultant dress. It's not the dressiest dress for a wedding - Feyza's family and friends were all far more glamourously dressed - but it was comfortable, and I jazzed it up with jewellery and heels. The wedding took place at 6pm, but it was still absolutely boiling at that point. The whole thing was outside, on the Asian side of Istanbul, right on the Bosphorus. It was absolutely stunning, but I was glad of a loose fitting, breathable dress (and that I'd thought to take extra deodorant with me), as it was almost unbearable for us fair skinned Scots. The heat did lessen though, as the sun went down and it became the most perfect balmy evening. It was such a fantastic wedding.


Congrats to my baby brother Ian and his beautiful wife Feyza.
SHARE:

Monday, 10 July 2017

Handmade Holiday Part 1

Our lives have been dominated by 2 things over the past few months: our kitchen extension and my brother's wedding in Turkey. The extension is still rumbling on, and I think I will blog about that once it's finished, but the Turkey trip is now just some lovely memories.

Our trip to Turkey was a 2 parter. 4 days with family in Istanbul for the wedding, then a further 4 days, just the 4 of us in a resort in Oludeniz on the West coast. Two very different experiences, but both fantastic in their own way. 

I did think I would post about my handmade holiday. I took a fair number of self made items with me, but I didn't take photos of my outfits because I was either too busy doing stuff or too busy doing nothing. Of course I made my dress for the wedding, and also my niece's dress who was one of the flower girls. I also made a couple of other garments specifically for the holiday, and I will blog about each in turn, starting today with my niece's dress. I didn't think to take lots of photos, though, so apologies. I also now can't remember many of the details, so this'll be a short post!

I didn't intend to make my Annie's dress initially, and my sister didn't ask. I kept telling myself to keep my mouth shut - I had enough to be getting on with - but clearly didn't listen to myself. I came across the Made by Rae Geranium dress on Instagram and it was pretty much what my sister had described as having in mind. I sent her the photo and before I knew it, I had offered to make the dress. 
It was very straightforward to make. There are quite a few options (there is now an expansion pack with even more options available!), but we went for the plain round neck, the flounce sleeve and the gathered skirt. I suggested we use broderie anglais as it's pretty and quite dressy, but still cool enough for the Turkish heat and not so dressy she won't wear it again. My sister chose a circle broderie anglais from John Lewis. I told her to get cotton lawn or voile to line it but the fabric the woman sold her was more like muslin - very thin and it frayed like mad.


I did a quick and simple toile in an old sheet to check for size. The pattern comes in 2 age ranges. Annie was between the different size ranges, but it made sense to buy the larger range, so we could use it again in the future. It was a little big for her, so I just took some width out at the sides. I can't remember how much.
Strike a pose
Due to the transparency, I decided to use 2 layers of lining fabric to line the bodice. As I went along, it occurred to me that I could underline and line the bodice, which meant no visible seam allowances in the "holes" in the broderie. This actually worked really well. The bodice is very satifying to make, with all raw edges enclosed. The broderie anglais didn't fray, so I left the edges of the flutter sleeve unfinished. 


I did plan to double line the skirt, but I felt there might be too much bulk with the gathers, so just underlined it instead. The length was ideal as was, so I overlocked the hem and finished it with some lace trim from Hobbycraft. Finally, I handstitched on some peach coloured ribbon at the empire line (waist) to tie in with my sister in law's flowers. The buttons are flower shaped, again from John Lewis.

And that's it. With a flower crown, her outfit was complete! She looked absolutely gorgeous and did a fabulous job as a flower girl, along with her partner Betul (I have definitely spelt that wrong), my sister in law's cousin.
SHARE:

Sunday, 25 September 2016

Completed: M&S Inspired shirt dress

Hello, hello! Wow, I made a thing and I even got photos! I took an unintentional break for a bit there. There's just been quite a lot of Life Admin that's taken up all my time. Hopefully normal service will resume reasonably soon.

I mentioned before that I have been ploughing through some WIPs before starting anything new. This is the last. Well, it's not the last WIP I own, but it's the last I am finishing right now.
Still rocking the bare legs at the end of Sept!!!
This was a slow burner. Instagram tells me I cut this out on 16th April. My blog tells me I've started and finished 8 other items since then. I don't really know why this has taken so long, other than I made my first ever shirt in the most lightweight, shifty, loosely woven fabric ever, errr, woven, and that some evenings I just wasn't that into torturing myself.

Let's go back to the beginning on this one. The dress is ripped off from inspired by the below dress from the Autograph range in M&S, which I spotted in January.  It was one of those "oh, I could easily make that" type moments that actually gained some traction. I already owned the Archer shirt pattern. I just needed to play around with it and then find the right fabric.
I found the fabric pretty easily, from Anna Ka Bazaar. It's a very lightweight viscose, that moves when you so much as show it the scissors, but I loved the stripes, which run parallel to the selvedge. Perfect for the back of the dress. It's probably too lightweight for this (the original dress was in a medium weight poly), but I didn't know that until it arrived and it was also very cheap. Including postage, it cost 31.60 euros for 3m, so about £27, and I have fabric leftover. The M&S dress was about £65, I think.


So, the pattern is obviously based on the Archer. I did all the alterations so long ago, I can't remember exactly what I did, but essentially, I cut the front piece at the waist, then "drafted" a skirt piece, which was basically the bottom part that I cut off extended to the length I wanted. I tapered the sides out a little to make it slightly A line, just so I'd have enough room to walk, although in the end I also added side vents. The back was just extended to the dress length and widened the same as the front. That was it, although I ultimately added a hem facing as well because I didn't make it quite long enough.

There is a pocket, but only one, in the side seam. I omitted the breast pocket in the original pattern. Genuinely can't remember why I only did one pocket. Laziness, probably.


I based the stripe placement on that of the M&S dress. That was the bit I loved the most about it. Before cutting out, I wrote a list of how to cut each part, and I actually marked each pattern piece with how to cut it (on grain or cross grain) with a little diagram.

I found my first shirt OK to make, actually, despite the difficult fabric. I followed the sewalong on the Grainline blog to the letter, except that I used Andrea's tutorial for the collar because I've read so many good things about it. I enjoyed the process. Some of it was great - I loved doing the yoke - some was not so great - my sleeve plackets are an absolute mess - but I did enjoy it, when I was in the mood to sew it. The quality of my sewing is so so, but it's good enough. Sometimes good enough is OK. Something is also a bit off at the hem as it doesn't hang straight, although it measures the same length all the way around. I suspect I should have rounded the hem a bit, but it doesn't bother me enough to do anything about it.

Ultimately, I love it. It feels a little nightdress-ish on, so I'm glad I didn't do the curved shirt style hem (which on dresses makes me feel even more like I'm wearing a nightie), but it's so comfy. And cool. In both senses. I just love it. P hates it, but what does he know?! ;)
Small Boy was my assistant on this "shoot"!
I have fabric to make 2 more Archers (a tencel and a rayon voile - I like to keep things challenging). Let's hope they don't take as long!
SHARE:

Sunday, 12 June 2016

Completed: Aphrodite Dress

I was alerted to I Am Patterns, a new (to me) French pattern company by Jen. I love both the Pan top and this, the Aphrodite dress. At the time though, I had no need for a backless dress. Then I was invited to a wedding reception of a colleague and although I have plenty of dresses that would suffice, an idea was born.


This is the first time I've bought a paper pattern in I don't know how long! I normally go for PDF for cost, immediacy and I figure tracing is as joy-killing as sticking together a PDF. It was nice though to have a "proper" pattern for a change, and this one comes in a nice sizeable envelope, big enough to also hold the additional traced pattern pieces.

The pattern was the easy bit though. This dress went through a lot of iterations before I actually placed a fabric order. The only finished versions I could find online were on French blogs, and with the help of a french dictionary and my 2nd year at Uni French (where we learnt no sewing terms. Honestly!), I managed to figure out that most of them had used fairly robust fabrics. I also ummed and ahhed for a long time about whether to make it backless or not, even conducting an IG poll (results: 50/50 for and against).


In the end, I decided I wanted a solid colour, but not black, and that I probably wanted a lace or similar insert. I particularly fancied a geometrical lace, or even something laser cut. I love the look of the stripe lace in this skirt, although obviously it's black.

I made a quick, but fairly comprehensive muslin in the size 38 and I made the muslin backless to check how it felt and looked on. As suspected, the backless was just too... bare. As the dress is a boxy shape the back stands away from you a bit, so I just felt that anyone tall would have a great view right down to my knickers. Not what I'd feel comfortable in. So, back to the lace.
The lace was from Stone Fabrics. I couldn't find anything that fit the idea in my head, but this was suitably unflowery, with more of a foliage design and quite lightweight. It's also a beautifully rich royal blue and was only £8.50/m! It also appears to be the same lace that Rumana used for her dressing gown in last week's Sewing Bee. Even P recognised it!

The rest of the fabric is poly crepe bought from Fabriclab on ebay. It's the exact same fabric that Jen used for her Inari, but in a different colour. I actually bought the colour she has too, as I was short of time to order swatches and I didn't know which would work best with the lace. It has a lot of drape and is surprisingly lovely for the price (£6.99/m), but it's quite staticky and it frayed badly. It also doesn't press well, and I have a few shiny bits as a result.
The dress isn't hugely well made, but I had about a week to make it so there was no time to redo things that didn't absolutely need it. As a result, there are a few puckers (you can see them in some of these photos), a few wispy thread poking out from my French seams and one of my bust darts has a bubble at the end.
When I made the muslin the dress seemed fairly roomy, and I considered sizing down. But with a seam allowance of 3/8" I would have had to trace a smaller size, then add seam allowance to do French seams, so instead I stuck to the size I muslined and instead took a SA of 1/2". In hindsight I should have stuck with the original size, as it's now a little tight over the thighs and when getting it off and on (there are no closures of any type), but it's totally wearable and comfortable.
The only other changes I made was to add 5cm to the length. I'm glad I did as it ended up pretty short as is, and at 5'6, I'm not overly tall. And I cut about 6cm off the length of the sleeve as it felt more summery.


The pattern itself was fine. Apart from the back detail it's a fairly simple dress to put together. The instructions come in French and English and the English translation is not quite right. For instance on the facing it instructs you to topstitch, when it clearly means understitch. I suspect this is a translation issue rather than poor instructions though, and as the dress is marked as Intermediate, I don't expect this would cause anyone any issues. On the English translation, all measurements are in inches, whereas they are in cm in the French version. I used a hybrid of both, because I can't cope with 16ths of an inch. The backless version has the edges topstitched, and the full back does not, but because the poly was hard to press and I didn't want seam allowances showing through the lace, I topstitched here. I think it looks quite nice. Topstitching lace is good because you can see through the lace to your SA markings on your machine! :) One thing that I found odd was that there wasn't a double notch on the back of the sleeve and bodice, so I was kind of left guessing as to which was the front and which was the back the sleeve. Another quick IG poll backed up my thoughts, and it seemed to work, but why cause the confusion?
Ignore the smartarse comment from my brother!
I really like the resultant dress, and I really enjoyed wearing it. The colour is glorious, and I love the lace insert (pity I can't see it when wearing it though...). It feels a little short for bare legs, but I'm going with it. Just need to work the fake tan! The only downside was the underwear. I wore the stick on bra that I wore with my Ailakki jumpsuit, but it didn't really work. It kept unsticking! It was a really hot evening, and there was a fair bit of dancing, but I had to keep fiddling with it all night. I'd like to wear the dress again, but am not overly keen to keep wearing that bra, so I might have to come up with some other alternative. Maybe I could just style it out with a matching bra?
I doubt I'll ever wear a backless version, however gorgeous it looks, but there is lots of scope for playing around with contrast colours or textures in that back panel. I think with a bit of length added, it would be so cool as more of a daytime dress. Imagine pleating/pin tucks in the back, or a bit of stripe directionality (my current crush), or a simple colour block? And although the pattern doesn't suggest it, it would definitely work in a stable knit. Lots of possibilities, fully justifying the £14 price tag for the pattern! I will be making this again.


SHARE:
© Grosgrain Green | All rights reserved.
Blogger Template Created by pipdig