Wednesday, 28 December 2016

Completed: Hand printed cushions

Technically I should win Worst Sister of the Year award with these, but I think I managed to redeem myself. My brother and his girlfriend got engaged in May this year, and moved house in September, and I only just gave them this, their engagement/new house present on Christmas Day. That's the bad sister bit. The good sister bit, was that I made the effort to hand print, and sew them their present, which they did at least get in the same calendar year.
I don't think my brother reads my blog, but he does follow me on IG, and has a tendency to ask me to make him a version of whatever I've made from time to time. One of these days I'll call his bluff and make him dinosaur PJs, but in the meantime I made him cushions inspired by a sweatshirt and a dress. If you read my original sweatshirt post, you'll see that the inspiration for that was a cushion, so it's all got a bit meta.

 The stencil is the same as that used on my sweatshirt - not the exact one, I don't keep them, so I  had to cut a new one - and the cross is that which I used to block print my Scout dress. They are both printed with black ink onto white soft furnishing fabric from Remnant Kings. It has a slight texture, which keeps it interesting, and it was really cheap at something like £7/m. I wanted some colour, and so used a turquoise cotton velvet from Edinburgh Fabrics (which was something ludicrous like £20/m) to back and pipe them. This is only the second time I've sewn piping and my first sewing velvet. It was OK, but I wouldn't rush to do it again. There are quite a few mistakes on these, the most noticeable being that I sewed the piping onto the back of the cushion, meaning the zip is now on the front. I put the zips to the bottom, and my brother will never notice, but that's one to remember. I also made the zip opening too small, so I did actually think I wasn't going to get the cushion pads in there for about 5 mins. That was fun. (It wasn't). 


Regardless though, I really like these. They look nice and contemporary, but also look unique and handmade (in a good way. I hope). I love the turquoise colour, and the velvet is gorgeously, strokeably tactile. I am seriously considering making velvet cushions for our house. Possibly not piped though. 

I don't yet have photos of the cushions in their new home. My brother and his girlfriend live in London, but were heading straight off to Turkey yesterday (she is Turkish) for New Year. So these photos are all taken in our house. 
And yes, I've already started wondering what I'll be sewing to wear to a wedding in Istanbul in July! ;)
SHARE:

Thursday, 29 September 2016

Completed: Emerson Pants

Hi! Yes, I really am back again so soon! I have 2 days of sewing goodness to thank for that.

On Sunday, a few of us met up for a chilled afternoon of sewing, chat, lunch and cake at The Stitchery in Glasgow. Sorry to everyone that we didn't invite - it wasn't meant as a cliquey get together or anything like that. It just started from an IG chat between Jen, Kathryn and I, which grew organically until we had 10 people, the max that The Stitchery could cater for. I probably don't need to explain this, but I didn't want anyone to think they had been deliberately excluded. There's nothing worse than that feeling! :( While it was great to catch up, the best part of the day was getting to finally meet Kathryn, a fellow Scot who lives in London, who has been a blog-and-Instagram friend for a few years now. Obviously she is lovely!!!! I also finally met Amy, another Instagram friend, but one who lives about 15 minutes away from me.

Anyway, I got 5 hours of pretty much non-stop sewing, which gave me a good start on this pattern and I followed it immediately with a child-free day off work, which allowed me to get this finished off. Feast or famine over here, I tell you!


The pattern is the True Bias Emerson Pants, and I really wish I'd made these at the beginning of the summer. I couldn't, of course, because she only released the pattern at the end of July, but I'd had a pretty clear idea all summer of making trousers like these. I had even bought the fabric - a medium weight chambray from The Sweet Mercerie. It's the same fabric I used in this dress. I liked the fabric so much, I bought more. I still have 1.5m left.

Even in a mid weight fabric, these are not the most seasonally appropriate for late Sept in Scotland, but I decided to treat these as a wearable muslin, with the hope that they will be wearable for our just-booked trip to Santander in Northern Spain in October. I can't vouch yet for the Spanish wearability but so far they are ticking all boxes boxes for Scottish wearability, as long as I don't mind having cold ankles. :)


I almost made these exactly as the pattern - a novelty for me these days, it seems. I would have done, but when I tried them on, I liked the length as it was. I did like it at the drafted length, but I preferrred them slightly longer, so I drafted another hem facing. Trousers like these need a deep hem, I think, so I just made the hem facing the width of the instructed hem - 2 inches. Next time, I'll add 2 inches to the pattern length.

My plan was to have contrasting top/edge stitching on these, and I even chose a kind of beigy gold thread. And then I forgot. Too much chatting.


Do I need to say how much I love these? They have an elasticated back waistband, so are very comfortable, but I think the flat waistband on the front makes them more flattering. I love the pleats, I love the wide leg, I love the length. And P likes them because, and I quote "cute bum". :)
Love the pleats!
The fit isn't quite right. I always have issues with my calves in trousers. I thought with wide legs, this wouldn't be an issue, but you can see from some of the photos above that side seams don't hang perpendicular to the ground - they shift forwards. And in the photo with my back to the camera you can see something happening. Not sure if that's my thighs or my calves to be honest. If you have any ideas, feel free to chip in. It doesn't hugely bother me, but it would be nice to know how to fix it.

So, yeah, the fit isn't perfect, but I don't really care! I love them and I have already cut out a second pair.

SHARE:

Sunday, 25 September 2016

Completed: M&S Inspired shirt dress

Hello, hello! Wow, I made a thing and I even got photos! I took an unintentional break for a bit there. There's just been quite a lot of Life Admin that's taken up all my time. Hopefully normal service will resume reasonably soon.

I mentioned before that I have been ploughing through some WIPs before starting anything new. This is the last. Well, it's not the last WIP I own, but it's the last I am finishing right now.
Still rocking the bare legs at the end of Sept!!!
This was a slow burner. Instagram tells me I cut this out on 16th April. My blog tells me I've started and finished 8 other items since then. I don't really know why this has taken so long, other than I made my first ever shirt in the most lightweight, shifty, loosely woven fabric ever, errr, woven, and that some evenings I just wasn't that into torturing myself.

Let's go back to the beginning on this one. The dress is ripped off from inspired by the below dress from the Autograph range in M&S, which I spotted in January.  It was one of those "oh, I could easily make that" type moments that actually gained some traction. I already owned the Archer shirt pattern. I just needed to play around with it and then find the right fabric.
I found the fabric pretty easily, from Anna Ka Bazaar. It's a very lightweight viscose, that moves when you so much as show it the scissors, but I loved the stripes, which run parallel to the selvedge. Perfect for the back of the dress. It's probably too lightweight for this (the original dress was in a medium weight poly), but I didn't know that until it arrived and it was also very cheap. Including postage, it cost 31.60 euros for 3m, so about £27, and I have fabric leftover. The M&S dress was about £65, I think.


So, the pattern is obviously based on the Archer. I did all the alterations so long ago, I can't remember exactly what I did, but essentially, I cut the front piece at the waist, then "drafted" a skirt piece, which was basically the bottom part that I cut off extended to the length I wanted. I tapered the sides out a little to make it slightly A line, just so I'd have enough room to walk, although in the end I also added side vents. The back was just extended to the dress length and widened the same as the front. That was it, although I ultimately added a hem facing as well because I didn't make it quite long enough.

There is a pocket, but only one, in the side seam. I omitted the breast pocket in the original pattern. Genuinely can't remember why I only did one pocket. Laziness, probably.


I based the stripe placement on that of the M&S dress. That was the bit I loved the most about it. Before cutting out, I wrote a list of how to cut each part, and I actually marked each pattern piece with how to cut it (on grain or cross grain) with a little diagram.

I found my first shirt OK to make, actually, despite the difficult fabric. I followed the sewalong on the Grainline blog to the letter, except that I used Andrea's tutorial for the collar because I've read so many good things about it. I enjoyed the process. Some of it was great - I loved doing the yoke - some was not so great - my sleeve plackets are an absolute mess - but I did enjoy it, when I was in the mood to sew it. The quality of my sewing is so so, but it's good enough. Sometimes good enough is OK. Something is also a bit off at the hem as it doesn't hang straight, although it measures the same length all the way around. I suspect I should have rounded the hem a bit, but it doesn't bother me enough to do anything about it.

Ultimately, I love it. It feels a little nightdress-ish on, so I'm glad I didn't do the curved shirt style hem (which on dresses makes me feel even more like I'm wearing a nightie), but it's so comfy. And cool. In both senses. I just love it. P hates it, but what does he know?! ;)
Small Boy was my assistant on this "shoot"!
I have fabric to make 2 more Archers (a tencel and a rayon voile - I like to keep things challenging). Let's hope they don't take as long!
SHARE:

Sunday, 14 August 2016

Completed: Pleated chiffon skirt

Time and time again, I promise myself that I will not make something to a stupid deadline. I don't enjoy it. Yet, on Friday night, there I was again...
But first the fabric. I bought this pleated poly chiffon on a complete whim from The Sweet Mercerie, in June. It was one of those see it on Instagram, must have it moments of weakness that we all succumb to. I'm definitely getting better, but some fabrics are just too good to miss out on. I have a longtime love of pleats, although I don't wear them often, plus this emerald green colour is just stunning. 
I thought I had 1.5m of this fabric. It turns out I have about 2.5m. I have no idea why I decided to buy so much, since my intention was always to make a simple skirt. I'm actually wondering if they just got my order wrong. I really can't imagine thinking I'd need 2.5m. Anyway. When it arrived it was in a box. I've never had fabric arrive in a box before. i had ordered some chambray too, but that was only a couple of metres (actually, just thinking about it - maybe I'd better check that. Perhaps they got my lengths and my fabrics mixed up?). When I opened it, I realised why. The chiffon came wrapped in paper. The paper was pleated so its clear that when the pleating process took place, it did so with the fabric between 2 layers of paper. Cool!
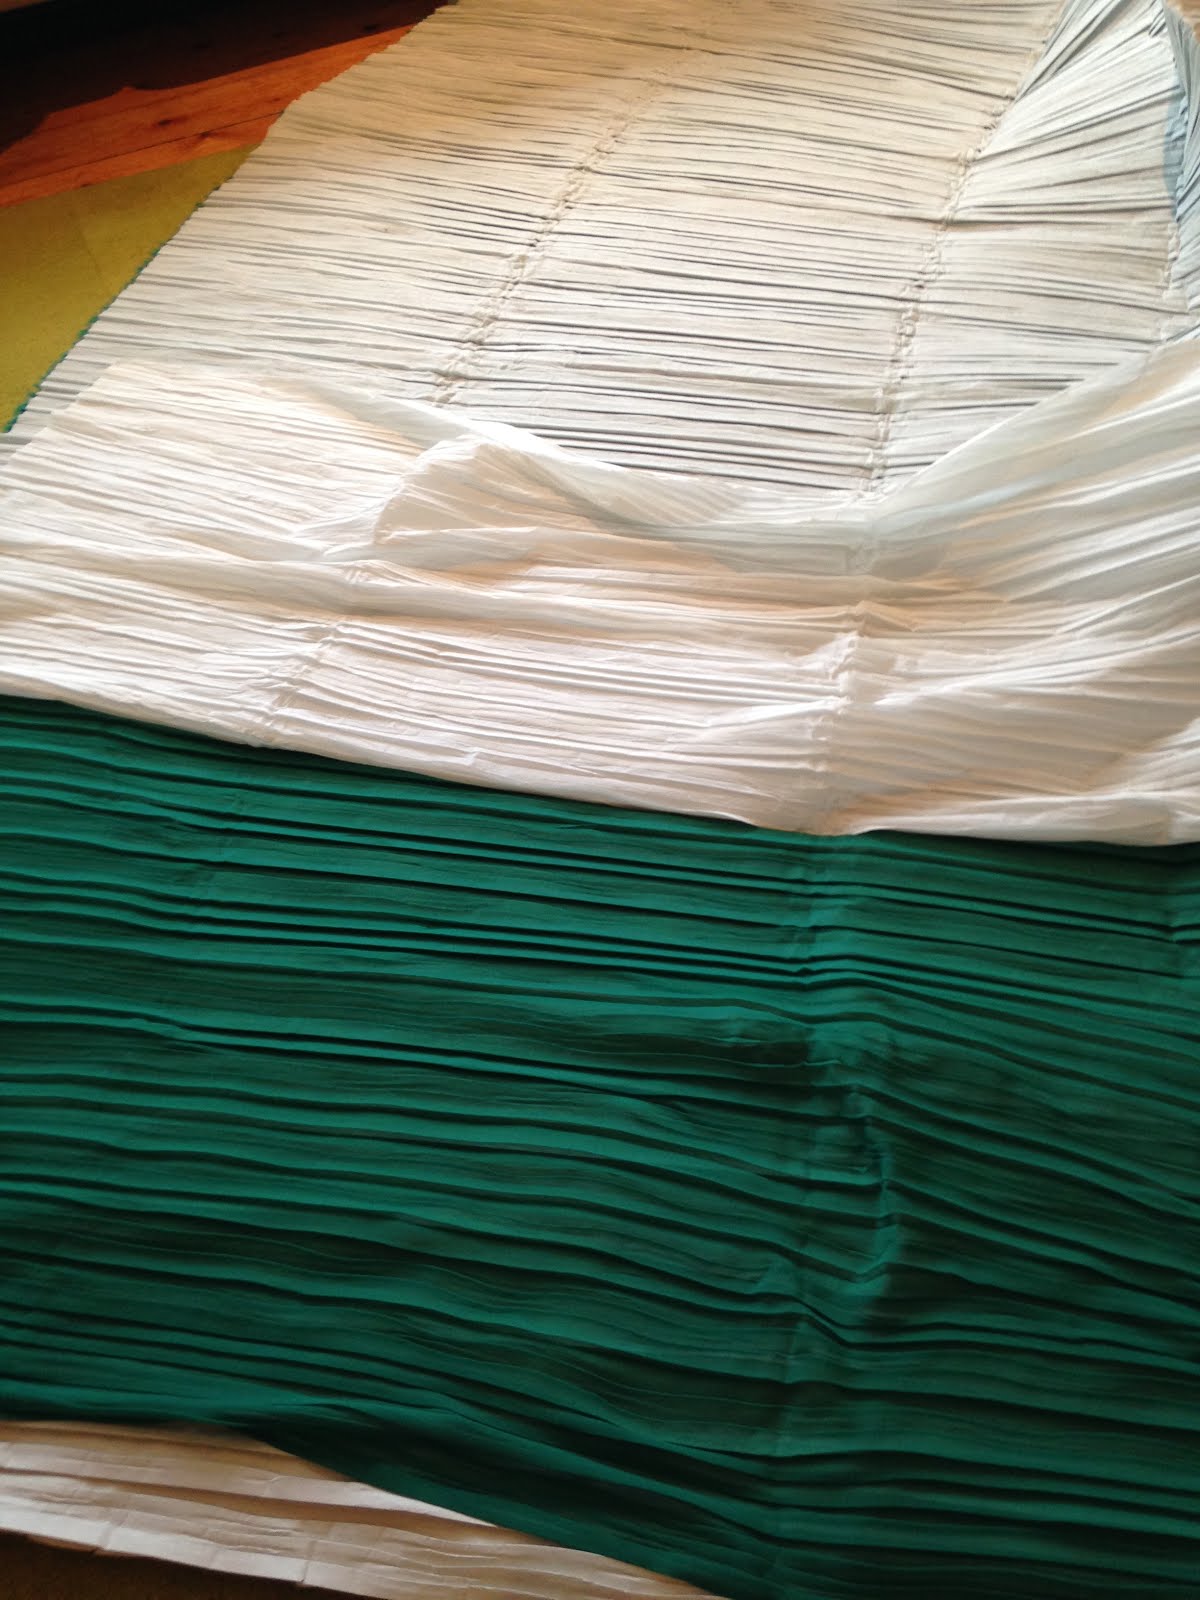
Actually, although I hate sewing to a deadline, I have a feeling that if I hadn't this fabric would have sat in the stash for a while. I predicted, correctly, that it would be a bit of a bitch to deal with, and I would probably have procrastinated on it, if I hadn't had a sudden "need" for a midi skirt to wear to my manager's engagement party on Saturday night!
The pattern is loosely based on the Cashmerette elasticated back skirt tutorial (you need to sign up to her newsletter to get the tutorial). It's a basic gathered rectangle, with a fixed waistband at the front and an elasticated waistband at the back. I don't have a huge amount of love for how an elasticated waist looks on me, but with the time constraints, I wasn't about to attempt a zip in chiffon. An elasticated back seemed like a good compromise.
I say loosely, because I followed her instructions right up to the point where I realised that the elastic length she had me cut, just wasn't going to work. It was too short to fit the width of the skirt piece. I have no idea why. I checked my measurements several times, so maybe my elastic wasn't stretchy enough? I cut a second length, guessing that an additional 2inches might be enough and that seemed to do the trick. It's actually a little loose on the waist, but it only just fits over my hips, so perhaps I'm right about the stretchiness of the elastic. I also didn't understand her instructions for attaching the elastic, but it's very likely that's because it was about 10.30 at night and I was shattered. 
The fabric itself was pretty difficult to deal with. It grows. I tried to cut it with the pleats closed (if you know what I mean), but then they would unfold and open as I sewed. I couldn't baste them closed on the machine as the foot opened them out. I probably should have handbasted them closed but I didn't have time for that. It was tricky to cut due to the shifting pleats, but it actually wasn't too bad to sew once you got it where you wanted it. It wasn't slippery at all, actually it was pretty grippy and stayed put. But I couldn't press it. Actually it pressed pretty well, but every press unpressed the pleats, so I only tried once. After that it was pins and finger pressing all the way. 
Apologies, the close ups are out of focus.

Due to time issues, I'm embarrassed to admit that all edges are still raw inside. I will go back and finish them off, but I thought they'd do for one night. The waistband is also a complete mess on the inside due to the aforementioned growing issues, but it works and it's all enclosed. 
The fabric is pretty sheer, so I lined it with cupro lining from John Lewis. It's more expensive than the chiffon but I hate the feeling of acetate lining, so for me it's worth it. I lined both the waistband and the skirt, although the skirt is only lined to above the knee. The lining isn't hemmed, simply finished with an overlock stitch, but I felt that decision was valid since Tilly did something similar recently.
The skirt is finished with a baby/rolled hem. I used Jennifer's tutorial, but I only did the first and second stage, i.e. the hem is only turned once. This was time driven but also an aesthetic decision. The hem was fluting quite a lot and I'm not actually a huge fan of a fluted hem, so I didn't want to exaggerate it too much. I'm really pleased with how neat I managed to get it, given I couldn't press it.
The pleats run horizontally i.e. from selvedge to selvedge, so I cut the skirt on the cross grain. The waistband is cut on the grain so the pleats run in a different direction. The fabric is 150cm wide, so I actually got this skirt from about 75cm off fabric. Not sure what I'm going to do with the other 175cm... although I am thinking if I made a top, then I could wear it as a sort of faux dress type thing.
The verdict? Well before hemming it, I felt a little meh about it. But then it was 11.30pm and I was exhausted. It wasn't quite as I'd envisioned and I felt the back waistband looked really puffy and stupid. On Saturday I had the kids by myself, but I bribed Small Boy with his DS and Sky Kids App, while Baby Boy napped and I got it hemmed. I also cut some length off at that point, which helped with how it looked and although I still don't really like fluted hems, I think it adds some interest in this case, and now I love it. 

I'm wearing it here with another Eucalypt tank in black rayon. This was another WIP that I finished last week. This time I added the CF seam for some interest, but you can't really see it anyway. I wore the 2 together on Saturday night, with heels and a sparkly necklace, but I couldn't be bothered to get back into my heels for photos today. I kind of like the skirt with trainers though, and it looks cool with a t-shirt. It's also insanely comfortable. With small kids, this is not hugely practical for general day wear, but for lunch or dinner with friends, and engagement parties, it's an absolute winner!
SHARE:

Monday, 8 August 2016

Completed: Summer PJs

I had a sneaky sewing day today. I was off, as I worked on Saturday, but it wasn't my rota'd weekend working, so I had already arranged and paid for childcare. So off they went (I didn't tell them I was off - I am such a bad Mummy!), and I had a lovely 6 hours of sewing all to myself. I spent the time finishing off some WIPs. This project was the first.

Pyjamas were on the list of things I was never going to make. Nothing against them, but I always just thought that when time, funds and resources were already limited, my priority was always going to be making actual clothes that people see. I did briefly consider the Carolyn PJ pattern in double gauze until I worked out how much money that was going to cost me!!! And then, somewhere along the way my brain suggested that PJs/sleepwear might be a good way to use up those fabrics in my stash that I like, but don’t see myself wearing. This fabric fell under that category. It's a cotton voile, called Moody Blues by Cloud 9, and I bought it from M is for Make a while ago.
But I thought I had more than I actually did. I thought I had 1.5m, which, I thought I could probably squeeze a tank and simple shorts from. However. Firstly, I actually had bought 1.25m which shrunk slightly during prewashing. Secondly it’s narrow at 110cm. Thirdly, it’s a directional print. I was resolved to just making the shorts and they buying/making a jersey tank to wear with it, but then I managed to find a bit more fabric online – at a considerably cheaper price than I initially paid, I may add – and bought another half metre. I got the tank and the shorts front from one length and the shorts back from the other length, with plenty leftover for bias binding.

The top is the Eucalypt tank from Megan Nielsen, a top that I had already made one and a half times at this point (I finished my second right after these PJs). It was much easier to make in cotton, I have to say. I made that first, and then wondered why I hadn’t just made this as a top and been done with it. It’s absolutely fine and wearable as a top on its own, and I might even do that, although I’m already imaging the scenario while out in public; “Mummy? Why are you wearing your pyjamas?” *extra loud voice*!!!

As I had some slight fitting issues in my first iteration, I cut this with 0.5cm added to centre front, and then sewed the recommended 5/8" SA. This seems to have done the trick.


The shorts are by Melly Sews and are a free, one size pattern.They are designed to be made in a knit, but have quite a bit of ease, so work OK in a woven. I had to buy the pompom trim (twice! Because Hobbycraft cut me the wrong length initially), but I like the detail it adds. The pattern was fine. I added a waistband, as these are designed to sit pretty low - on your hip bones. I wanted them just below my natural waist so made up the difference with the waistband. I actually used the pattern piece from the Sunny Day shorts as it's the right length for the elastic I had to hand. Obviously I widened it, though. I also added a couple of lines of stitching, just to hold the elastic in place. Although I like the look of it, I'm not sure I will rush to sew pompom trim again. I used my zipper foot to try to get as close as possible to the trim, but there were a few kamakaze poms that jumped under the needle. I ended up topstitching those at the front several times to get them to sit properly. Those around the legs still flip out, but I have given up caring. It's just pyjamas...

My legs look like dead sausages in the above photo, but I have included it so you can see the length better. You are welcome. And in case you are wondering, I am wearing underwear in these photos.

I dreamed these up during the hot spell a couple of weeks ago, but I have only just got them finished. Since the hot spell lasted about 2 days, I don’t really have a great need for such summery PJs, however I’m sure I’ll still wear them. I can't vouch for comfort as I haven't yet slept in them, but I think they will be grand. Needless to say, the hubby likes them! ;)
SHARE:

Saturday, 30 July 2016

Completed: Dog Shorts (Woof!)

I made Small Boy another pair of shorts. This was the fabric he first picked from my stash. It's by Cloud 9 and is from the Small World collection, designed by Rae Hoekstra and it's a really fine organic cotton cord. I love it. I bought it from John Lewis at the same time as I bought the fabric for this cushion. Is it ridiculously childish to admit that I was thrilled when Rae herself commented "LOVE" when I posted the below photo on IG this week?

I have learned recently that my memory plays tricks on me - or perhaps the staff at the cutting table do - and I have a number of lengths of fabric that are not nearly as long as I thought they were. This is one of them. I could have sworn I had 1.5m of this but it turned out I only had 0.8m. Odd length, so either I bought a metre and it shrunk significantly during pre wash, or maybe this was all they had left. The latter rings a bit of a bell.


The original plan was to make trousers for Baby Boy with this, but I never got round to it. Somehow I couldn't imagine them as shorts and I didn't know what else to make. I thought the print would be a bit too babyish for Small Boy, but he decided otherwise and actually his vision was spot on. The fabric is fabulous as shorts.
There's a pattern matched back pocket in there somewhere, I swear. 

The pattern is the Sunny Day shorts again, pretty much made as last time. This time I used one pattern piece for the pocket facing, and I did no top stitching, other than at the pocket opening. I also only did one back pocket and the drafted one piece waistband. This all made for a much faster make. The front pocket lining is recycled from one of my husband's shirts. A nice touch having Daddy's shirt in there, and he was proudly showing that off to his Granny today.

I pattern matched the pockets front and back, but that was all. There wasn't enough fabric to do any more. The waistband is pieced for the same reason, but it all looks fine. You need to take my word for the pattern matching, as I have no flat photos. These shorts are either on him or in the washing machine.


I'm really happy with these. The colours are so vibrant and although I worried that they might not go with many of his t-shirts, he has proudly been rocking them with an orange Star Wars t-shirt. Colour clashing and print mixing FTW. I guess you might need to be 6 to pull off all the colours.

No posey shots this time. These photos were taken on my iphone at Hoggenfield Loch in Glasgow, which is near where my Mother in Law lives. My sister in law is over from New York at the moment so it was nice to see the cousins catch up and play so nicely with each other.


SHARE:
© Grosgrain Green | All rights reserved.
Blogger Template Created by pipdig