Saturday, 17 January 2015

Scrubs and a skirt fit for diving

I did some major power sewing through December. I got a bit carried away with plans, as I am wont to do, but this time I kind of had to deliver due to various deadlines! I've covered the Birthday Dress and the Nativity costume - next this True Bias Sutton blouse!


I did like this pattern when it was first released, but it only became high priority when I saw Caroline from Blackbird/Sewaholic's makewhich I absolutely loved and which became my inspiration.

My version is made from a poly crepe (this) and this lace, both from The Cloth Shop in Edinburgh, which is part of Remnant Kings. Yes, I know! I bought polyester!!! It was the colour that sold it. Recently I have, rather usually for me, been drawn to monochromatic and darker colours, and this just felt like such a happy antidote to that. It actually made me smile when I was sewing! Love it!!! I couldn't get an exact colour match for the lace, but love the contrast this provides.


The Sutton is a really simple, straightforward and quick make. Unless you stupidly French seam the back bodice piece on backwards. Harrumph. Well I figure there's got to be at least one stupid mistake per make as far as I'm concerned. Anyway. My first True Bias pattern. I like Kelli's attention to detail on finishing details. The side slits at the hem are finished so nicely and neatly, which I find really pleasing, as I do the French seams, and the method she uses to attach the bias facing.


Weird neck/face thing going on here, but you can see the sleeve and kind of see the hi-lo hemline.
It was my first time sewing with lace, other than a previous fancy dress outfit (not real sewing!). I made absolutely no attempt to do any research on it and jumped right in. The lace has a lovely scalloped selvedge that I hoped to use as the sleeve hem, but the back yoke is cut in one piece, which would have meant piecing the lace. I did do some reading on that, but quickly realised that the repeat was not exactly the same on each selvedge. And to be honest, I really didn't have the time, so I let myself off the hook, cut the yoke as directed and it seemed to work out ok. I think it might have stretched out a bit, so next time I might stay stitch all cut edges, but otherwise it was fine. I think the blouse took me a few days to make, but my sewing time is in fits and bursts - an hour or 2, here and there during nap times and in the evenings. And then there was that back on wrong side out incident to correct.


The colour is way off on this and the subsequent photos. The earlier photos are closer to the real colour.
The crepe is lovely and drapey, but it isn't particularly lightweight, so it's probably not ideal for the top. This is probably the main reason that I am actually a bit meh about the make. I don't know why. I love the colours, like the shape, but I am just not that excited about it on me. If I'm totally honest, it actually reminds me of scrubs, albeit posh ones. Just as well it's not blue!!! I don't think that about anyone else's version, just mine, so either it's the fabric, or the v neck, which is a shape I don't often wear.


Side slit finish - whoops wonky hem stitching there too!

Bias facing on the neckline. My V wasn't perfectly matched, but not bad. With a lighter weight fabric this would be easier.

Back pleat
The side seams can't be french seamed due to the slits at the bottom, so I used the overcast stitch on my sewing machine. I wasn't happy with the finish so turned and stitched as well. 
Anyway, my husband convinced me it was nice, and to be honest, I had a night out and nothing else to wear! But my friends all loved it too, so I am going with popular consensus that it's actually OK. Do you ever get that? You don't love an item of clothing but others talk you in to it? I'm still undecided, but will wear it because I love the colour, and it's nice and easy to wear with jeans - and with a cardigan hiding the lace, it dresses it down a bit for daytime. Not that you can't wear lace in the day, but small fingers like to pull and small teeth like to bite! 


With jeans
And what did I wear the Sutton with on my night out? Well, halfway through making it, I realised I didn't have anything that wasn't jeans that would go. So I made a skirt. In an evening. The inspiration for this came from the RK blog, via Hazel. I was convinced scuba wasn't for me, until she showed me the tutorial. It obviously stuck in my head because when I was deliberating on what I could wear with the blouse, this was what I thought of first. I didn't actually follow the tutorial. Instead I used the Colette Mabel skirt - the short version, as that was what I had printed - which I lengthened. I can't remember by how much, as this was very much fitted on the hoof. I cut the back on the fold instead of cutting 2 pieces because I didn't read the pattern pieces (told you: one stupid mistake per make), so they then ended up too big, as there was seam allowance included that I didn't need, but I just removed that as I fitted it. I have small hips relevant to my waist measurement, so even though I graded down a size at the hips, I still had to take quite a it more there too. I think about 4cm through the waist and hips.


It was all sewn on my sewing machine using the lightening bolt zig zag. Raw edges are unfinished. The hem is twin needled.


The waistband is faced with a much lighter weight jersey, to reduce bulk, but it's too lightweight for the scuba and has a much higher stretch percentage, so it doesn't work well. 

Inside waistband and side seam.

I think in retrospect I could have done with taking it in slightly more at the waist/hips. It was fine for dinner with the girls on Friday night, but at my Mother In Law's 60th birthday party the following night, it didn't quite pass the Mr Brightside dancing test*.


Selfie taken in the toilets at my MIL's party! RTW top
But OH MY GOD, scuba is THE most comfortable fabric ever! It is thick enough to cover all lumps and bumps, but stretchy enough to permit walking and dancing and eating. I even wore it on Christmas day.

So, there you go - a Christmas outfit, sewn in a week!


Mr Brightside by The Killers - the only acceptable dance to this is to jump up and down like a lunatic, punching the air where appropriate, for as much of the song as your fitness levels permit. Clothes therefore need to be able to stay in place without adjustment.

SHARE:

Friday, 9 January 2015

A handmade gift for a little star

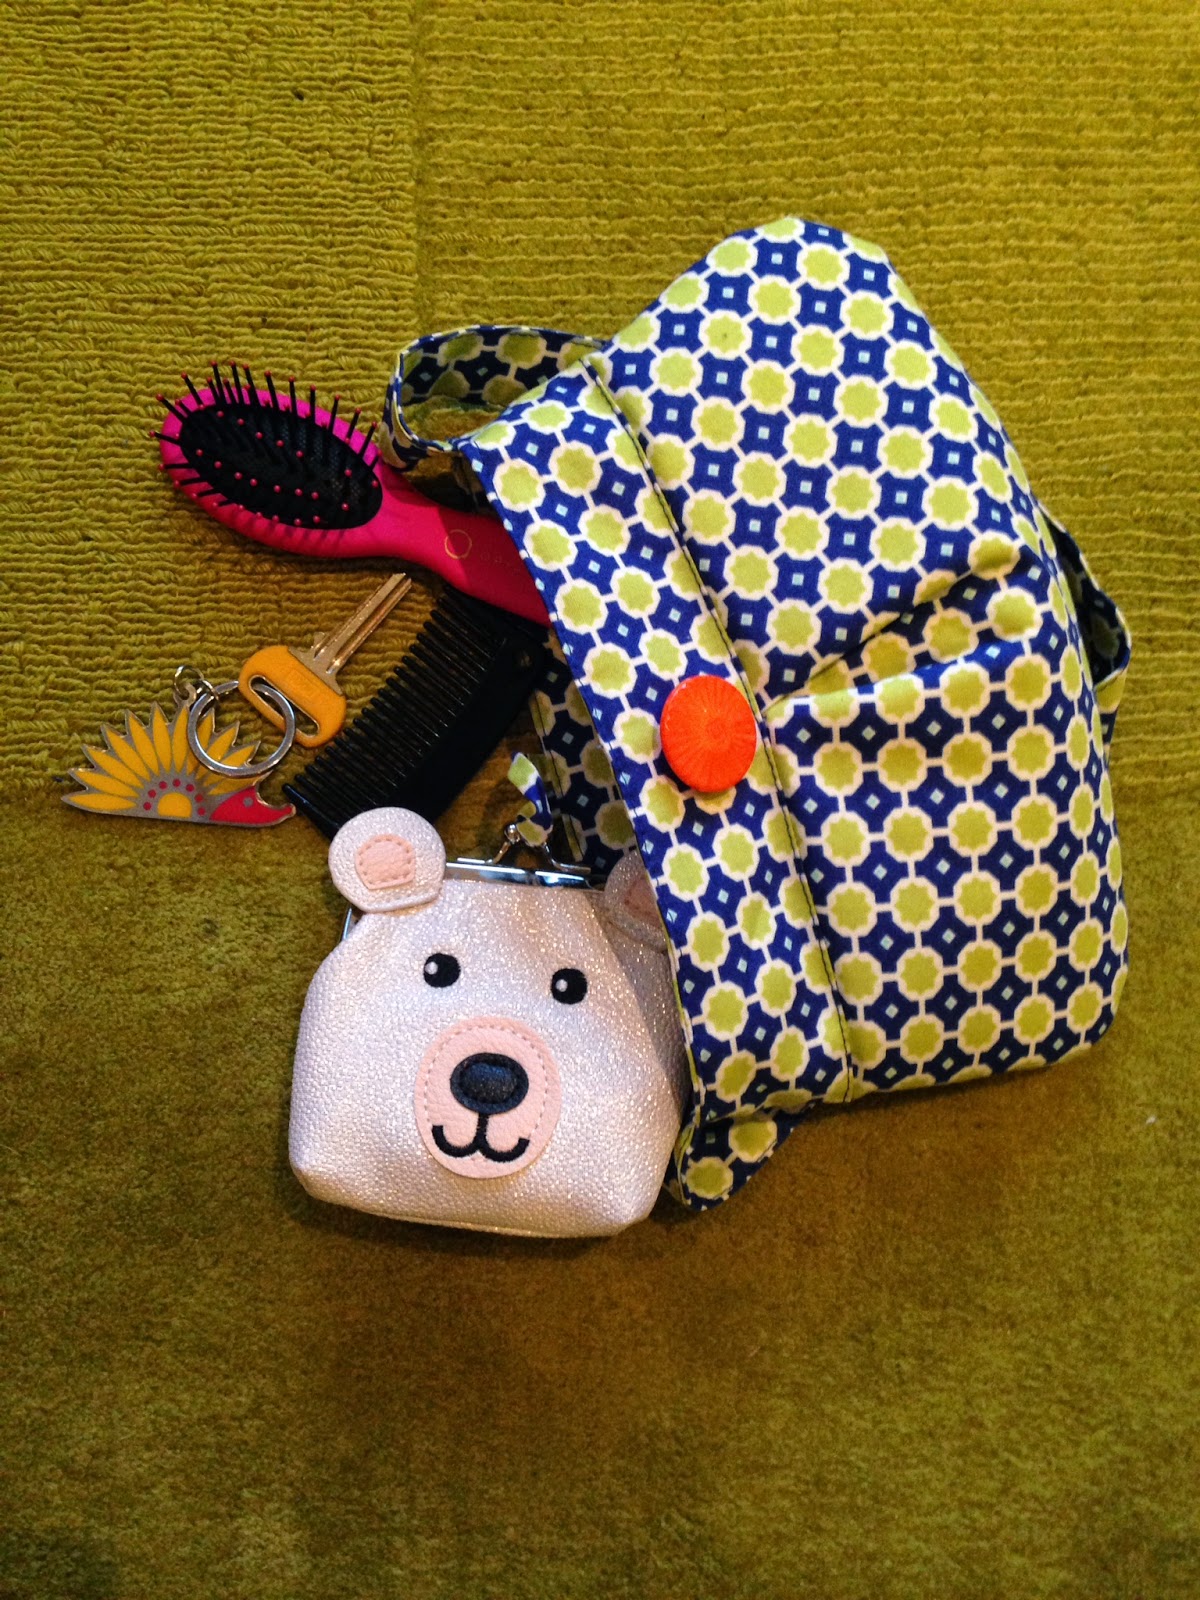
This year, I made my 3 year old niece (who I shall henceforce refer to as the Little Star) a Christmas present. She is really into bags, and has quite a few shoppers, but I thought she might like more of a handbag style bag. I did a bit of Googling, and a bit of Pinterest surfing and found this tutorial, which fit the bill perfectly.

I have a bit of an aversion to the "pinkification" of wee girls, so I have to admit I do go out of my way to avoid pink when I buy anything for the Little Star, hence the fabric choice. Luckily she is OK with this, so far.


The bag was really straightforward to put together, although it took considerably longer than the hour suggested in the tutorial. I think it took one hour to cut and prep the fabric, and then a full second evening to do the sewing. But, I have said before, that I am not the speediest of sewists.

The tutorial calls for you to interface the fabric, but instead I decided to use batting. My mum actually gave me this really cool iron on batting. No idea what it's called or where she got it, and she only had a scraps left, but it was enough. I didn't quilt the bag, but I like the additional structure that the batting gives it.

Contrast lining

The bag closes with a fabric loop (a chunky rouleax), which loops round a button. Both fabrics are from Remnant Kings, as is the button. I know the orange button is a bit random, but I couldn't find a green or blue button that matched, and actually I quite like the pop of the orange. I also just really wanted to buy that button.

As you can tell from the photo, I didn't waste too much energy on pattern matching or placement. I did manage to get the horizontals matched at the side (no photographic proof) but that was about it. I don't think the Little Star minds too much.

A better pic of the lining fabric. I love that scallop print!
There really isn't an awful lot to say about this pattern. It was a straightforward sew and the instructions are clear, logical and give good, well finished results. If I was being picky, I'd say that it's a little bit annoying that the lining is the same size as the outer, as it just doesn't sit inside neatly, but that's an easy fix if I ever make another.

I decided the Little Star might want a grown up bag a bit like Mummy's, so I filled it with a few bits and pieces.

Hair brush and comb, key ring complete with house key and purse

 Miraculously, on Christmas day, I got a compact mirror in my cracker, and so gave that to the Little Star for her bag as well.

The bag was a huge hit. It's meant to be a shoulder bag, but my Dad didn't realise that and so put it on her cross body style, and there is stayed. She pretty much wore it all day, and spent a good chunk of the evening brushing and combing everyone's hair!

I asked for a photo, and she obliged...


Happy girl!
SHARE:

Saturday, 3 January 2015

Welcome, 2015!

Happy New Year, everyone! Finally I'm back. It wasn't enough that December was super busy, and expensive, but then our laptop packed in completely. It's currently in PC World, having all the files, photos etc taken off it (£80 for the privilege of getting our own stuff back - and so far that's taken 2 weeks and counting), but we decided just to replace it. So, today, we got our new one. With fancy Windows 8.1 which neither of us know how to use...

I have a few half written, or fully written but no-photos-taken posts in draft currently. The laptop issue actually has nothing to do with lack of photos - blame the appalling weather for that one - but, as I've moaned about mentioned before, I cannot fully write a post from my iPad as I can't add links, formatting etc on the Blogger App. Really? Still?!

Anyway, its that time of year when everyone writes their review of 2014/plans for 2015 posts. I wasn't planning on doing that. 2014 wasn't a "typical" sewing year for me (whatever that is), as I had large periods of no sewing (pregnancy tiredness, working full time, new baby), followed by short bursts of intensive sewing (start of mat leave pre-baby, December craziness), and I never really set any goals for the year anyway for exactly that reason.

A few of my favourite makes from 2014. Second from right is as yet unblogged (skirt)
Furthermore, 2015 will throw up some further challenges, and I have no idea how that will affect my sewing time. In May I will go back to work. I don't yet know if that will be full or part time. In August, Small Boy will start school, meaning a whole new episode of our lives and different childcare, thus I will be dropping off/collecting 2 children from 2 different places every working day. In June this year my husband started a new job where he works remotely, and spends a lot of time travelling. He's been away pretty much 5 days a week, every week for the past 3 months. So, it's odds on that I'll be doing all of the above myself. I'm not sure how much time that's going to leave for sewing. Still, I remain optimistic. I might need the sewing to save my sanity!

Considering all of this, I feel there is little point setting myself goals. I know I enjoy sewing best when I am free of constraints and deadlines, so why stress myself further? I have sewing goals that I would like to achieve AT SOME POINT, but I have plenty of time for them.

Instead, for 2015, I'd like to focus on creating space, both literally and mentally. Finishing all the WIPs, mending jobs and promised but not yet fulfilled projects. I'd like to spend some time clearing out my sewing storage space (bit of the hall cupboard), getting things in order and establishing what exactly I have - and then to try to use up my stash where possible. I can't afford the luxury (financially or spacially) of a large stash, and to be honest, I just find it a bit stifling, so I think it would do me good to clear as much as possible: to give my sewing and my creativity room to breathe and develop.

Our hall cupboard - AKA my sewing storage, I am ashamed to admit!
For my recent birthday, I received money, which I plan to spend on a new camera. Our current camera is about 8 years old, and the photo quality is pretty poor. I've recently taken to using my phone for blog photos as the quality is much better. So my last aim for 2015 is to get round to choosing and buying a new camera, and then learning to use it. I think I want a bridge camera - a step up from a point and click, but easier to lug around and to use than a DSLR (I am not a photographer, but I'd like to learn a bit more), and it seems that a bridge would give that. If any of you have any recommendations or suggestions, feel free to let me know in the comments. What camera do you use? (I also asked this recently on Instagram, so apologies for the repetition if you already saw that there).

So, that's me. I am enjoying reading all about what everyone else is planning for 2015 and can't wait to see what progress everyone makes. Good luck to us all!


SHARE:

Monday, 29 December 2014

The Activity Play

Merry Christmas! I hope you had a lovely time! :)

I've done a fair bit of sewing recently, but haven't managed to blog any of it. December seems to have passed in a whirlwind of sewing, birthdays, a holiday, illness and a broken laptop. Not to mention Christmas, itself!

I will get round to blogging my makes, and thought I'd start with the most Christmassy first, seeing as you'll not want to read about that mid Jan. Small Boy's nursery decided to do a Nativity this year (or "Activity Play", as he insists on calling it). He was cast as one of the wise men. Nursery asked parents if they could supply the costumes. Most parents did the normal thing, and went to Tesco. But my sister and I are not normal (my niece was to be a star), and were raised on a diet of Jane Asher inspired homemade Halloween costumes, so it was homemade all the way for us.


I decided to use my Liberty Kimono pattern as a starting point, and I used a blue poly cotton from IKEA, that I already had. The blue felt quite regal, but it needed a bit of blinging up (they are kings after all), so I paired it with a gold poly lining from Remnant Kings. I mentioned when I first made my kimono that it wasn't particularly large. Tellingly I did not size the pattern down for Small Boy, merely shortening the length and slightly raising the v of the neckline. I bought some gold braid to use as a tie belt.

There's not much to say about the construction. Seam allowances are overlocked. The bindings are machine stitched in place. The binding around the neck/edges is appallingly applied. It somehow got twisted, and so doesn't lie flat, but meh - it's a single wear kids costume. I left it as is.

I was a bit stuck about what to put on his head. I did consider a cardboard crown, but decided to go for more (very unauthentic) Arabic feel. I have no idea what you would call this style of headwear, but I can tell you it's made of a blue pongee (I love that word!) lining, tied in place with more of the gold braid. Both were from RK. I had all sorts of grand plans to use my overlocker to do a rolled hem on the pongee, but in the end time constraints dictated that I simply pink the edges.

The piece de resistance though was the beard. I have to admit that initially I had to google "wise man" to get an idea of what he should wear, and when I did so, I found this template for a felt beard, which I just had to make. It's made from brown felt and 1/4 inch elastic (again from RK). I am so pleased with it, and I feel it really made the costume, but sadly on the day, Small Boy refused to wear the beard on stage. It was a shame, but I wasn't going to push him into it. He was already nervous enough. He did amazingly well though, and said his one line really clearly.


I was really pleased with this make, especially when the Nursery manager didn't realise it was homemade, but the icing on the cake was that it won Remnant King's Merry Stitchmas Christmas competion, winning me £50 of vouchers for the shop!!! I am so pleased, but convinced that Small Boy's cuteness was what swung it! 

I'll leave you with a (blurry) photo of the wise man sans beard, with his younger cousin, a little star through and through!


SHARE:

Tuesday, 9 December 2014

Fabulous Forty... and the blogger's not looking too bad either!

Today is my 40th birthday. Happy Birthday me! I'm actually currently on holiday. Nowhere exotic, just the East Neuk of Fife, but it's a holiday! In the meantime, though, I wanted to share a special birthday make, so this is a scheduled post.

I haven't sewn myself a birthday outfit before. No real reason other than there is usually quite a lot going on in December already thank you very much, but this year I decided to something a little different. The idea started when I saw one of Kerry's recent makes, and clocked the year her pattern was printed. An idea grew... why not make something from a pattern that was the same age as me? I'm not a huge fan of 70's fashion, but I did really like Kerry's dress and I figured I could probably find something similarly simple, not too "70's fancy dress" and make it wearable.

Easier said than done, particularly since I didn't have a lot of time to play with. I needed to find a pattern that was a style I liked and was wearable, was my size (no time, energy or inclination for grading) and was in the UK (no time for postage from the US). Oh, and it had to have been printed in 1974!

A trawl of Etsy and Ebay eventually led to this dress pattern.


The dress has a slightly bloused bodice with gathers at the waist on both bodice and skirt (reminiscent of the gathers on the Colette Peony). The bodice has a stand up collar and an all in one facing at the neckline. The skirt has 4 gores and is A line in shape.

I wanted to make the dress in a modern fabric, and recently fell in love with this viscose from Atelier Brunette that I had spotted on their Instagram feed and which I bought from Guthrie and Ghani.


I made view 2, but with the short sleeves from view 1. View 1 is kind of cool with the quilting on the hem, collar and sleeves, but with such a busy pattern, I though it would get lost.

I muslined the bodice which fitted fine - a wee bit big, but definitely wearable as is. I initially thought the neckline was super low - indecently so - but when I went to make the change I wanted to the pattern piece, I realised I'd just sewn to the wrong marking!!! Luckily that was the only daft mistake I made as I was really up against it time-wise to make this. I only had a week, which for me, is not that long. I finished the hemming (machine sewn - no time to hand sew) at 10.30pm the night before the day I wanted to wear it!

Where I originally thought the neckline sat!


In terms of construction, I followed the pattern, only making the following changes:
  • invisible zip instead of standard zip
  • I didn't make the tie belt
  • I omitted the decorative buttons on the front
  • I took 1 cm off the skirt pattern piece when cutting, due to fabric limitations (I managed to get this out of 2m of fabric), and then took a further inch off the length when hemming.
  • Insides are finished with French seams where possible, and the rest are overlocked.
  • Added pockets
  • Used a strip of fabric, rather than the seam binding that was called for, for the waist stay.
Invisible zip with perfectly matched waist seam. Win!
I'm really happy with the dress. The facings at the neckline are a bit annoying and flappy - I've had to tack them down with invisible stitches to stop them flipping out. They are not interfaced, which I think doesn't help, as the collar is interfaced and they don't have enough structure to support the weight of the collar. If I was to make this again, I'd try to do something different there.


Weird selfies so you can see the collar and neckline better.

Actually, I've just remembered I made a second daft mistake - I borrowed my pocket pattern pieces from Simplicity 2360 which has the top of the pockets caught into the waist seam. No problem, I could do the same here, only I managed to catch them into the back skirt pieces rather than the front ones - so the pockets were backwards! I only realised after I'd French seamed the waist. I didn't want to have to unpick the whole thing, so I have to say I hacked it a bit - I unpicked the second stage of the french seam, just at the pockets, and then cut them. I then flipped them forward and sewed them in place over the top of the french seam. My insides are now a bit messy, but I'm not too bothered.

The fabric is lovely. Soft with a beautiful drape. Really nice to sew with and to wear, although it does crease quite easily. All in all it's what I wanted: a really wearable, comfortable dress with a nod to the past, that is special to me.


I am not pregnant again, despite the fact I look it here!


I actually wore the dress over a week ago - as part of my birthday celebrations, my mum treated my sister and I to afternoon tea at The Balmoral Hotel, which is an iconic, old hotel in the centre of Edinburgh (where JK Rowling finished the last Harry Potter book). It was a lovely afternoon and the dress was perfect for the occasion- sorry I didn't take any photos while we were there, but suffice to say there was plenty of sandwiches, tea and cakes in beautiful surroundings!!

Palm Court - where we had afternoon tea!


Right, I am off to spend my 40th freezing on a Scottish beach, eating fish and chips in the local pub, and drinking champagne!  

ETA: forgot to add that I will be adding this to A Stitching Odysey's #vintagepledge


SHARE:

Tuesday, 28 October 2014

Completed: An almost eponymous skirt

In my last post I referred to my Autumn/Winter sewing plans. I haven't blogged these, because it seems that blogging my intentions is the kiss of death to said plans, and I don't want to jinx it. I have some good, viable makes planned for this season, that I want to make happen.

The first is this: the Moss Mini by Grainline Studios.


I have to confess I am in real danger of becoming a Jen/Grainline fangirl. Her patterns are great and just what I need in my wardrobe right now. In case you are not familiar with Grainline (and if not, why not?), she also designed the Scout Woven Tee of which I am so enthralled. You can see my Scouts here, here, here and here. I have another planned. I just need to pluck up courage to make an Archer and I am contemplating the Linden.

Back to the Moss. I have had a particular version of this skirt planned in my head for a while now. Recently I ordered the fabric, which you'll have seen if you follow me on Instagram (this). I love the fabric but it is lighter weight than I imagined and now I have my doubts. I am considering underlining it to stiffen it up slightly, but not sure with what. Any suggestions?


In the meantime I decided to make what I hoped would be a wearable muslin from this upholstery/home dec fabric from Ikea which I'd been hoarding for a while. I love this fabric. It's very stiff and quite thick which gives it great structure for this shape of skirt. It's a very dark, dark grey, and is ribbed. It actually reminds me of grosgrain ribbon in texture (hence the post title). Pity it wasn't green! It very nearly killed my sewing machine more than once, when sewing over multiple layers, and my needle actually got stuck in the fabric and was wrenched out of the machine at one point. The lining is leftover Liberty Tana Lawn from my kimono. Small Boy keeps asking why I made a skirt out of my dressing gown.

I'm still fluctuating between measurements. At least I hope I am. My waist measurement is currently 30" and it was 28" pre-pregnancy. Those last 2 inches seem to be quite stubborn and don't seem to want to go anywhere. That said, my waist measurement only really affects anything that is high waisted. I am back into pre-pregnancy jeans (and in fact recently bought a pair of jeans that are 26" waist! Oh Gap and your unrealistic, but very flattering sizing!), because they sit below my natural waist. I'm not going to pretend there isn't a bit of muffin top going on with those jeans, but that's what loose tops are for. Since the Moss is designed to sit 2" below the natural waist, I cut what would be my normal size - a 6. I'm actually a 4 in the hips, but I cut a straight 6 figuring I could take it in if necessary, but with this being an A line skirt, I didn't think it would make too much of a difference.

I made the skirt pretty  much as directed. The only changes were that I used lining rather than self fabric for the waistband lining to reduce bulk; I omitted all interfacing for the same reason; and I added patch pockets to the back.


I wanted this to be a muslin but also a practice run, so this is the most detailed "muslin" ever. Every seam is top stitched, which I really enjoyed doing. So satisfying, and it gives me great pleasure to look at. Sewing nerd alert. Pity it's black on black and you can't see it. I also took great care to ensure the back yoke matched perfectly.


The primary reason I wanted a practise was the fly zip. My first ever. And I don't know what all the fuss was about. I used the pattern instructions plus the fly zip tutorial on the blog. Actually both are the same but the tutorial has photos and the instructions diagrams. Sometimes one was clearer and vice versa. It took a bit of head scratching, a bit of unpicking, and about 3 hours. I even sewed the whole thing shut at one point (and nearly killed my machine in the process), but I got there. AND I AM SO PROUD! Honestly, it's like my third child. I keep looking at it in wonder and awe, amazed at what I created! I still have no idea how it goes together and can't imagine I will ever be able to do it without the instructions, but who cares?


What really got me unstuck on this make was the waistband. It's a curved waistband, which was new to me, but the issue was it was too short. When I started to attach it I got a little confused as the instructions say to match the side seams (to what? The waistband is a single piece and the side seams aren't notched). There were 2 notches, which I presumed matched CF and CB although the CB notch wasn't referred to. But anyway that didn't matter as they didn't match. I did a bit of tugging and pulling and eventually got it to fit, by ignoring the notches, and attached it and the waistband facing. Only at this point did I realise it still didn't fit. See photo below - it didn't extend to the fly shield and therefore I would have had nowhere to sew a button!


My assumption was that something had gone wrong in printing or cutting the pattern piece, so I reprinted it, but it was the same size. When doing this I noticed some strange vertical marks on the printed version that were not on the screen. Weird!

Left is the printed version, right is on screen
I asked for help on IG but no one was any the wiser. Feel free to chip in if you know what's happened here. Shar pointed me in the direction of a post that Jen wrote earlier this year referring to issues with the waistband where people were cutting it on the fold - and it's not a symmetrical pattern piece - but I cut it flat as directed, so that wasn't the issue either. In the end, I measured how much I was short, about 7/8 inch, and added this to the CB of my waistband pattern piece and cut another. This is better but actually still not perfect - but this time I think it's just an issue with my fabric. The pattern piece includes 1/2""overhang" on each end for seam allowance, but because my fabric is so thick, I think it needs more to allow for turn of cloth. 

The instructions have you understitch the waistband facing once attached, but I could not for the life of me fathom out how to do this at the ends and round corners. In the end I just understitched as much as I could along the length of the waistband and left the rest. It's a pity because the waistband is a bit of a bodge job now. Annoying when I took such care over the rest. But with this style of skirt I am unlikely to tuck my tops in, so no one will really see it.


Some flat shots now:


Seams are all overlocked.
Patch pockets copied from a pair of RTW jeans. I'm pretty sure they are level IRL!
Somewhat ironically, given this is meant to be a muslin, I'm not sure the fit is right. The problem with fitting at the moment is that we have one full length mirror in the house, which is in our bedroom. But I can only sew when Baby Boy is asleep and guess where he still sleeps?! So when trying this on, I had to go by feel, rather than looking. And trying to stand on the sofa to look in the mirror over our mantelpiece. Which doesn't work. 

I think it's too big. I think it sits lower than it's meant to. It can't actually fall off, but the back waistband slips down, which makes the bottom of the front of the skirt stick out. I have decided to wear it for a while before deciding whether I want to do something about it. I really don't want to have to do a third waistband, but if it makes the skirt more comfortable and fit better, I might just do it. It's not like it's a neat waistband anyway. What I am unsure about is how best to fix it, especially for my next one. Should I just cut a smaller waist size? Just take a bit off the side seams? Or since it seems to be slipping down at the back, is that where the issue is and should I take a wedge out of CB? This is why I hate fitting. It's just so confusing.

Potential changes/lessons to learn for next time (other than fit)? 
  • If I was making this in a thick fabric again, I'd do the pocket lining and the pocket facing in lining fabric, (rather than just the pocket lining) to reduce bulk at the seams.
  • If I change the fit at the waist - add length. This is as short as I want to go, and obviously if it sits higher on the waist, the whole skirt hikes up a bit...
  • Add a bit more length to the waistband. I think about 3/4 would do it.

So, not a perfect skirt, but I am really, really pleased with it. It's a good basic skirt that will go with a lot in my wardrobe. And the top stitching and fly zip just make me so happy. Sad, but true.

If you can help with any of my above questions, and there are quite a few, please chip in via the comments. I'd love to know what you think.

SHARE:

Thursday, 9 October 2014

Hoppity Hoppity Hop

The amazing Danielle from One Small Stitch, who never fails to amaze me with her flattery and generosity (I haven't yet told you that she knitted Baby Boy the most gorgeous cardigan!), has nominated me for this Blog Hop that's currently doing the rounds. Hopefully you are not yet bored of reading this type of post. I know I'm not. I love finding out more about fellow bloggers - it rounds out their personality in my head - and this hop is interesting in that it's about the writing process, not just the sewing.

So, here goes:

1. What am I working on?

Plans. I'm not actually sewing anything, but am planning my next few makes. In the past, I have fallen into the trap of writing a big "summer/autumn/winter sewing plans" type post, and then 100% failed to deliver. I always overestimate my capabilities and underestimate my time. This autumn/winter may be no different, but making my recent Scout in 3 days was a real confidence booster in terms of execution but also in terms of realising what I can achieve if I put my mind to it. P will be working in Dublin for 8 consecutive weeks in the near future, which will leave me lots of evenings to myself, with plenty of sewing time. Of course, it will also mean me looking after 2 children by myself all day (and since our recent holiday Baby Boy has steadfastly refused to go back to sleeping through the night. Sigh.), so of course my evenings may instead be spent exhaustedly collapsed in front of the TV. But I'll go with the optimistic view for now.

My next make is most likely to be another blouse - I bought this gorgeous viscose (below) at the recent Glasgow bloggers meet up for this purpose. I won both the Belcarra and the Afternoon Blouse back during Me Made May, so the viscose will probably become one of these. Unless I go the easy route and churn out another Scout. I am wearing my most recent one every other day at present!


Other plans include a Mabel, a Moss, more blouses/tees (patterns TBC) and perhaps even the Ultimate Trousers if I can psyche myself up enough.

I also have a huge pile of promised unselfish sewing that has been hanging around since the beginning of the year (I promised a friend a dress for her Christmas last year!), and since I  now know that I won't be having any daughters to sew for, I'm taking more interest in boys clothing patterns. I absolutely adore this tee by Girl Like The Sea:

Girl Like The Sea

2. How does my work differ from others in it's genre?

It's written by me. Hopefully my fabric and pattern choices, my personality, my decisions and my skills make my blog mine, because from every other aspect its the same as a million other sewing blogs out there.


3. Why do I write/create what I do?

I sew because I love it. Simple as that. My motivation was never to improve fit, to stop buying RTW or to make a stand against fast fashion. I just really like the process and the achievement. I find sewing utterly addictive and totally consuming. It allows me to switch off from every day life, as it requires concentration, but it's something I love to concentrate on, which makes it a joy. That being said, there is also some motivation around being able to make a "one of a kind" garment, as I do like to be different (my sister would say I like to be contrary, but I disagree :)). That I can make something fit better, that I can avoid unethical manufacturing processes are secondary benefits.

I'm not sure why I write. About 18 months ago, the idea of writing a sewing blog became appealing. I think I wanted to join in and belong to this great online community that I had recently discovered. I wanted to be part of the fun, and I wanted to communicate with like minded, passionate individuals. I suppose a small part of me also wanted to show off what I was making. I actually never expected to stick at it. I thought I'd get bored pretty quickly - I had previously written a blog that had a very short life - but then I found I really enjoy the writing process. I miss it when I don't blog. I've found that having had a baby this year has cut off 2 creative outlets for me - sewing and writing. The 2 have become intertwined for me.


4. How does my writing/creative process work?

I am quite ad hoc about both. As I mentioned above, I make plans but rarely stick to them, so there ends up being no great design. I am easily distracted by the next shiny pattern release, and by pretty fabrics. I didn't take part in Me Made May this year, but if I had done, I know my conclusions would have been no different from the previous year - not enough bottoms and not enough casualwear. I am hopeful this will change. Being pregnant and then not sewing for a while, plus now having different wardrobe requirements (I will be off on maternity leave for a year and don't have nearly enough casualwear for that) are forcing me to think differently. I can't necessarily make the next "big" pattern, as it might not fit my currrent lifestyle requirements, so I'm trying to focus on what will work for me and my current circumstances.

With writing, again there is no one approach. I obviously blog about more than just my sewing here. My personal life does make quite an appearance, and sometimes I have been brutally (too?) honest about things that have been going on in my life. Sometimes I just start writing and see what comes out. Sometimes I have a game plan. I write about what interests me and what I think I'd like to read elsewhere.

With the FO posts, it's a matter of documenting the what and the how. I narrate my post in my head as I sew, but of course I don't write it down, so when I eventually sit down to write, I'll have forgotten most of what I previously "wrote". I'll frequently publish a post only to immediately edit it with something (several things) I have missed. I try to keep a record of changes, issues I've encountered and fixes I put in place, plus any helpful tips I've come across along the way. I don't really consider myself good enough to be writing tutorials, but I like to give something back.

My photography leaves a lot to be desired but I like to ensure I include photos of me wearing the item I have made, front and back views, plus some photos of the insides. I am unfailingly honest about my makes and will post the duds as well as the successes. I'm not sure if that's what people necessarily want to read about, but for me it's important. I like to show that everyone makes mistakes, but more crucially I like to record what I learnt so that (hopefully) I don't make the same mistake again. Unless, of course, I am pregnant/hormonal/sleep deprived in which case I will continue to sew things inside out and back to front.

Writing a post takes a long time for me - several hours. I will write it, read and reread it. And then reread it again. Mostly I end up having to edit and remove content, as I waffle (I do it in real life too). It's important to me that I write "well". I like to read something that's well written (correct spelling, grammar, extensive vocabulary), so I am careful to write something I would want to read, as much as I can within my capabilities. I'm not saying I'm a brilliant writer - far from it, I am far too fond of excessive exclamation mark use - but I like to push myself to be the best I can.. I am also careful to keep my voice. I can easily be swayed by the writing styles of others (e.g. Lauren from Lladybird has a distinctive voice), but that wouldn't be me. And if I wrote like that, you'd be mightily disappointed if you ever met me!

So, I think that's it from me. I'd now like to nominate 2 fellow bloggers to carry on the fun, and I am keeping it here in Scotland, although neither of these bloggers are Scottish! - Kerry from Kestrel Makes and Nessa from Nessa's Place. Kerry's was was one of the first sewing blogs I discovered. I love that she makes 1980's patterns her own - they never look dated on her - and she is less likely to jump on the new pattern bandwagon, so there is always something different to read on her blog. I'm also pleased to hear she's planning to go back to recording her charity shop finds! Nessa makes clothes but also makes the most fantastic quilts. They truly are beautiful! I don't quilt, but again enjoy the differences in the posts she writes.

I have enjoyed this series so much that I would encourage any of you to join in, nomination or no nomination. In fact, although I'm not naming you, consider this your nomination if you fancy a go! If for no other reason than to appease my nosiness!

Finally, because this is a very text heavy post, here is a picture of Baby Boy to break things up. Told you, I put too much of my life in here!


SHARE:
© Grosgrain Green | All rights reserved.
Blogger Template Created by pipdig