Monday, 4 January 2016

Completed: A Christmas Jumpsuit!!!

Merry Christmas and Happy New Year!!! Apologies for the radio silence. I hadn't intended to disappear for a bit, but I was busy sewing, and once that was done, I needed to take a break to get organised for Christmas, and then it was Christmas. Well, you know how it goes.

I have been meaning to blog my latest make since I made it, but I just never managed to prioritise the time for photos. I finally managed that today, so here we go.

I decided that I wanted to make something to wear to my work’s Christmas Night Out. I always have time restrictions (as most of us do) at this time of year, so my initial vague plan of culottes/midi skirt plus matching cropped top were quickly dismissed as being too much work. I did think another Inari (quick and easy sew) in a flashier fabric like sequins, but I wasn’t sure I wanted to cope with sequins. So, I decided on a jumpsuit. Go figure as they say!


This is the Named Ailakki Jumpsuit, one of their patterns from a couple of years ago. I couldn’t actually find that many versions out there, but these versions by Sew Dixie Lou and Jolie Bobbins really sold it to me. Really, is there a pattern that Jolie Bobbins hasn’t made? I wasn’t sure I could totally pull it off, but I did fall in love the cross front bodice, so vowed that if the trouser part was horrific, that I’d use the bodice and make a dress (lovely examples here and here).


I decided to muslin it before even buying the main fabric, as I knew I’d want a different fabric if I ended up making a dress version. I actually made 2 muslins. The first muslin was in size 38 (my “true” size, according to my measurements). The bodice was OK, with a little excess at the sides and shoulders, but the trousers were huge, although the waistband was spot on. I then made a 36, but with the 38 waistband. The bodice was still a little strange fitting. It’s a difficult style to fit. The cross over part isn’t fixed, so it moves around, which was really making me worried about overfitting. And the trousers still didn’t look quite right.


In the end I went with the following:

Size 38 bodice, with 3cm removed at the shoulders (a bit too much in hindsight) and 2cm removed at the underarm, tapering to nothing at the waist.
Size 38 waistband, no adjustments. This give a nice but not overly snug fit, which is very comfortable.
Size 36 trouser, widened at the sides to fit the 38 at the waist. With a whopping 8cm off the length: 4cm taken off the crotch length, and a further 4cm out of the leg length, which gave me a slightly cropped/ankle length leg once hemmed.
Changed the exposed zip for a concealed. Just my preference.
Omitted the pockets because I messed them up and ran out of time to redo them.

First time I've ever seen my own back. How weird is that?!
The fit is still far from perfect. With hindsight I probably took a little too much out of the shoulders and/or the crotch length, however it’s fine to sit and stand in, and doesn't want to cut me in half unless I crouch right down. How do I know? I tried painting my toenails whilst wearing it! I also think that on the final version, I stretched out the bodice sections as I have quite a bit of gaping right above my right boob (for lack of a better description), which wasn’t there on the muslin. If you make this, stay-stitch those edges!

But, do I care, about these issues? Not one fig!!! I love it (me and my huge hair!)


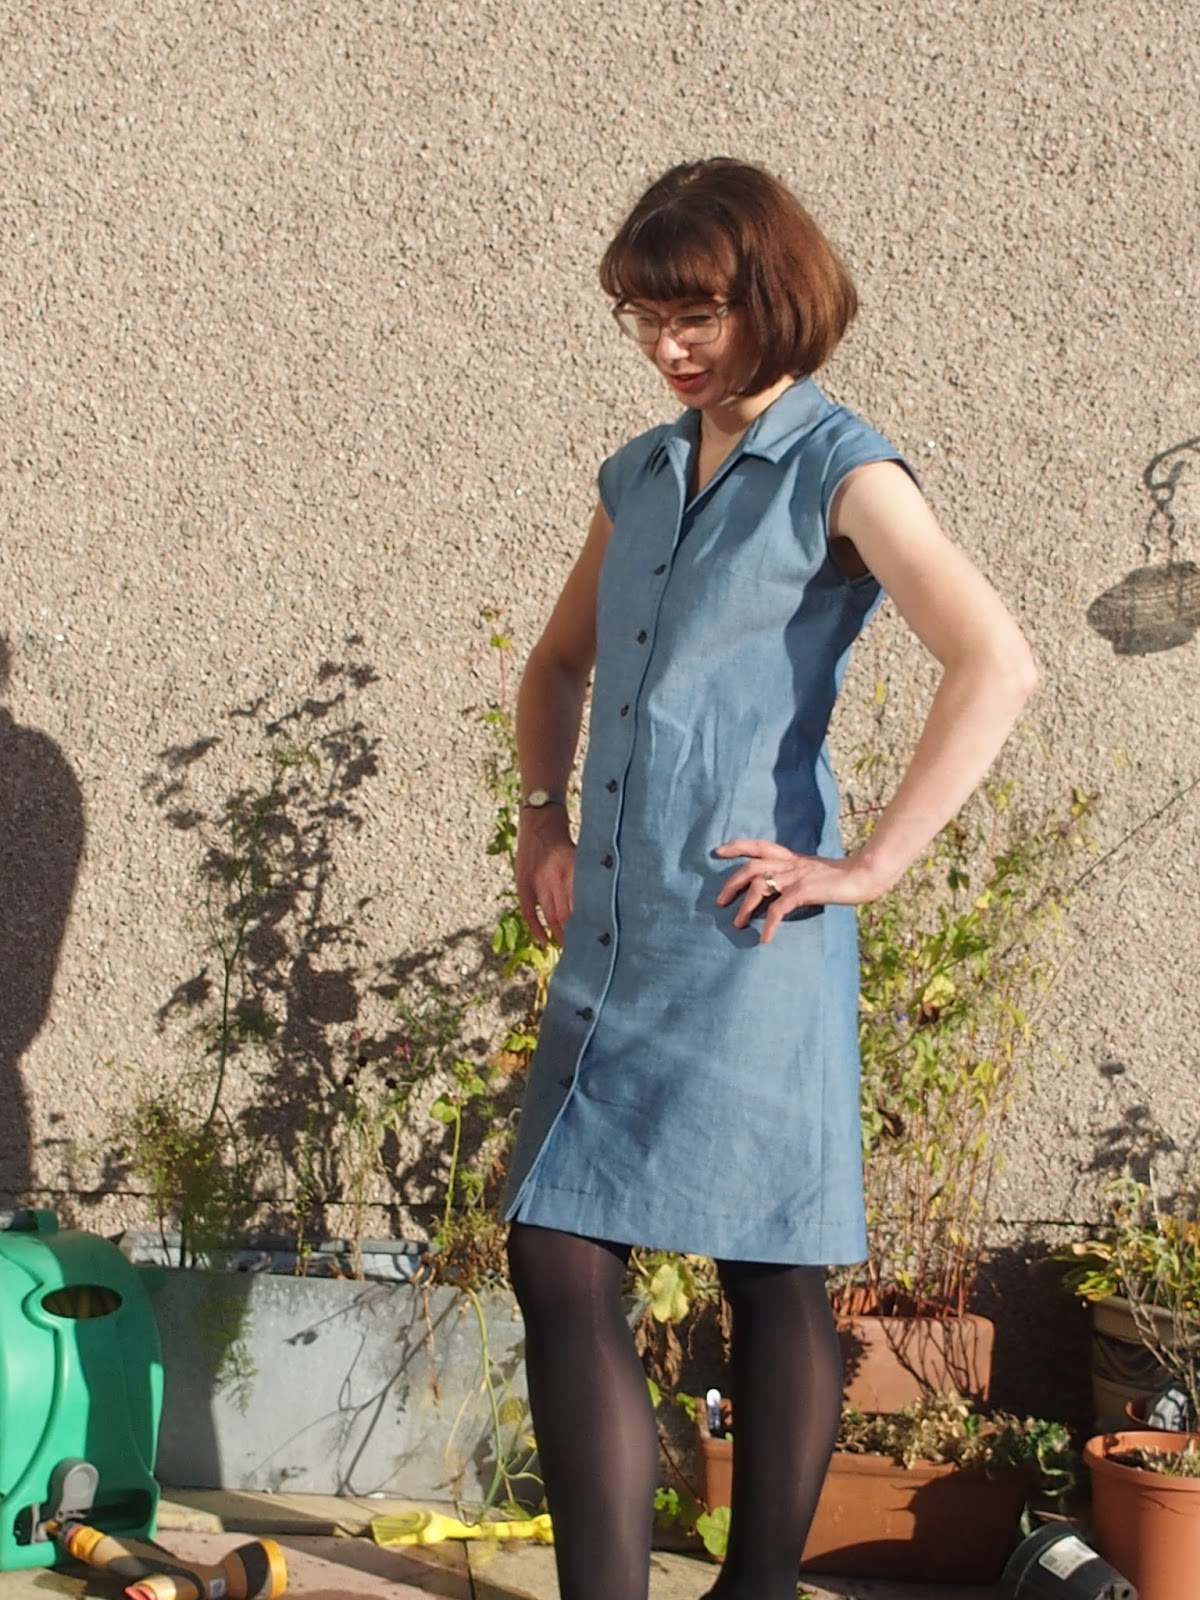
The fabric decision was pretty easy. I wanted to make it in black or a dark colour. A cross front jumpsuit is a big enough statement for me, without throwing pattern and colour into the mix. I ordered a few swatches from The Splendid Stitch, a relatively new to me Glasgow based online shop, and finally decided on their Sybille poly crepe (currently out of stock). For a polyester, this is a lovely fabric, with a good weight for this type of project, and lots of drape. It was a little shifty during cutting, but was nice and easy to sew. Pressing was a little tricky due to the polyester, and I did scorch it a few times, but mostly on the inside, so that’s good. I also managed to snag it in the Black Friday sale, which wasn’t intentional, but was a happy result of delaying my order. I also ordered a metre of their basic polyesterantistatic lining for the bodice, but once it arrived I realised I didn’t like the feel against my skin, so instead used some remaining John Kaldor polyester left over from my Seachange top. I had forgotten that this fabric is very shifty and hard to sew, plus it frays like mad, so it added a bit of challenge, but it is much nicer to wear and prettier to look at.


So, in terms of construction, I printed, stuck and traced the pattern, made the first muslin, ordered the fabric, printed, stuck and traced* another size to make a panicky second muslin, spent several evenings debating over fit, before finally committing to how I wanted to make it. By this stage, I had less than a week before my night out. So I made this in 4 nights, not getting to bed until after 11.30 each night. And one of those evenings was my birthday! I changed the order of construction a bit on the final garment, starting with the trousers. I fully made the pockets, but then sewed them on so the raw edges were on the outside. I didn’t have time to unpick and redo them, so I just cut them off. That was annoying because I then had no pockets, but also because I’d wasted a good portion of one evening putting them together. That was my only major mishap though, and the rest went together without issue. Having made it twice already (in muslin form) definitely helped. The bodice is a real head scratcher to put together, but the instructions and accompanying illustrations are very clear.


This was the completed bodice before attaching to the waistband.
*I ran out of tracing paper halfway through, so cut some pieces out and traced the rest. By the end, I think I probably printed and stuck together 3 or 4 versions of this pattern. As it’s an earlier Named pattern, most of the pieces overlap.

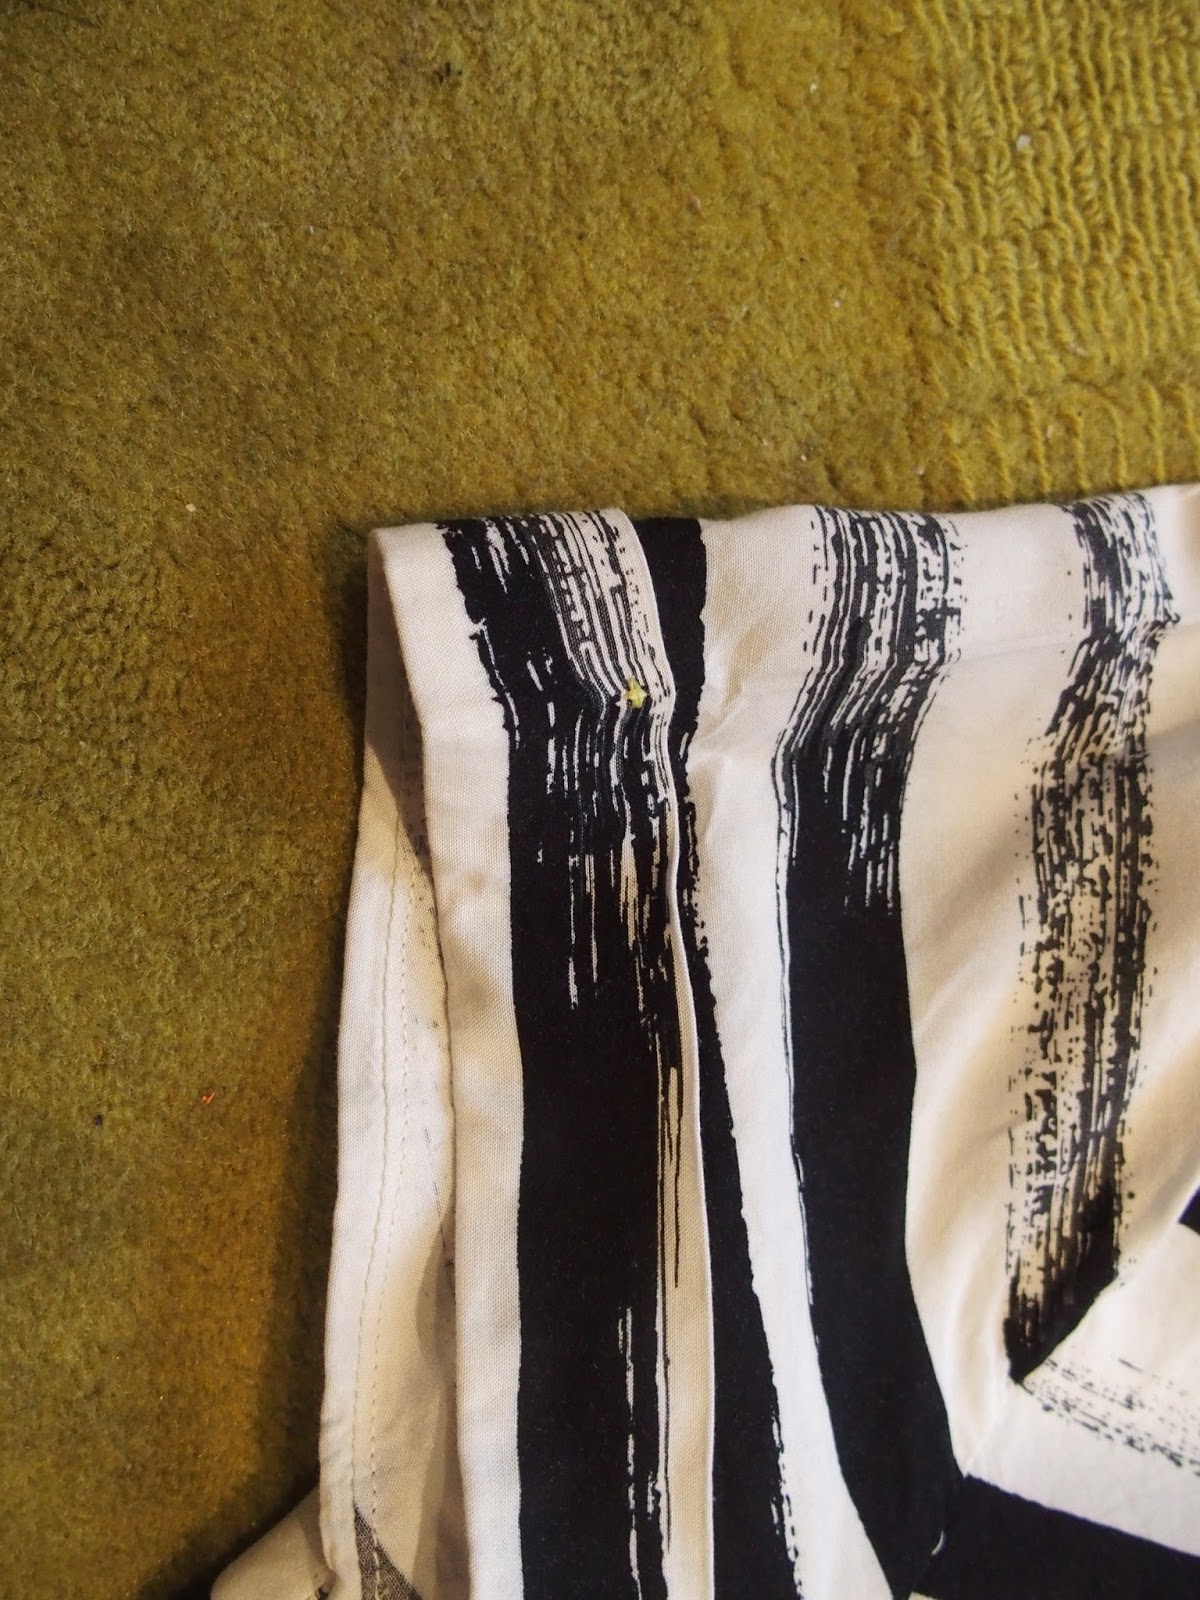
My only issue with the pattern is that it doesn’t allow for turn of cloth in the bodice. So you cut the same pattern piece for both main and lining fabric, but you then understitch, so that the main fabric rolls to the inside slightly on both sides of the straps. This then means that the lining piece becomes too big. It was something I thought about from the start, but wasn’t sure how much to reduce the lining piece by, and I didn’t have the luxury of time to experiment. Since my lining is not black, it does show a bit.


Photobombing thumb from my director of photography, which led to...


But as I said, I love it. I love the cross over bodice, which makes me feel fabulous. I love that I can just pull it on, and I'm ready to go out. I love that it's so comfortable to wear - no fiddling required at any point! I love the low-ish back and the square armholes. I even love the trousers part, which makes it my first successful pair of trousers.

It is so different to anything else I own or have made, and my colleagues could not believe that I made it myself. Some of them are still going on about it! It performed admirably on the night, standing up to dancing, eating and some Rockaoke (karaoke with a band – apparently my 40’s are all about the karaoke. Who’d have thought?!). Although the cross over isn’t fixed, it stays in place no problem, and the little key hole at the front is not too scary. It also worked for a (dressed up) dinner at a friend's house!


And, because I am always curious about these things, I’ll let you know that I did wear a bra underneath. One of these. The back isn’t super low, but it would show a bra strap. I could have raised the back to cover it,  but my friend talked me into buying and wearing one of these, and it was great. And now I can make and wear all the backless styles!!!

I'll finish with a standard Xmas night out bathroom selfie. I think my smile says it all! :)


SHARE:

Saturday, 21 November 2015

Completed: Tanja Dress

Sometimes you get an idea of how a pattern should be made up, and you can't shake it. So it was with this dress. I came across the pattern on my new favourite blog: Noble and Daughter. I discovered Charlie's blog via Seamwork magazine, and have spent a good few happy evenings pouring over her back catalogue. I could happily wear every single thing she has sewn. And she has great hair! When I first saw her version of this dress, I thought it was a knit dress. Further reading established she actually made it in wool crepe, which is just beautiful.


The pattern is the Tanja Dress by German pattern company Schnittchen. I have heard of them before, but haven't been particularly drawn to any of their patterns. And to be honest, I'm not enamoured of the version on the pattern cover, which I don't think looks great. However, as I said, Charlie's version is beautifully made and fits perfectly. I was sold, and from nowhere the pattern jumped the queue right to the front. If you are unfamiliar, it's a "fancy dress" (their words!), with a tulip skirt with pleats, and either a cap or long sleeve. It has waist darts at front and back.


It's designed to be made up in wovens; they recommend cotton or wool with some body, presumably to preserve the tulip shape of the skirt. But I couldn't shake the knit idea, specifically ponte. My plan was to make it in a woven first, but I didn't have anything seasonally appropriate in my stash. I did, however have quite a lot of this purple ponte, which I bought in Mandors last Feb.


My measurements put me at a size 36 on the bust and hips and 38 on the waist, but because the fabric has stretch I sized down to the smallest size the 34. The picture on the pattern looks pretty roomy at the waist, and I knew I'd prefer it a bit more fitted.


Thoughts on the pattern:
Well... it was OK. The instructions were brief to say the least. The pattern level suggests Easy+, but the instructions were half a page of A4 with no diagrams. There was mention of a sewalong/tutorial on the website, but no direct link and I couldn't find it. The instructions themselves were pretty straightforward, and the dress was very intuitive to put together, so I didn't really use them, but a beginner would really struggle.

I bought the pattern on PDF, although a printed version is available. The pattern pieces are full size, rather than half, which is nice, but I'm not sure I understand why it's necessary, particularly when I then had to trace, as they were overlaid. I'd rather have half pattern pieces and not have to trace. There were also a few printed blank pages, which always annoys me, as they are never truly blank and so it's just a waste of paper. Some of the pattern markings were different to what I am used to, but they were all explained.


The construction would have been fairly straightforward but I made a few stupid mistakes. The ponte shifted around a bit during cutting meaning my pleat marks were off on the front skirt. I then realised I'd cut my back skirt piece too large. There must have been a fold in the fabric when I cut out. I know cutting flat is meant to result in a more economical use of fabric, but when your clear bit of living room floor isn't wide enough to accommodate a 170cm wide fabric, it just becomes problematic! I had to do a fair bit of unpicking as a result, which, in a lightening zigzag stitch was not fun.

I changed a few things to accommodate the knit fabric. I omitted the hem facing and instead just turned once and hemmed with a twin needle. I also omitted the bias facing at the neck, and again just turned and twin needled. The sleeve hem were meant to be turned twice by 1cm, so I cut off the first 1cm  to reduce bulk, and so it got the same turned once and twin needled treatment. I added clear elastic at the shoulders and waist to help support the weight of the fabric. Finally, I omitted the side zip, as I can get it on and off without. I used a lightening stretch stitch/twin needle throughout, and my walking foot on some bits. The edges were left raw.

The cap sleeves are really only half sleeves. I'm not sure if there is a technical term for this, but by that I mean that they don't fully enclose the arm. I find this difficult to explain so have a look at the techincal drawings above and the photo below. I have a RTW dress with sleeves like this which I love. My sleeve notches didn't match, but this could have been my markings - I didn't go back to check - so I used the shoulder seam one and ignored the others. The instructions had you finish the bottom half of the armscye with bias binding, but I opted to turn and twin needle. But this kind of presented a problem in that the top stitching was just going to kind of stop in the middle of nowhere. I chedked my RTW dress, but it has princess seams, so they top stitched to there. After a quick headscratch, I decided to continue the top stitching and curve it round to meet the top stitching on the sleeve hem. I'm quite pleased with it.


Thoughts on the dress:
I love it. Love love love love it! It has turned exactly as I envisioned in my head. I was concerned that it just might not work in a woven, particularly with the darts and pleats, but it does. Yes the darts could be a little sharper and the pleats a little more defined - the fabric doesn't press well - but actually I like the looseness of the pleats as they are. I'm really pleased with the finish. I took care to ensure my side seams matched and that the pleats were even. I love how the fabric hangs, I think it looks quite luxe, although it will be interesting to see how it washes and wears. I understand ponte is prone to pilling pretty badly.

Nice view up my nose, but it's the only photo where I actually look like I love this dress!
I adore the shape of both the bodice and the skirt. The skirt narrows quite dramatically towards the hem - in fact, uncut, the pattern piece looks like an A line skirt piece upside down. The bodice in particular is really flattering, and could be used with many other skirt shapes. The fit is good. There is a little bit of gaping at the back neck that I would address next time, but it's not bad enough for me to bother in this version. The waist is ever so slightly dropped. I have no idea if it's meant to be like that or not - it's hard to tell from the technical drawings, or the photo on the pattern, but Charlie's is also like that, and actually I like it that way, so I'm calling it a design feature, regardless.

I'm in danger of rambling on forever about this, so I'll wrap this up now.


SHARE:

Sunday, 15 November 2015

Completed: Cotton + Steel Inari Dress

I genuinely am a fan of Autumn. Not in a "squeee pumpkin spice latte" kind of way (I've never had one, but they sound disgusting. I'm a black Americano kind of person), but I love the change of seasons, the colours, ankle boots and the fact that tights mean I no longer need to shave my legs every day. I do not like the lack of light. It affects my mood, and it limits my ability to take blog photos.

Which is my explanation for the fact that my new favourite ever garment has taken so long to make it to the blog.

Awful, awful indoor photos with terrible, terrible lighting BUT thanks to Franca, I finally have a tripod! Also, I genuinely have no idea what's going on with my legs in all of these photos!
This was a fabric driven make. The fabric is yet more Cotton + Steel rayon challis, this time from the spring collection. I wasn't totally blown away by the prints this time around, but I loved the painterly aspect of these stripes. The print is also available in the cotton substrate, and in more colours, and I wish these colours had been available in the rayon. Look at that citron colour - beautiful!

This time I decided to buy enough to make something decent - rather than yet another simple dartless loose fittging top. I bought 2m from Miss Matatabi, as it's cheaper to buy it there, including postage from Japan, than buying it in the UK.

Once I had the fabric, I deliberated I while. I did think about a pleated or gathered skirt for a while. It then was going to be an Alder or a Biscayne, and for a while I considered a Biscayne dress hack. But there have been some really lovely versions of the Inari dress by Named on the interwebs, which slowly won me over. So instead of a simple dartless loose fitting top, I've made a simple dartless, loose fitting dress...


But, but, but! Isn't this lovely? The drafting is impeccable. I'm sure you will have come across this pattern before, but for those of you who haven't, this is a subtly cocoon shaped dress which sounds awful, but is actually very lovely.  I generally have a preference for balancing out volume; loose fitting tops with skinny jeans or trousers, or full skirts with a skinnier fit top. As a result, I was a little concerned that the silhouette might not work on me, however that shaped side seam which curves forward, results in an optical illusion of far less width at the bottom, which removes the sack-like feel. The vents and the high-low hem also provide some interest to an otherwise very plain dress.

Hi-lo hem and vent
I did my best at pattern matching, but with the inconsistent stripe width and the slippery fabric, success was variable, even with my walking foot and many pins. I'm not overly bothered though. Even with stripe matching, I was able to get this dress from a little more than a metre, leaving me enough fabric to make something else!

Stripe matching at the side seam
This is actually my second Named pattern. The first was the Alexandria Peg Trousers, which were not a success, I think partly because they are too big. This time around, I went with my gut and cut the smaller size. My bust measurement put me in a size 38 (same size I made for the trousers) but the finished garment measurements showed there was plenty of ease in the 36. The dress is meant to be oversized, but I wanted it slightly more fitted in the shoulders, like the Scout tee. So I used the Scout pattern as a comparison for the shoulders, and the 36 matched most closely.

The fit in general is fine, however I have some reservations about the sleeve. The armscye is quite long and low, which has the effect of feeling like the sleeves are clamping my arms to my side. Due to the ease, I have full arm movement, but the shoulders ride up if I put my arms out to the side. I am aware that I cut a size smaller than recommended, however I don't feel this is the cause. After a quick conversation with Cassandra of The Stitchery about it, we both agreed it was the armscye shape that was to blame. When I make this again, I think I will switch out the armscye and sleeve for that of the Scout, although I will keep the length and the cuff which I like.


Before sewing a pattern I tend to google image it, particularly if I'm unsure about fabric type or fit. When I googled the Inari, I found this lovely version in wool. I particularly loved the little touch of neon thread details and so shamelessly copied them for my version. In my head this would be a fabulous contrast against the black and white, but in reality you can't really see it's there! Never mind.


I did attempt to use my overlocker on this project, but it seems to be broken. It will not form a thread chain no matter how carefully I thread it. It might need to go into the repair shop, but I will try Google and Youtube first. Instead, I did a mixture of zigzag and pinking shears to finish the seams on the dress. Unfortunately this hasn't worked well. After a first wash, the pinking has frayed badly, and the zig zagging looks pretty raggedy too. On the insides this isn't such a problem, but the side seams are visible at the vent. I'm sure it's something that no one else will notice, but it bothers me.

The pinked facing after one wash.
The neckline is finished with a facing, which isn't my preference, but I do like the clean look on the outside. So far its staying in place, but as this as the area I pinked, I will need to go back and refinish the edge differently in such a way that won't reduce the width further!


That facing after 2 washes! I really need to fix that!
My only gripe with this dress, other than the poor finishing, is the lack of pockets. I guess I could have incorporated them into the side seams, but it feels like that would detract from the shape of the dress. I will just have to cope without them. Other than that, I love this dress. It's brilliantly comfortable, but also feels quite dressy. In this type of fabric I think it could work well as a "going out" dress, but it equally works for casual and work. It's not hugely season-appropriate, but I can layer it up, and that hasn't stopped me from wearing it. In fact, so far I've worn it to a sewing meet up at Kelvingrove museum, a Halloween party*, to work, to the opera and for dinner and karaoke! How's that for hard working? I think there may be more of these in my future!

Recent meet up at the Kelvingrove in Glasgow
 *the Halloween "party" consisted of the 4 of us, lasted half an hour and Baby Boy was scared of the pumpkin, and cried the whole time. He looked pretty cute though!


SHARE:

Friday, 16 October 2015

Completed: Vintage Pledge: 1970's Shirtdress

We are now into the last quarter of the year, and I finally finished the first of my 2 vintage pledges for 2015. This is also the first of my A/W sewing plans, and it came from the "need" category. I'm feeling pretty smug right now. It won't last. My next project is already a bit questionable.

But back to the dress in hand. I came across this pattern last year when searching for a pattern from 1974 to make my 40th birthday dress. This pattern is from 1973, so didn't fit the bill, but I loved it so much, I bought it anyway. I made it part of my Vintage Pledge to stop it from becoming yet another unmade vintage pattern in my collection (I don't have many - maybe 15 or so, but I have to date only made 3).


For ages, I couldn't see past the red dress on the cover artwork. It was always about the short sleeve dress for me, and the lady in red just looks so fabulous. But then, suddenly chambray popped into my head. This particular chambray was bought in Goldhawk Road during my visit to London in July. It cost me something like £12 for 2.5m. I like Goldhawk Road. Its a nice chambray. A little stiff, but it has a nice slubbiness and texture to it. Frayed like crazy though, and it creases pretty badly too.

It was sunny! Far from ideal photo-taking conditions.
For some reason this dress took ages to make. I can't remember when I started, but I think it might have been August. It wasn't a difficult sew - it's a very straightforward pattern - but there were whole weeks where I wasn't sewing, due to life, that made this quite a protracted process. Particularly annoying as I would then forget what changes I had made. I made a muslin first, as it's a 36" bust, and I am a 34". The muslin swamped me, and the initial collar was beyond hilarious, so I made the following changes:
  • Took 24mm out of the side seams
  • Took 24mm out of the centre front and back
  • Moved the bust darts up by 3cm and also lengthened them by 3cm
  • Removed about half of the collar - taking out about 8.5cm in width. I actually used the collar pattern piece from the Archer shirt for the shape, as the original was also far too pointy.
  • Took 14cm off the length, at the lengthen/shorten line.
In the end, I think I overfitted it. It fits, particularly in the bodice, but it's a little neat over the hips and bum - most noticeable if I put my hands in the pockets. When making my muslin, I took it in at the back, but made a note to redistribute this 24mm across the front and back, so the side seams stayed in place. What I think I might have done is rather than redistribute, I've taken 24mm off the front and 24mm off the back. As I say, I can't remember, but this would explain why my collar piece then ended up being too long... Ahem. So, yeah, not a great collar, but not bad for my second ever attempt. The bust darts are a bit too long now, so could do with reducing by about 1-1.5cm, and for some reason they are not level.

I can also see from these photos that there are serious draglines at the shoulders. I'm not sure if that's just from wear - I took these after wearing this for a full day - or if it's a fitting issue. If it's the latter, I have no idea what's causing them. Ideas?

Hands in pocket - tight over the bum. Now you are looking at my bum!

I made some construction changes too. The pattern came with a sleeve facing, which I don't like, particularly as the instructions have you slip stitch the facing down and then top stitch, which seems kind of pointless. Instead, I made bias binding from an old shirt of P's, and faced the sleeves using that, topstitching in place. I added in seam pockets. I french seamed all seams, including those pockets. I ignored the instructions to hem using seam binding and just did a double turn. It's a nice deep hem, so there was plenty of allowance to do this. I also topstitched it, as I liked the consistency with the other topstitching. I did consider topstitching the side seams, almost fake-flat-felled-like, but I couldn't figure out how to do that without sewing my pockets shut. Finally, I neglected to make the self fabric tie belt, as I don't care for them.


I really like the resulting dress. There are a few niggles, which I've mentioned above, but it's absolutely wearable as is. It's quite a plain dress for me, but I like its simplicity. I'm really pleased with my topstitching. This was the first time I've been brave enough to do it in a contrast colour. I picked the buttons to match the contrast thread (and did the buttonholes in the contrast thread too). Two are slightly more purple than blue, which wasn't planned, but which I quite like. It's not hugely noticable, but like the stripey bias binding, it's a detail that makes me smile.
Unbelted. It kind of works (pls ignore the creases).

I did think about adding another couple of buttons so it buttons right up to the collar, which would give it more of a modern feel, but my collar is wonky. Not noticeable as is, but definitely noticeable when I hold it closed. For a future version though, I think adding a collar stand would be nice. I considered it for this time but ruled it out as I've never sewn a collar stand before, so I thought doing a hack might not be the best place to start. I should probably sew an actual shirt first. Other variations to the pattern would be to add a back yoke, with maybe a pleat, or patch pockets, either on the skirt or as breast pockets. You could add quite a lot more "shirt" details which could be lovely. Or equally I could continue to keep it simple.

Top stitching, and slightly wonky collar (where it joins the bodice, particularly on my LHS)

Buttons - the third and fifth down are a different colour. 


Bias faced armholes
I'm not sure I'll like wearing this under a cardigan. I just feel a bit mumsy wearing collared things under cardigans. But it might layer over a polo/roll neck or a long sleeve tee. It would have been perfect in summer, when I was meant to make it, paired with my clogs. Next summer. In the meantime I'm wearing it these lovely new shoes, c/o Clarks!


Also, I got new glasses! I actually have 2 new pairs. You'll definitely see the other pair in future posts. I really love these pinkish brown ones, but I know they aren't everyone's cup of tea. P took a bit of persuading. What do you think?


Finally, I have joined The Fold Line. This is a new online sewing community type thingy. If I'm honest, I'm always skeptical* about these things, not least because it just feels too much like hard work to have to post everything I make to a million different social media. I've pretty much given up on Kollabora, I'm rarely on Pinterest or Twitter these days and I hate Flickr since Yahoo took it over. However I thought I would give it a go. You never know, this one might be more like Instagram and keep me hooked. I did have an interesting sign up experience, where I created an acount and then was immediately banned from the site because it thought I was a spammer, but that was all resolved literally within 5 mins of me emailing them. Pretty good customer service! Unsurprisingly, I'm @grosgraingreen if you want to be my friend! And there is a Sewing Scotland group, for those that might be interested! Are you joining?

*Is that the correct spelling? It looks really weird, but autocorrect is telling me that "sceptical" is incorrect, and I'm too lazy to get up and check in the actual dictionary.
SHARE:
© Grosgrain Green | All rights reserved.
Blogger Template Created by pipdig