
I've wanted to make trousers for, well a couple of years now, but never plucked up the courage. Finally, I bought the Sew Over It Ultimate Trouser pattern earlier this year when it was on offer. It seemed like a good place to start, and there are so many gorgeous pairs out there in the blogosphere. Given that they only have 4 pattern pieces, they aren't too intimidating. Really the only thing that scared me was the fit. I knew that, unlike on other garments, if the fit wasn't right on trousers I would never wear them. Me Made May finally gave me the push to get going.
 |
| This is after I pinned out the excess. The back looks OK but you can see the "frown lines" at the crotch at the front. |
Once back, last week I had to force myself to go back to them. I knew if I started on another project they'd never see the light of day again. So, I started by taking in the excess at the sides again - this time taking about an extra 1cm off the side - I only took this off the right side though, as I couldn't bear the thought of unpicking and redoing the zip. I think that part of the problem might have been that I didn't maintain the 1.5cm SA when adding the zip - somehow, at some point it went off track. But it's not just down to that. Perhaps I just didn't copy my previous adjustments onto the paper correctly? In order to further tweak the fit, I took the front and back darts in a smidgen (about 3mm on each dart). I then confronted the crotch issue.
 |
| Altered side seam, plus altered back dart |
The next day, I did the opposite and scooped more out of the original curve. This looked better. I scooped a little more, and did a happy dance. It looked so much better! You can see below the different stitching lines I tried.
 |
| The red line is the original stitching line. On the right is the straighter curve I took. The far right is the curve I was happiest with. |

After I added the waist facing, suddenly there appeared to be gaping at the back. I don't really understand this, as it did look fine before I added the facing. So, with the facing intact, I took them in at the CB seam. I did this by unpicking the stitching holding the waist to the facing, and the underfacing, just for a couple of inches - enough to release the CB seam allowances, I then took the CB seam in by about 1cm and did the same for the facing. This isn't too precise, but it more or less works. I then resewed the seams I'd unpicked. It still feels like it's gaping a bit, but actually the trousers are very comfortable to wear so I may leave it as is for any future versions.
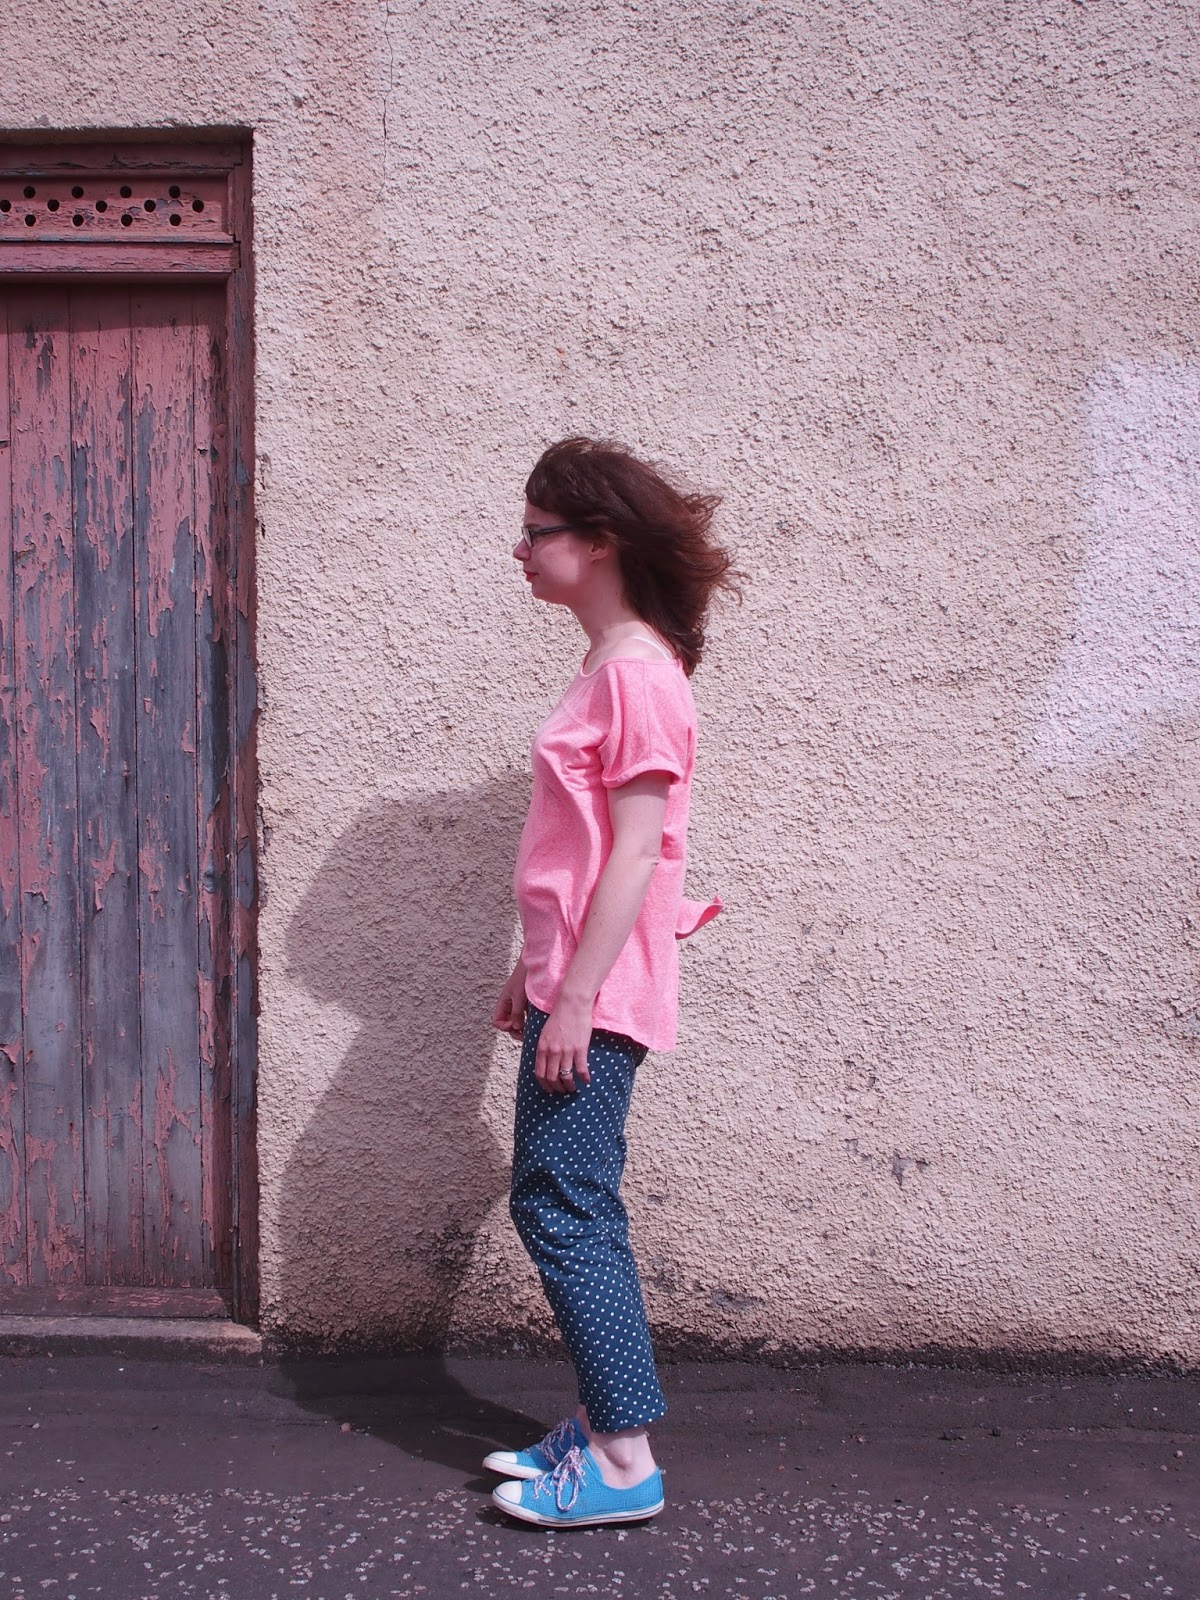
Finally, there are still some further adjustments necessary to make them truly perfect. I can see that the side seams, particularly on my right leg, are pulling to the back, and the hem is skewed. I don't know how to describe it but you can see it in the photo below. Basically my leg isn't in the middle of the trouser, and the trouser hugs my leg at the front and sticks out at the back? There must be a technical term for this. Anyway, my gut feel is that I need to do some sort of full calf adjustment here to make this sit better. The leg isn't too tight, but clearly the distribution between the front and back pattern pieces are off. However if I'm completely wrong on this, feel free to jump in.

 |
| You can see a slight excess of fabric at the crotch. It also looks like there is some twisting on my left leg. I'm not sure if that's really there, or is just how I'm standing here. |
 |
| Some excess fabric under the bum, but I think that's just "sitting down ease", right? |
And in order to make them perfect for me, I need to add pockets. Casual trousers without pockets are not practical.
The fabric is a linen look cotton from Remnant Kings (this is the navy, it also comes in beige and grey). I love the slightly slubby look to the fabric, which I think lends itself to a casual trouser. The polka dots make them a bit more interesting, however I am finding myself struggling for solid tops to wear with them. And after a second day of wear, the fabric has bagged out a bit.

All in all though, I am delighted with these. I love them. I am super proud of the fit I have achieved - for the first time ever, I have supremely comfortable trousers that do not need fiddled with, and pulled up all the time. I am really pleased with my pattern matching. I am happy with my invisible zip. I am just overjoyed that I have finally crossed that imaginary trouser boundary, because do you know what? It wasn't actually that difficult! And now I have all sorts of trouser pattern researching to do, and a million different variations to come up with, because I have absolutely been bitten by the trouser bug. And I want more!
Yeah well done! They look great! I would have given up, but they are def worth all that extra effort. I'm off out to buy some work trousers this week and I'm sure I'll have issues with every pair I try on. Maybe I should just bite the bullet.
ReplyDeleteI love the dots too! I have sewing envy! 💙
What a great first attempt! Taking the time with the tweaks are worth it. I'm trying to crack the fit in my pattern but gave up after finishing the first pair as I don't like how they feel. You're inspiring me to go back to them soon.
ReplyDeletewell done - they look great! i need to get back to mine after sewing machine was in the hospital (and then i decided to finish the cardies i was making before my buttonholes stopped working and then i got overexcited about the morris blazer). so mine won';t be made in may but they will be made!
ReplyDeleteTHese are adorable! I hope cropped trousers never go out of style because I live in them...
ReplyDeleteThey are great! The trouser bug must be going around :)
ReplyDeleteYay! Congratulations on making trousers, and on making trousers that look so good! I agree, once you add some pockets you've got a perfect pattern! I really will need to have a go, I've been looking at Burda7017 as What Katie Sews, Crab & Bee, and Did you make that? have all made lovely versions.
ReplyDeleteThese look great and well done for putting the work in. Spotty trousers are ace! This pattern certainly does seem to be that 'magic trouser pattern' doesn't it? I have a Simplicity Amazing Fit trouser pattern that I need to break out . Btw, I did finish my skirt from that wax print and I'm so happy I did - I love it! Will share a picture soon x
ReplyDeleteWell done for not giving up on these as they look great. Now you just need to copy all your tweaks onto your paper pattern. Then more and more trews!
ReplyDeleteI'm so glad you went back to them, because they were absolutely worth it! I think it's so wonderful that you can say that your first ever supremely comfortable trousers are ones that YOU made! What a perfect advertisement for sewing that is right there :)
ReplyDeleteChimac journey for a home started in Chattanooga, Tennessee in our first restaurant Wings Town. It was here where we honed our Wings recipe and felt we were ready for a larger city with a more developed flavor profile.
ReplyDeleteThank you and as always stay blessed! Contact us Today !!
Chimac##
Thanks for the blog loaded with so much information. It's really informative.
ReplyDeletebuy paithani saree online