Monday, 4 March 2019

Completed: Olya Shirt

Let’s talk about stress sewing. Is it something you do? I know that I love sewing for a number of reasons, one of which is its ability to destress me. It consumes enough of my mental energy to allow me switch off from other stuff, whether it be work, Brexit, Euan’s eczema or the state of my garden. I actively seek out sewing as a distraction and a relaxant (assuming of course that a project is going well!). But stress sewing is another matter. Stress sewing is sewing in response to mega levels of stress, and in my case at least, results in a far from perfect results. Unfortunately this shirt was a stress sew.
I should probably give a bit of background here. I mentioned here that I am going through redundancy. Basically we are getting a new system, which will significantly change our ways of working. This in turn is driving a restructure. My current job won’t exist in the new world, but there are other jobs I can apply for in the new team, elsewhere in the company, or I can take redundancy and go. A week after finding this out, we also found out that Paul’s job was also under threat of redundancy. I had mostly been doing the ostrich impression (head in the sand), but with half term holidays came time off work and time to think. I am feeling all the emotions about my job. I anticipated this happening, but didn’t know to what extent or when. The idea of having to apply for a new job is anathema to me, I haven’t gone through recruitment in over 10 years, but what upsets me the most that week is that I will likely lose my flexible working. We have loads of flexibility in my current company and role. I work 4 days, finish slightly early by taking a shorter lunch, we get childcare vouchers, healthcare, an excellent pension and heaps of annual leave. I can’t guarantee my current shift in any new role, so there is a good solid chance I will need to work full time, which I know a lot of parents do, but it's not what *I* want to do. Fraser starts school in August (I know!) and I really want to be able to take him to school at least once a week. Then chuck in the additional child care requirements both term time and holidays, plus what the boys would need to give up. I've never taken working part time as a given, but I didn't have children to never see them. Told you, all the feelings. 

While I was off, I had a day’s sewing to myself, while Euan was at a Bushcraft holiday club, and so I started on this shirt. Emboldened by the success of Paul’s shirt (I know *all* about shirtmaking now!), and loving the design lines of the Olya, as well as having the perfect fabric in the stash made an obvious project, and what better time to do than to also support the So50visible challenge.


The fabric is Atelier Brunette modal challis. It was a limited edition collaboration, I think, from a couple of years ago. Its lightweight and very drapey and it feels absolutely gorgeous to wear. I actually had it in 2 lengths, having first bought a 70cm remnant and then a further metre from a different retailer at another point. The 2 lengths are actually slightly different, with one having brighter colours and the other being more muted. They also feel every so slightly different. I guess much like wallpaper, fabrics have batches! I managed to squeeze the pieces into the 1.7m by cutting the yoke on the cross grain. I even had just enough fabric to cut the collar second time (which happens when you sew the first one upside down), but the rest was minimal scraps.

Firstly, let me say this is a great pattern. It is well drafted and very clever in design and construction. At the front, the sleeves and front yoke are one piece, but at the back there is a sleeve seam attaching it to the back yoke. This requires a very cool right angle on the shoulder which is difficult but satisfying to sew. There are also concealed pockets in the seam attaching the front yoke to the front bodice pieces. The instructions definitely assume a good sewing ability and are not hand holding at all, but there is a sewalong with more details should you require it (I’d recommend it for the shoulder/sleeve seam).


Stress sewing a complex pattern with a slippery slidey fabric was not my best idea, but in fairness I didn’t actually realise I was stress-sewing at first. And actually, it’s not nearly as bad as I first thought . My topstitching is dodgy at best, but not very noticeable. I did sew my first collar upside down, but thankfully managed to cut another (although it’s interfaced in white, not black). My edge stitching didn’t quite catch all the edges, but I rescued this with a bit of hand stitching (collar stand, cuffs and part of the button placket). My pockets are a bit messy, and I had to do a bit of jiggery-pokery to get the sleeve seam to sit right, but honestly all issues were as a result of the fabric and stress-induced slapdashery, rather than the pattern, and even more honestly, literally none of these things are noticeable in the finished garment. It still needs to stand up to repeated washing and wearing, but I am absolutely delighted with it.

I was in between sizes, so picked the smallest one, the 8, as this is loose fitting. Generally my waist is the largest size if I am between sizes, but the waist is not an issue on this pattern. I made no alterations to the pattern, other than to use a different method for attaching the collar, and to sew the bottom button hole horizontally, a trick I picked up from the Fairfield. I have no idea if this serves a purpose, but I liked the idea of it! :) In terms of attaching the collar, I used my preferred method, which is to attach the outer collar stand separately, make up the collar and the inner collar stand, then attach them to the outer collar stand (better explained here). I have tried both methods and this is the only one that works for me. 


I actually forgot about buttons, so had sewn most of it up relatively quickly before realising I couldn’t do any more till I went shopping. It was only when I paused that I realised that I was doing the whole stress-sewing thing, basically sewing as a distraction (distracting me from what I should have been doing which was my CV!), but in a way that was not careful or particular and was pretty dismissive of the bits that I was recognising were crap, as I was sewing them. Ah well, I thought, it doesn’t matter. This after taking such care over Paul’s shirt.


All in all, this could be better, but I love it regardless. I do want to invest in some fray check before I wash it, as I’m nervous about that right angle’s ability to survive the washing machine (it’s sewn in a way that’s impossible to completely encase the raw edge), as I want this to last. I keep stroking myself as I wear it, it’s just so soft and silky. I will definitely make this pattern again. I love the idea of stripes or contrast stitching, something that really show off the design details. In the meantime, I am going full Paper Theory fan girl. My next project is the Kabuki!

Before, I go, I wanted to mention a few things. Firstly, Paul's job is fine, so we are good for the time being at least.

Secondly, somewhere along the line, I have stopped referring to my boys as their nicknames, probably because they are frequently named on Instagram, and probably because they really have outgrown their nicknames. Anyway, in case you don't follow me there, here's a quick key: Euan = Small Boy and Fraser = Baby Boy.

Lastly, my hair. I decided last year to stop dying my hair. There are numerous and various reasons for this, which I won't get into, but it is something I'd been thinking about for a long while. It's one of these things that's a gradual change, so I did get quite a shock when I saw the photos I took for this post. It looks different, whiter, here than it does in the mirror. I'm OK with it turning grey/white but the inbetween process is a lot more noticeable than I realised. I don't really know why I feel the need to explain myself, but at least now you know!

Thanks for reading!
SHARE:

Wednesday, 17 April 2013

A few things

Thank you everyone for your lovely comments on my Mad Men Elisalotte! Sometimes I really get too hung up on the negatives and forget that I MADE A DRESS! I still have to remind myself that this, in itself, is an achievement! Julia said it's "a knock out" (and coming from her that means A LOT. I mean, have you seen her?!). And the By Hand London girls have said they "absolutely adore" it, and Elisalex herself said it was "beautiful"! I am now basking in the glow of praise...

Thanks to everyone's positivity, I am considering revisiting the dress and improving the fit if I can. Shar suggested I look at Janelle's post, which pretty accurately describes some of the problems I had and having looked at other peoples versions, I think Elisalex is right - the bodice is maybe just too big all over. I think I forgot that it's designed to have no ease and is meant to be very fitted. But since revisiting it means an element (a LOT) of soul-destroying unpicking, first I need a quick fix of positivity. A nice and easy to make project that won't take up much time or thought and will make me happy! Not quite sure what that will be yet, but I did start cutting out a Mathilde last night...

Next up: do you want to see what I received through the Nautical craft swap?

As you can see, I was too excited to wait until I got home to open them, so here is a photo of the lovely packaging, taken in my car! I actually went straight to the hairdressers after this, so there was NO WAY I could wait that long to open it!

And now some better pictures, taken once I got home, of the contents.


A beautiful printed and embroidered lavender pillow. Isn't that vintage postcard print just fab?
Needle case and pin cushion - both of which I needed! Look at the embroidery on the pin cushion - it's about a million french knots!
The outside of the needle case - patchwork and lace trim on the back.
And a gift of some very cute little pins!
Louise absolutely nailed this for me! I had let her know that I love birds and an anchor motif, which she covered very well. I hadn't mentioned though that I also love seahorses, or that vintage postcard look, so she hit gold! And how funny that we both needed, and made, needle cases!

And finally...

 'I, Helen of Grosgrain Green, sign up as a participant of Me-Made-May '13. I endeavour to wear one self made garment each day for the duration of May 2013'

I have given some debate to this challenge as although I love the idea of it, I just am not sure I have enough garments to see me through. But having done a quick review of my wardrobe, I have counted the following:

Tops - 5 blouses, 1 t-shirt, plus 1 "going out" blouse (my graphic print kimono sleeve blouse)
Bottoms - 4 skirts
Dresses - 3, plus my Elisalotte

This should be enough. I can also whip up a couple of additional simple blouses (am thinking Mathilde and maybe a Sorbetto) and possibly another Charlotte, or a simple skirt of some description, to bulk things out. Work will be a cinch as most of my makes are the kind of smart/casual that I wear there. It's weekends that will be trickier. My weekend uniform usually comprises of a striped breton tee with skinny jeans, and it'll be hard to give this particular addiction up. But then the challenge is just that. It's not meant to be easy, so this will hopefully get me thinking more creatively about my wardrobe. I will just need to get on top of my laundry to make sure I have something clean to wear every day! :) Not sure how I'll go with the photos, but I will try to capture as many outfits as possible, and will aim to post once a week, for my sanity as much as yours.

What about you? Are you signing up for the challenge? What are you working on now?

H x
SHARE:

Monday, 15 April 2013

Joan dress. AKA Mad Men Challenge. AKA Elisalotte.

AKA the fabric dilemma dress.

AKA the catharsis dress.

Whatever I call it, it's done. C'est fini.


Please ignore the wonky hair in these photos. I thought I'd make a token effort at looking a bit more Mad Men - hair up and a bit more eyeliner!. As you can tell, hair styling is not my area of expertise! :) and P neglected to tell me it was wonky before he took the photos.

I'm in a state of ambiguity about this dress. I want to love it, and mostly I do, but there are some fit issues and the inside is a mess, so it is not as "nice" as I would have liked for a relatively smart dress.

The Good
I LOVE the fabric. I am so glad you guys talked me into buying the more expensive one because it was so right for this dress. It was lovely to work with, it give some structure as it's fairly thick, its comfortable as it has a slight stretch and it looks smart as it has a slight sheen to it. And the print is extremely forgiving of errors! Although I am noticing in these photos, it's making me look strangely one dimensional, like some type of paper doll!

I love the shape of the dress. It feels quite classy. I already knew I liked the Charlotte skirt, once adjusted for my lack of hips, and the princess seams of the Elisalex bodice are extremely flattering. And it has 3 of my favourite design features: boat neck, interesting back and 3/4 sleeves. Oh, and P LOVES it! :)

I think it totally fits the bill for a Mad Men dress and I am really pleased with the similarity to the inspiration photo. Other than the colour, and my lack of curves to fill it out, I think it's pretty spot on.

My first ever self-drafted neckline facings worked well! :)
The ONLY pic you are getting of the inside of this dress and only because it's my first ever self drafted facing.
The Bad
OK, so I could leave it there and not point out the flaws and we could all pretend it is the perfect dress. But it's not and I'm keen to get your views on what's gone wrong. So here goes.

Fit: It fits perfectly from the hem to the top of the bust and then it all goes slightly weird. There is too much fabric from that point up to the neck line. The neckline is too wide and so drops off my shoulders and the sleeves just don't sit right. Also at the back, there is some gaping at the neckline if I stand up really straight. My thought is that it's just too big in this area. What do you think? I cut a 12 for the bodice and skirt, based on my bust and waist measurements, and it fit fine here without any adjustments needed (other than for length of bodice, but we'll come on to that). I was meticulous about stay stitching the neckline, so it can't have stretched (plus that wouldn't explain the sleeves, would it?). I did adjust the neckline, but I did so based on a pattern that is my size (although, admittedly, I haven't actually made that dress, so can't say for sure it fits me). But I only widened the neckline. I didn't touch the shoulders. The armscyes/armholes should be exactly where they were intended to be.

Here you can see gaping at the back
I did make a muslin of the bodice, which seemed OK, but I really only focussed on checking the bust and bodice length and so never attached the sleeves, or really paid much attention to the shoulder or above bust area.

Looks like there is some excess fabric across the back, just above the waist, which I hadn't even noticed before!
Too much material above my bust makes it look like I have zero chest whatsoever! Although, on the plus side, I can't see the excess fabric that appears in the above photo. And from this angle, my hair looks pretty good! :) And thinking about it, I'm wearing a pre-pregnancy strapless bra, which probably doesn't actually fit that well...
So, what do you think? Should I have maybe graded down a size in this area? And crucially, is there anything I can do to fix this now? On the plus side, it can't actually fall off my shoulders as it's too tight. It does feel a bit weird though, wearing a strapless bra with a dress with sleeves!

You can see it's nearly hanging off my shoulders here
The Ugly
Second negative: the inside is a mess. I opted not to line the bodice (the pattern has you do this) as I didn't know what to line a stretch fabric with. Instead I drafted a neckline facing, which worked pretty well - see above photo. So, I should have bias bound the raw edges. I would have been the right thing to do. But I didn't. I didn't have any bias binding tape and I couldn't be bothered to make it, and with all those seams it would have needed metres and metres! And if truth be told, I actually just couldn't be bothered. I've written previously about my frame of mind when making this. So I zigzagged all those seams! It's not the end of the world, because actually no one will see that, but I feel the inside doesn't match the outside and it takes something away from the dress. Especially since seeing Katy's Tessuti dress, which is beautiful both inside and out. Something to bear in mind for next time, I guess.

Oh and I'm extremely embarrassed to admit that there are at least 4 different colours of thread on this dress. I know! Cardinal sin of sewing! But I was trying to use thread from my stash, so I started with a dark purple, which ran out (all that zig zagging), then moved to a lighter purple, then managed to get an aqua colour in there too (bizarrely, my bobbin ran out, and the machine seemed to just carry on with the thread that was underneath almost without a gap. How odd! And it was the facing and is inside and it seemed pointless to unpick it all again...), and finally a white thread for the skirt and sleeve hems!

The darts on the skirt don't match up with the princess seams on the bodice. This actually isn't a biggie. I did make an attempt to move the darts slightly, but then adjusted the length of the bodice a couple of times, by which time, the darts were off again. But that busy print really obscures this. On a plain fabric it would look noticable, but on this fabric you can't see it. As I said, not a biggie.

I had a few nightmares making this dress. As I mentioned above, I lengthened the bodice by 2 inches, then sewed the bodice and skirt together, zig zagged the edges then tried it on. And realised the waistline was about 1.5 inches too low. It took a couple of attempts to get it right, but I got there in the end. After quite a bit of unpicking.

I also had some issues with the zip. Some of you may remember I initially planned to move the zip to a side zip, just because I fancied it. But then I realised that this would mean I'd need more fabric than I had bought (as both the back bodice and back skirt pieces should really then have been cut on the fold), and that it would also mean I couldn't have a vent at the back of the skirt. So, I reverted back to the original back zip, replacing the exposed one with an invisible zip. I like invisible zips. I think they look sleek and professional and I have never had a problem inserting one. Until this dress. Again, I don't know if this was my frame of mind, or just carelessness or lack of luck, but I kept getting it wrong. At one point, I even managed to sew on top of the zipper coil, which I can tell you was a nightmare to unpick! I got there in the end and the zip is now fine.

Back to a positive: I did use seam binding for the skirt hem, which looks nice and neat, and makes me wish even more that I'd bias bound the raw edges!


I found the making up of the bodice sometimes problematic. None of the notches seemed to match. No one else has mentioned this in their reviews, so it may well be a tracing error on my part. I will need to check this before I make this again. And there will be another one. Next time, an unadulterated version. I love everyone else's versions, so I am super keen to make myself one that I'm happy with.

In the meantime, what do I do with this? Do I wear it as is? Can I fix it? Do I order more fabric and re-make the bodice and sleeves? Or do I cut off the bodice and just wear the skirt? It would be a fabulous skirt and I probably have just enough fabric left to make a waistband! Any suggestions, gratefully received!

And finally, can we all just pay particular attention to my new shoes?

Please excuse the "pealy-waly" (pale) Scottish legs!
Guess how much? Go on, guess! £8.50 from our super-cool new local charity "boutique", which opened on Saturday. Jo has blogged about it here.


SHARE:

Saturday, 9 March 2013

HELP! And my swap partner revealed.

I received my International Craft Swap partner's details yesterday. I have been paired up with Louise from Elsie May and Bertha.I wasn't familiar with Louise's work or blog before, as (determined from a quick squiz at her blog) she mainly crafts rather than dressmakes, however it's always nice to meet someone new, and to gain access to more inspiration, insight and skills! Louise describes herself as a maker and says she would do it full time if she could, which is ever-so-slightly daunting, as I describe myself as doing zero crafting, so I'm hoping she'll be very tolerant of my very simple effort! Just need to pick up a couple of notions and then I'm hopefully ready to get going on that.

Rather sweetly, Rachel (from House of Pinheiro) opted to match me with Louise to provide me with support, which I really appreciate! It also makes me think she must have spent a LOT of time ensuring she'd made the right pairings! I'm impressed.

HELP!
On another note, I need some help! I am really struggling with my Mad Men Challenge/Elisalex sewalong dress. Not the dress itself which should be fine (although I still only have half a muslin made, so perhaps I'm being overly optimistic there), but I'm really struggling to make a fabric choice. As a reminder, here is the inspiration dress, which is from season 5 (set in 1967, according to Wikipedia - I don't watch the show, sorry. Is that sacrilege?)

Source
I don't want, or need, to be too literal on this, but if I go for a really different fabric, then it's just a random shift dress, as it has no real period distinguishing features. The fabric of Joan's dress is a kind of floral/paisley print on a purpley-grey background (looks more grey in the bottom pic). 

Here are my issues:
  1. I've never been a huge fan of paisley print and while I probably could find something similar I'm not sure I'd actually want to wear it once made.
  2. The colours here are fairly wintery and we'll be well into spring once the challenge is finished (mid April)
  3. I actually have no idea where or when I'm going to wear this dress. All the fabrics I've liked so far give more of a formal vibe (for me, anyway) and I have no upcoming formal events. I hate the idea of spending time and money making something I won't wear any time soon. 
  4. I fancy a stretch woven fabric to make it more comfortable (and therefore more "day"), but as I'm using the Elisalex bodice and it's lined, the stretch won't work unless I also line it in a stretch fabric. Won't that make it too bulky?
  5. If I don't go for a stretch, do I go for a cotton voile? or would a heavier-weight quilting fabric work for this (I suspect not...)?
  6. Don't want to spend a lot on this. If I could get fabric for less than £20 I'd be happy. And I will need at least 2m, if not a little bit more.
  7. Because of princess seams I don't want the hassle of having to pattern match.
  8. Probably something else, but now I can't remember!
Here are a few serious contenders so far:

Liberty cotton lawn from Stone Fabrics. Gorgeous, but 40's inspired, not 60's! Would be maybe a bit less formal? Not stretch.
Lightweight cotton from Stone Fabrics. Like this, but maybe a bit more formal? Not stretch.
Cotton poplin from Stone Fabrics. Really nothing like the inspiration dress. Not stretch, but quite fun and maybe a little bit 60's?
Stretch cotton from Fabric Godmother. Really like this, ticks all boxes, but £16 a metre!
Stretch cotton sateen from Stone Fabrics. Colours are right, print is wrong, but I got tired of looking at florals.
Cotton voile from Raystitch. Not stretch, but suddenly I'm feeling it for this one, AND it's reduced to £9.95. Would a a whole dress of this be too much? And I'd need to pattern match.
Cotton poplin from Stone Fabrics. Wrong colours, but right kind of era. Loving the summery-ness of this. But what is cotton poplin? Will that work for a dress? Not stretch. Does it look a bit too much like a tablecloth?
I have tons more on my Pinterest board if you're not bored already!

So, what do you think? Do I completely deviate from the inspiration dress in favour of something more "me"? Do I forgo stretch (and comfort) for a pretty print?

If I knew how to do it and had enough regular readers, I'd do a wee poll here, but I don't and I don't, so if you have a strong opinion, can you please let me know in the comments? I'd really appreciate some input on this, as I am really, really struggling! Thanks in advance!

H x
SHARE:

Monday, 4 March 2013

A quilt show, a holiday and a trip to hospital.

Well, it's been a wee while since my last post, and gosh it's been an eventful week in the Grosgrain Green household!

The week began with the Edinburgh Quilting Show, moved onto a couple of days mini-holiday, followed by a couple more days DIYing/pottering and culminated with an overnight stay in Sick Kids with Small Boy!

First things first, Small Boy is OK. He developed a cough midweek, which became a little bit wheezy, which by Friday evening was a LOT wheezy. He had a similar episode last November, which was diagnosed as a viral infection, and we had an inhaler leftover from then, but that didn't make much difference, so off to Sick Kids it was. As soon as they put him on the nebuliser he was fine, but they wanted to keep a close eye on his oxygen levels, and to give him the puffer/inhaler every couple of hours through the night. Eventually about 1am we were admitted and I was given a little camp bed to sleep on next to him. P was sent home - only one parent allowed to stay! It was actually fine, but Small Boy only slept for about 4 hours and I had even less! By early afternoon on Saturday they were happy, and he was discharged. He's been fine since, although still has his puffer until tomorrow, and he's full of stories about his adventure to "hostipal". His new favourite game is playing Dr Small Boy!

So, between little time, a holiday with no wifi or internet access and a bit of parental stress, I've had little time to READ blog posts, never mind write one. I finally checked Bloglovin yesterday and had 153 unread posts! Isn't that insane!?

So to the updates I was intending to write. I have done no sewing since I last posted (for obvious reasons), but I did visit Edinburgh Quilting Show! This is a twice yearly event, held in the Royal Highland Showground at Ingliston. It was my first visit, and I went with my mum and her friend, J. My mum, who doesn't really quilt but has made the odd thing, and J, who does quilt, have been before several times, and I'd always fancied it but never been able to go. Although I have never quilted and don't really do much in the way of crafting either, I like to look at quilts. I love the work and thought that goes into them, even if I don't particularly like the aesthetic, and struggle a bit with what, exactly, you would do with them once you'd made them. Most, are clearly not designed to go on a bed! And anyway, I knew there would be fabric and haberdashery for sale... I wasn't wrong!

I had really wanted to write a whole post about the show but unfortunately most of the stands forbid you from taking photos. I did manage a sneaky, terrible few on my iPhone of which only this one is worth showing (and even then, it's not really, but I feel like I need a photo!).
Actually took this by accident, but you can see how the fat quarters were stacked high!
The show was heaving with OAPs. In fact, when queuing to get in, the girl in front of me turned round and said "oh good! Someone my age". She looked most disappointed when I explained I was meeting 2 sixty-somethings inside!

It was good though. I really enjoyed the day. Yes, there were loads of hideous "granny" things but there were equally lots and lots of beautiful things - quilts, fabrics, you name it! Being the one of the three of us, who was really just going for a look and not intending to buy, I was the one who bought the most! So? What did I buy? Come closer, and take a look!

So, from left to right:
1. A GORGEOUS vintage-style boy-and-girl-playing-with-sailing-boats print. 1 fat quarter. Here's a lovely close up!

I did briefly consider this for House of Pinheiro's Craft Swap, but there was only 1 piece left and it was just too gorgeous for me to give away! I have no idea what I'll do with it, but I'm sure I'll come up with something. Eventually.
2. Retro coffee pot print on red background. 1 fat quarter. Again, have no idea what I'll do with this, but love it!
3. Citrus print. 1 fat quarter. I plan to make a toy oven glove for my nephew with this. I made one for Small Boy's Christmas this year, and as it worked out well, I thought I'd do another. Unfortunately my nephew's will be way cooler than Small Boys!
4. Bane bag kit, like this. I haven't opened the pack yet, and it didn't photograph too well, but it's essentially a kit to make 2 little bags from Japanese cotton. Here is a photo of the fabrics I got:

I plan to use one bag as a sunglasses case and the other to save my iPod from getting scratched in my bag.

I also bought this:


The colour is a little brighter in real life, and I LOVE this. I bought 2.5 metres (it was £6 a metre, so a bargain!), with the idea that I'd used this for my Mad Men Challenge dress. However since then I've changed my mind. It's probably more 50's than 60's, and I'm actually thinking it might better suit a different silhouette. Maybe a Peony? Or an Elisalex with a half-circle skirt? Definitely something a bit more summery. It is also nothing like the actual Joan dress I'm using as inspiration, so the search goes on for what I will use for that dress (although Fabric Godmother has some lovely floral stretch cottons, just in!)

I also bought a couple of other fat quarters, specifically with HOP's Craft Swap in mind. I won't divulge what these are to keep my planned project a secret, but have something in mind. Unfortunately they don't absolutely stick to the colour rules of the project (red/white/blue), so not sure if Rachel will let me bend the rules slightly... I'll wait to find out more about the person I'm eventually paired up with, and will then find out. Failing that, I guess I'll have even more fabric to add to my stash!
SHARE:

Tuesday, 19 February 2013

A challenge, a sewalong and a swap!

Isn't it lovely that the mornings and evenings are getting lighter again? It was light this morning when we left the house, and light still when I picked Small Boy up from nursery. It makes such a difference to my mood! And the snowdrops and crocuses are starting to come out. Winter is nearly over!

The more eagle-eyed of you may have noticed a few new buttons on my sidebar!
Source
Yep, I have signed up for Mad Men Challenge 2, the Elisalex sewalong AND House of Pinheiro's International Craft Swap. I may have over-committed myself, slightly! However, I have a cunning plan... I talked about my Mad Men inspiration and thoughts here. My dress will be based on the Elisalex (bodice and sleeves at the very least), so that, in my opinion, also qualifies it for the Elisalex sewalong! 2 down, 1 to go!
Source
I have no idea what I'm going to do for the International Craft Swap. I don't really sew much apart from clothes, I don't do other types of crafting (can't knit or crochet). And I never sew for anyone other than myself! But I love the nautical theme, and am tempted by the thought of getting something shiny and new through the post (just hope my swap-ee isn't too disappointed by my effort!). I'm going to a quilting show this weekend, so hopefully that will provide some inspiration. Failing that, there's always Google and Pinterest! It's exciting though.
Source
I haven't made a lot of progress with any of my projects this past week. I spent a couple of evenings trying my coat muslin on again, to check I really was happy with the fit (I am) and then cutting out my lining and interfacing. I was going to start cutting my fabric, but of course need to pattern match and need to be sure my fabric is absolutely straight, so spent about an hour, tacking/basting the folded fabric at about 40cm lengths to ensure the stripes stayed straight. I then played around with laying the pattern pieces, but gave up as it was late and I want to make sure I do everything as perfectly as possible on this project. I haven't yet gone back to it.
Poorly lit pic of my lining pieces cut.
Last night, however, I wanted to do something, but was tired (an 8 children/5 mum playdate/coffee session yesterday afternoon - including one runaway child (mine) - made sure of that!) and wanted to do something simple, so I traced my Elisalex bodice and sleeves pattern pieces and cut out my muslin. Annoyingly I don't have as much of the muslin fabric as I thought I did, so won't have enough to do the skirt. But I can crack on with the bodice in the meantime.

Previously I have not traced patterns and just cut them, but have since realised that tracing makes sense, not only to preserve the pattern (and potentially re-sell, pass on or giveaway) but to allow for changes in size, or more likely, allow for cutting the wrong size in the first place! Since then I've been trying out various different tracing papers. This time I used greaseproof paper, thinking it most like waxed paper that I've read about. This worked well, as it's very easy to see through, but it's quite narrow meaning for larger pieces, you have to tape it together. The other downside was that the usual tape I use to tape e.g. PDF patterns together, masking tape, doesn't  stick to greaseproof paper. I used sellotape instead, but of course you can't write on sellotape.
Re-drawing the neckline. You can just see the vintage pattern piece underneath.
I changed the neckline of the dress by tracing the Elisalex bodice, and then laying the tracing over my vintage pattern with the batteau neck, matching up the centre folds and the shoulder seams, and drawing the new neckline on. It seemed very simple, so hopefully this will work. I can't think of a reason why it won't, but you never know with these things (or at least I never know!).

I spoke previously about wanting to move the zip to the side. Not sure why I have this in my head, but I'd like to give it a try. Stupidly I forgot about this when cutting out my centre back piece, but later in the evening when I went back to look at the pieces, I noticed that the CB line is not on the grain! This isn't something I've come across before, and I thought it was going to scupper my planns to cut the CB piece on the fold as one piece. However, I dropped an email to Elisalex (the lady, not the dress) this morning, who explained:
"About the side zip/grainline at CB, I don't see the problem in cutting the CB in one on the fold - just remember to remove the seam allowance! The reason that the CB is slightly off grain is basically just to accomodate the cinched waist - extra full hips - tapered hem. But it's no biggie really."
I probably could do with all the help I can get on the hips, but I think I will sacrifice that for the seamless back. What do you think?

SHARE:

Wednesday, 13 February 2013

Distractions

Isn't the online sewing world distracting? I mean this in the most positive way, and I'm only distracted because I let myself be, but... isn't it just?

I really enjoyed Sew Grateful week. The number of different takes on each day's theme was so interesting - is it bad that I didn't write that I am sew grateful for my husband for allowing me to indulge in my sewing obsession, permitting me to take over most our our very limited available storage space in the house, for rushing home from work to allow me to rush out to my class, and for dealing with a tantrum-ing toddler as a result of said class ("No want you Daddy! I want Mummy!")? - and the little bit of exposure and additional (some!) traffic I got was lovely! But it was also great to just be acquainted to so many more blogs, that I hadn't previously discovered! This brings with it more inspiration, more "friends", , more hints and tips and more pretty things to look at. The downside, however, is twofold: 1. Even more time spent glued to the Bloglovin iPhone app, and 2. Even more shiny challenges to inspire but also divert me away from my aims.

I posted here about my plans for my Charlotte (now completed) and my 60's coat, which I am procrastinating on because I am scared. I really, truly want to make this coat before it becomes too warm to wear it (Ha! I live in Edinburgh! I'll probably NEED to wear it in August!), but it just seems so difficult and will take ages and I'm scared the wool will be horrible to work with, like my Charlotte skirt and... oh! I've just spotted something sparkly, new and tempting... 


Initially I thought, that looks like fun, but I don't watch the show, I don't want to go out buying even more patterns, and it's unlikely I'd get much wear out of something that qualified for this challenge anyway. Then, I thought "well maybe it's just any old 50's or 60's item that would fit the era" - which would be a good incentive to start on the coat. But Julia's rules are clear - she wants either a copy of an actual Mad Men garment, or something that is inspired by an actual Mad Men garment. I did flick through her Pinterest board in the hope that I might see a similar shaped coat, but nothing doing. But of course, while you flick through, you inadvertently start re-pinning, and then you start clicking through to the links and doing a bit of browsing and before you know it you've spotted this:


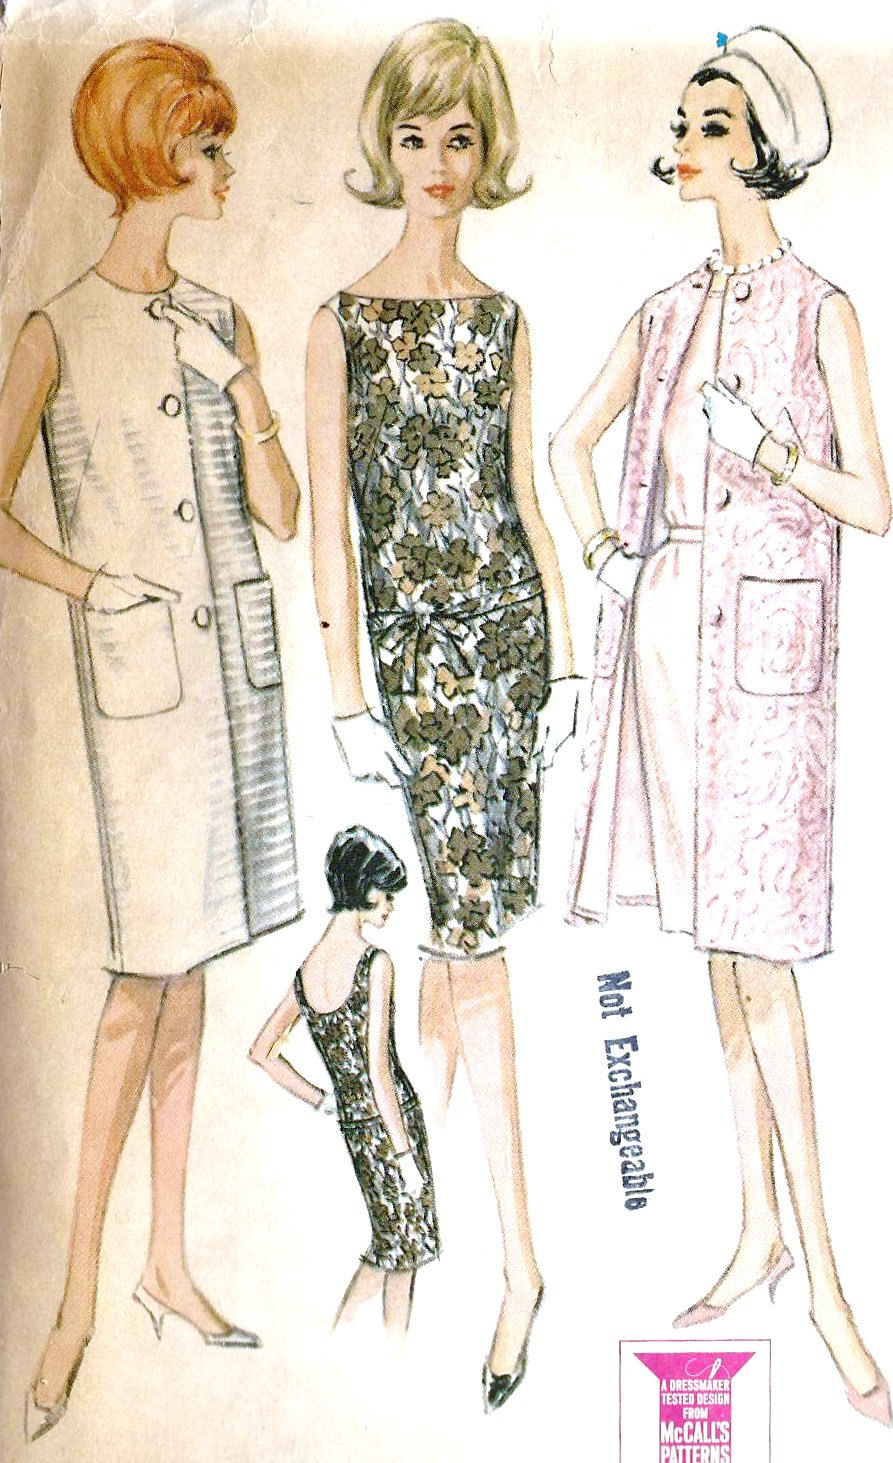
And just as you're packing up the laptop for the night, and getting ready for bed, suddenly you remember you actually own the below pattern, which has a very similar neckline, and before you know it you're digging out patterns at 11pm and then lying in bed, devising plans in your head!


I have not yet confirmed that I am joining the Mad Men Challenge, I need to work this out and to see if I can find some appropriate but not too pricey fabric, but here are my thoughts...

The neckline of the vintage pattern (which, along with the back neckline, is the reason I bought this pattern) would work here. I can't find pictures of the backs of the inspiration photo, so I figure I can do what I want there, as long as it's appropriate. However the vintage pattern is much looser fitting. I did briefly think I could just take it in, but then remembered my Elisalex pattern, which has very little ease in the bodise. The Elisalex also has sleeves which the Joan inspiration dress has, so I figure I could trace the bateau neckline onto the Elisalex bodice and I have two ticks in the box! The Elisalex has a back zipper but the vintage pattern has a side zipper, which I kind of prefer for this dress. Am I simplifying things, or is it as straightforward as cutting the back piece on a fold and then installing an invisible zipper in one of the side seams? How would that work with sleeves?

Now to the skirt - the Elisalex has a tulip shaped quite full skirt, but Joan's looks more straight in shape. I am wondering if I could use either the Charlotte skirt, or this DIY Couture tulip skirt (which is more pencil at the hem) instead. I kind of like the idea of the tulip shaped pencil skirt as this will give me the illusion of Joan's hips, which I do not possess. 

For fabric, I'm thinking a cotton with a slight stretch and a slight sheen would be good. I'll go floral if I can, but am not too bothered. This would definitely be an interpretation rather than a copy!

I have only once tried to Frankenstein 2 patterns, which was really just a matter of adjusting the sleeve length and shape, and I managed to do something wrong with the grain then, meaning my seams twisted. So I'm aware I'm probably punching above my weight with this idea, but hey it'll be development! It'll stretch me! And I'll hopefully learn something new along the way (even if it's what not to do).

What are your thoughts? Is this doable? Any tips, suggestions or advise? Or should I just forget it and crack on with the coat?
SHARE:
© Grosgrain Green | All rights reserved.
Blogger Template Created by pipdig